Photoshop: The Brush Tool

Tools
The only tool that I will cover in this section is the brush tool
Reason being, there is so much to cover on just this one tool! It is very versatile and will be used in most cases. To start using the Brush tool, click the icon of it on the toolbar or press "B" as shortcut on your keyboard.
Where does the fun start?
The fun can start anytime. But let's get the basics out of the way. The brush tool paints in any color you choose, in any size brush, in any shape the brush is, and more. When you have a new document window open and have the brush tool active, you will notice a few things.
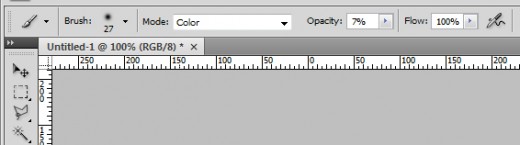
The picture above shows the various options that the brush tool can utilize.
- Brush size, type, and shape
- Brush Mode
- Opacity
- Flow
- Airbrush
Brush size, type, and shape
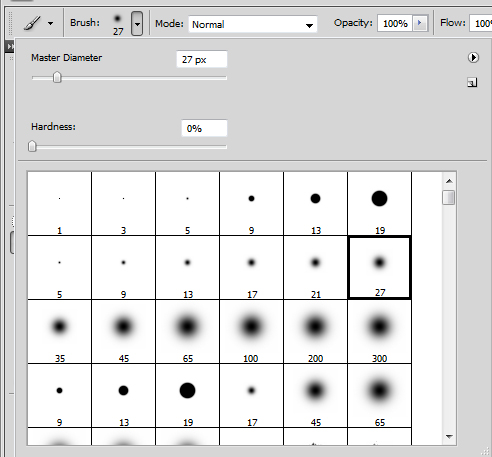
The Brush size, type, and shape can all be changed from the first drop down box on that menu bar. A box will pop up and show the "master diameter", "Hardness", and the various brushes you can choose from.
The Master Diameter
The Master Diameter is just how large or small you want your brush to be. moving the slider to the right increases the size while moving it to the left decreases the size. You don't have to keep coming back to this pop up window to keep changing the size. A much faster and easier way is the [ and ] keys (located next to P). Pressing the [ key will decrease the size of the brush and the ] key will increase the size of the brush. You can also press and hold for it to increase/decrease size faster.
Hardness
The hardness affects brushes that have a blended feel to them. For example, the picture located to the up and right shows brushes that are solid on the first row of brushes, and ones that look a bit blurry. These brushes make it so that that won't show solid lines forming between colors. They more or less blend the colors together. The higher the hardness setting, the less blend you will have. Different brushes have different hardness settings.
Various brushes
There are already preset brushes loaded into Photoshop as it already stands. But if you are feeling creative you can always add your own. Just run through the list of brushes that you can use and work from there. There are also different websites that offer aftermarket brushes which you can download for free to use (just make sure if you use them you give the artist credit). I will post a tutorial on how to make your own in a different hub.
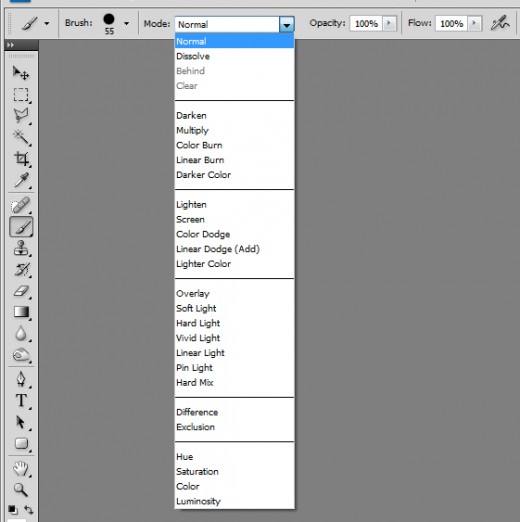
Brush Mode
After you have selected the brush, size, and hardness you wish to use, the next step is selecting the brush mode. The mode will normally be set on "Normal". But there are a vast amount of different options for this. Normal mode simply means you click and it paints. Easy enough! Another mode that will be useful is the "Color" mode. The color mode, set to which ever color of your choosing will then, color the pixels to that color while keeping all the highlights and shadows intact. This is very useful when editing skin color, the color of a car, or clothes that someone is wearing.
You can expirement with the different brush modes and see for yourself what they can do.
Opacity
The opacity is the amount that the brush will appear solid or faded. The higher the opacity, the more the brush will show. 100% opacity will mean that the brush will show to its full effect. 0% means that the brush won't show up at all.

Flow
The "Flow" of a brush means how smooth it will show up to be. The lower the flow number, the less opacity it will have, and less packed together the brush will be (this would be the smooth look). Thus, the less the brush will "flow" naturally when clicked and dragged.

Airbrush mode
The last button on the brush menu bar is for the airbrush mode. If you have a brush that has a blending effect on it, the airbrush mode will essentially bleed out untill the the full diameter of the brush. This is achieved like an actual airbrush. The more you click and hold in one spot, the more the brush will bleed out wider. This will only be workable with brushes that have a blended appearance to them.


