How to Make An Attractive Tissue Box From Scrap Box.

Give Added Value to Scrap Boxes.
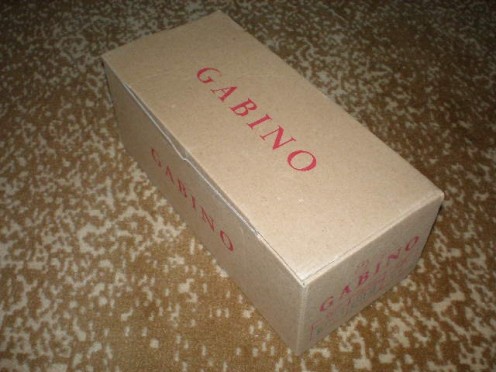
This is another hub which shares knowledge about how to give added value to scrap boxes that are dumped a lot in the neighborhood. Who doesn't wear shoes ? Almost every single person on earth wears shoes, and they change their shoes with new ones at least once a year. New pairs of shoes bought means more scrap shoes boxes dumped. There are some actions we can make to minimize messing environment with those boxes, some people make use of shoes boxes for keeping small things, or use them for storing old footwear, others just pile up the boxes in the corner and when they find them too many and ruin aesthetic value, they'll just be dumped as garbage, so the pollution has just begun. Here I use scrap shoe boxes to be basic material in creating tissue boxes.
Materials and Equipment.
1. Shoe box
2. Scrap cardboard and old calendar
3. White PVA glue
4. Brush (small and medium size)
5. rubber spatula
6. ruler
7. cutter and scissors
8. paints
9. Compound powder (you can buy it at hardware store).
10. Cord binder (buy it at electric store)
Step by Step of the Project :
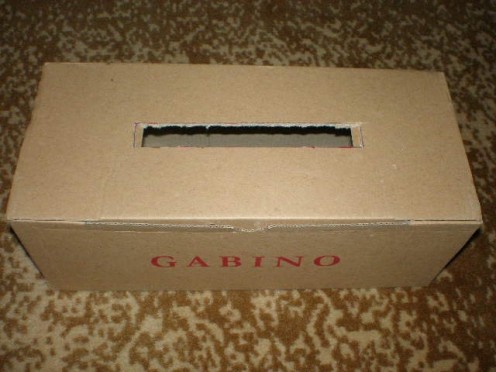
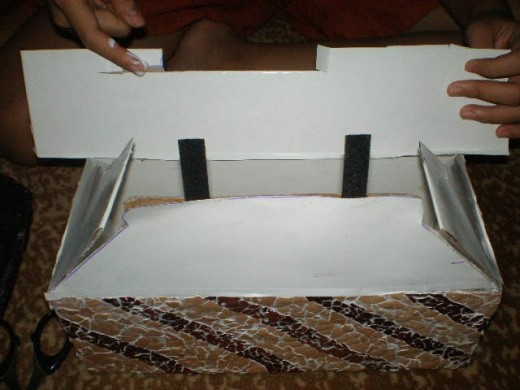
1. Get ready with a shoe box. Make a rectangular hole at the bottom of it, which is to become tissue outlet . You can use a ruler to determine the hole size and to locate it exactly in the middle, then cut it using a cutter.
2. Paste the Box :
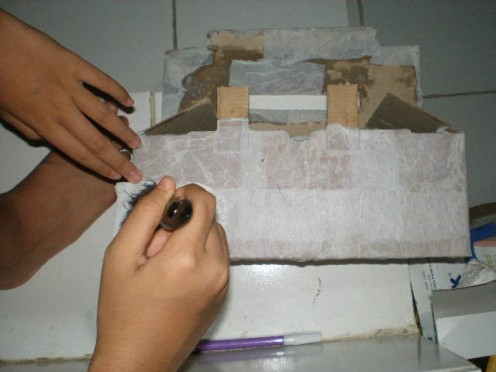
The box needs to be pasted to make it rigid, you can use thin paper or tissue paper for pasting. Cut the thin paper into stripes of 10 cm width, then dilute some PVA glue with water in 1:2 composition. Using a brush apply the dilluted glue on the paper and put it on the surface of the box, do it all the way like this to whole surfaces until all surfaces sufficiently covered with pasting paper. It will take some hours until one day for the wet glue to dry after the pasting.
When it's dried

3. Coloring and Decorating the Case.
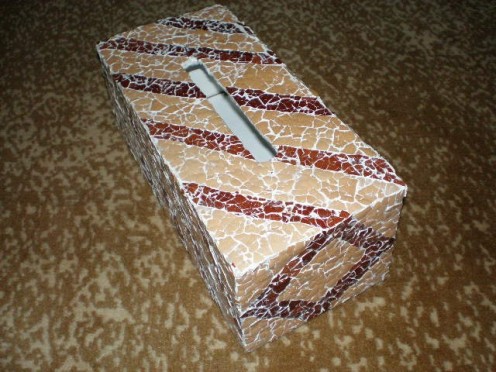
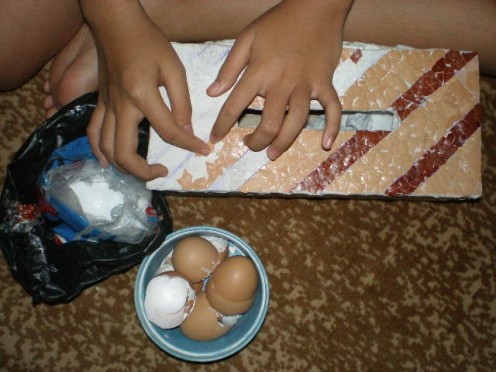
There are some technique you can use in coloring your box, here I don't use paint, but eggshell mozaic instead. I like egg shell mozaic because it's very economical, you can find egg shells very easily, besides it is environmental friendly. What you need to have in doing egg shell mozaic is patience and creativity especially in determining the paterns of decoration, in addition to perseverance and sometimes skills in shell dying too. Here I use egg shells, not only in their natural color, but also dyed egg shells using natural dye. Some shells are dyed using teak leaves so that they color red, brown and maroon.
Polish it up
Egg shell mozaic leaves some rough edges on the surface of the box, that's why we need to smooth it. You can use compound powder to do the polishing. Put some compound powder in a small-flat-bottomed container then add some water, mix it so that it becomes thin/light dough . Apply the dough on the box surface thinly using rubber spatula, remember you only want to fill the gaps which causes roughness with the dough, instead of covering the surface with compound, so it important to keep applying the compound lightly. If you find the application is too thick, wipe it using damp cloth promptly.

Let's Make Up the Inside.
Inside walls of the box need some touches too. Scrap paper of old wall calendar, can be used to cover inside parts with the white/blank page outside, but if you want to make your box looks classier offcourse you can use better material for the covering. Cut the calendar following the sizes of walls and bottoms to be covered, put pva glue on it thinly and evenly then set it. It's not so hard to cover the inside parts, accuracy and neatness is more important in this case.
After Making up inside walls and bottom


Related

Easy Gift Box Tutorial: Make Your Own Custom Gift Boxes

How to Make 8 Crafts From 1 Tissue Box

35 Excellent Oatmeal Box Craft Ideas

How to use, create and configure ActiveX Controls List Boxes in Excel 2007 and Excel 2010

What Fowers/Plants Would You Use if You Only Had Room for a Window Box Garden?


