Rounded Corner Image.Photos Round Using Free Gimp Software Photo Edit


Free Editors
Free photo editing tools like Gimp are available for download and can be a great resource for either learning how to edit photos or master photo cropping. One of the many different free editors to use is free gimp. Gimp 2 for example can be used to resize photo.images or for making rounded corners images. The free gimp download can be found on the website www.gimp.org.
The latest free gimp download,Gimp 2, can be found at www.gimp.org. The free gimp photo editing software works on numerous operating systems to include Linux, Mac OS X, Microsoft Windows. Once downloaded run the setup file and the PC will be prompted to restart to finish installation.
* note this author is in no way affiliated with Gimp software
Rounded Corners
Rounded corner pictures like used with apps has become a new trend for displaying all types of wonderful photos or images and for uploading them to the web. This article will give a brief step by step guide to making a image with the rounded corners effect. One thing to remember is that there are several other ways to enhance the image.photos to meet the needs of the web page or photo printer.
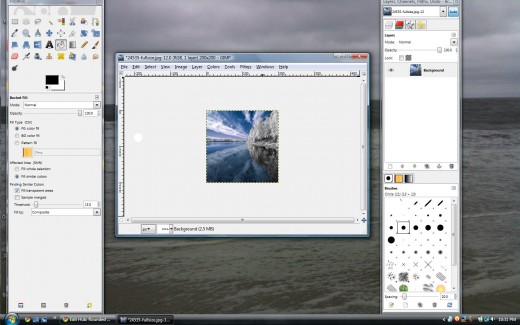
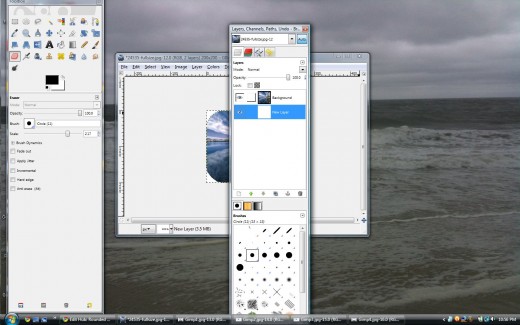
Open Gimp 2
In the upper left hand corner under file menu>click open. A new box will open allowing to search for a photo. For this example 200 X 200 .png will be used. [ to undo any mistake under click edit > undo ]
- Next under Layer>Transparency>Add Alpha Channel
- Select>Rounded Rectangle a box will pop up and click OK [ corner slider bar can be adjusted to desire concave for this example use 50]
- Tools>Paint Tools>Eraser
- Select> Invert
- Erase the corners of the photo
- This now has transparent corners. In this example a white background will be added to compensate for the website background.
** HOLD CTRL and SCROLL MOUSE TO ZOOM PICTURES
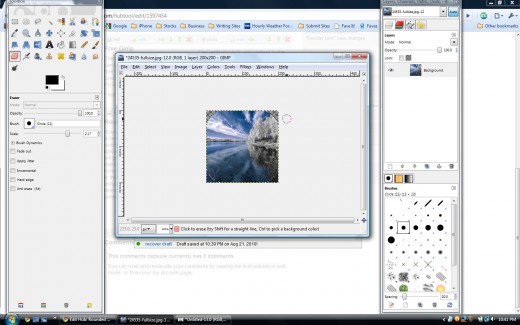
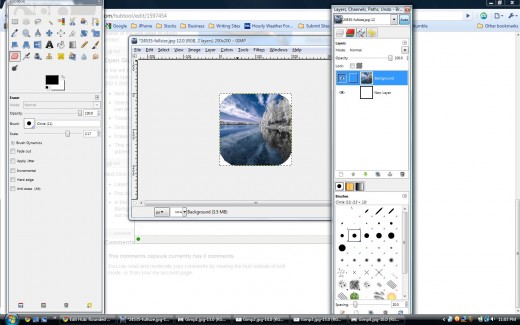
New Layer
Next Click on Layer in the menu
- Layer > New Layer
- Pop out box click Layer Fill Type > White background color
- In the Layers , Channels, Paths window drag the New Layer so that the Background Image is on top note renaming the layers can be helpful but not necessary until it is finished for saving
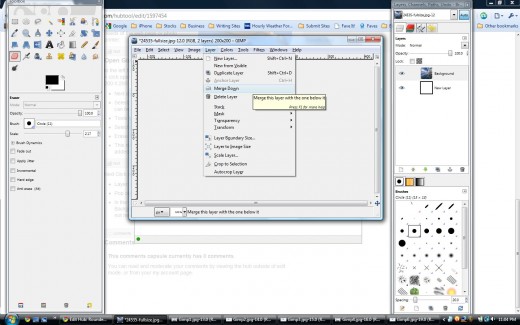
Merge Down
Click on the image labeled background so that it is highlighted
- Layer > merge down [ to undo any mistake under edit > undo ]
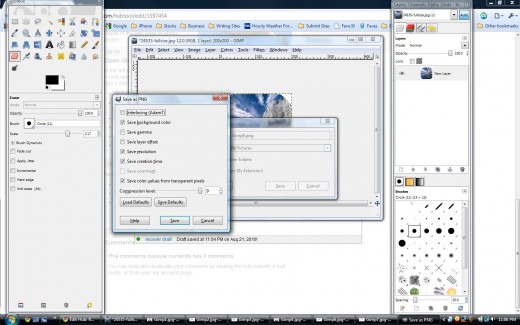
- File>save
- Save File as > name of image.png ***important the image must be saved in .png format for the transparency channel to export
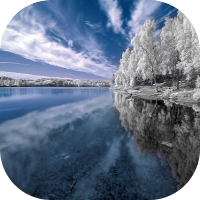
Finished Photo
Finished photo image should look like this example when uploaded to hubpages, blogs or websites. Please leave a comment if any questions or if you found this article helpful.


")