Set Up And Organize Your Craft Space
Ouch!
You Have a Craft Room, Right?
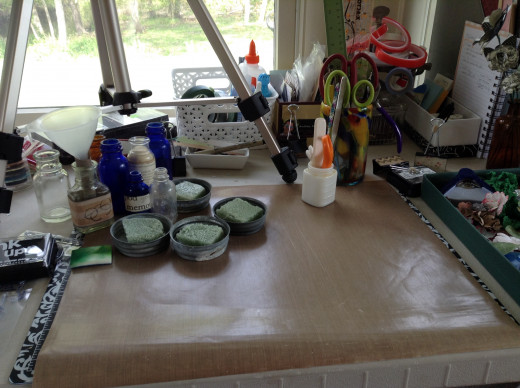
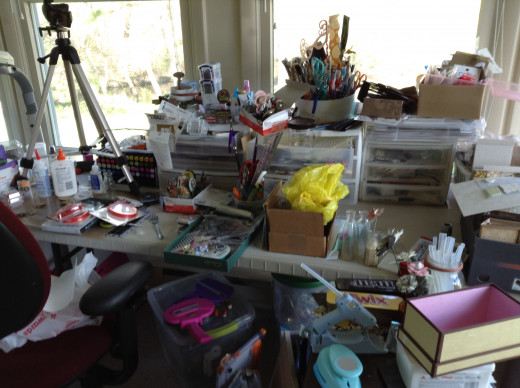
I am ready to start working on a new project so I walk down the hallway of my small, but comfortable home, open the French doors to my spacious craft studio located at the back of the house which overlooks a babbling creek-not! Well, my "craft studio" is at the back of my house and it does overlook a creek -- but in reality it's my very small four seasons room, with an 8' table set-up against my windows and heavily laden with crafting supplies. Sound familiar? Most of the time my husband turns a blind eye to the mess, he only occasionally suggests I rearrange the clutter.
I am however, determined to get organized! The challenge for me is to get organized on a non-existent budget. Last May, 2013, my position was eliminated and we were left to survive on a non-profit salary which prompted our decision to downsize. Add to this unemployment has stopped. I'm not complaining, life is good - these are just the facts. So getting my craft area organized and functional will just take "creativity" on my part. Actually I enjoy a challenge.
I can't believe I'm doing this . . . but here is a picture of my craft table. Trust me, there was no explosion, nor did a dump truck leave a deposit. This mess reminds me of my kids' rooms when they were growing up! How does it get like this? When I start a project I get completely absorbed in what I'm doing and don't take the time to put items back in their allocated spot. This leads me to my first tip on organization.
Stay Organized While You Work
This tip is not a high tech suggestion, but it can be difficult to achieve. Once we get crafting and our creative juices are flowing it is easy to just grab a supply, use it, lay it down and grab the next thing you need. Before you know it your work surface is cluttered, your are working in half the space you started with and now you can't find your scissors. You spend the next several minutes digging through the rubble only to discover the scissors are right under your nose. I hate that!
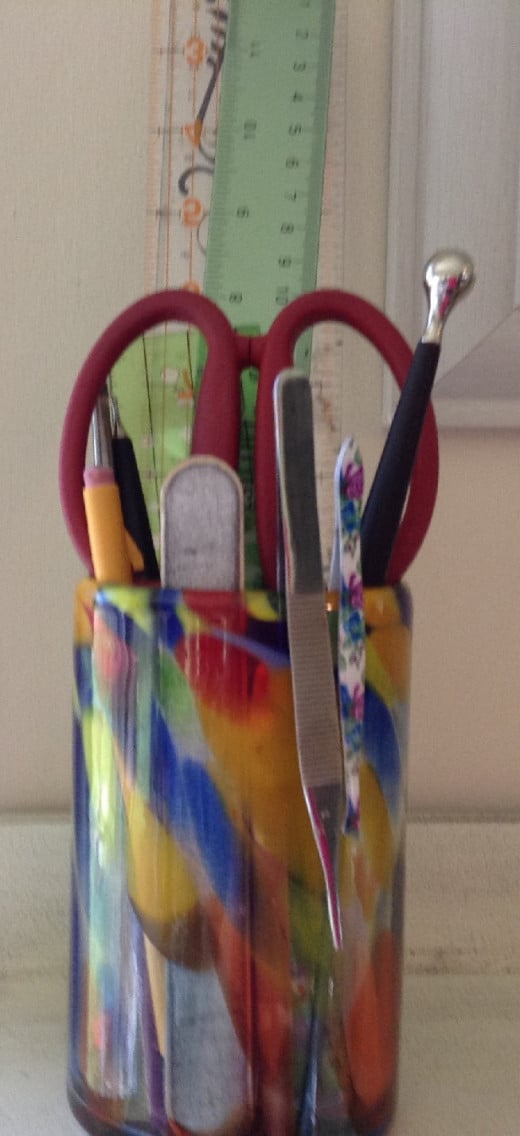
This first tip doesn't cost any money - it just takes time to reprogram our minds. I have made progress in this area. When our daughter returned from a trip to Spain she brought me a beautiful hand-blown glass. It's very colorful, she knows I love color. It doesn't go with anything else I own - so I started using it on my craft table. In it I keep items I use most frequently, my rulers, scissors, pencil, sculpting tools, etc. I rarely need to search for my scissors or ruler these days because I have trained myself to put them back in their place after use. Not sure why I don't carry this through with other craft items, but I'm working on it.
Staying organized while crafting not only keeps you sane, it seems your project progresses smoothly and quickly not to mention clean up is a dream. Returning your supplies to their designated place just makes sense.
Now that we've talked about our crafting mental state, let's talk about the physical - let's get organized!.
Simple Solution
Click thumbnail to view full-size
Claim Your Craft Space.
If you have a budget to organize your craft supplies, I suggest you skip this section and go right to the section entitled "My Dream Craft Room" because you don't need these shoestring organizational ideas. Oh, and FYI the rest of us are jealous, just sayin'.
If at all possible I would first encourage you to find a space in your home that you can setup a craft work area and leave it intact 24-7.
I remember when our kids were growing up we lived in a townhouse, and my mother-in-law had some health issues at the time and she was staying with us using our family room as her bedroom. Needless to say space was tight. At the time I was really into ceramics. We had a kiln in the garage and there was a small space there where I could clean my greenware and paint. It was cold and damp, but more importantly I couldn't keep my eye on the children. So if I wanted to work on my craft I had to drag everything out of the garage and setup a work area at the kitchen table. Then pack everything up when it was time to prepare a meal. Needless to say I spent many nights in the garage painting after the kids were in bed or I just didn't paint at all. I share this story not to discourage you but to encourage you to find a spot in your home that you can claim as your own, a space that can remain setup so when your schedule allows you can just sit down and pick up where you left off.
Your craft space doesn't have to be a large space. Most of us can craft to our hearts content in a relatively small area. A card table can work nicely, a piece of plywood covered with an old vinyl tablecloth is great, just make sure it's supported well. Think outside the box, look around the house or begin visiting yard sales. Maybe you have a family member or friend who has an old desk they'd love to get rid of - you never know until you ask. Don't be shy, send an email blast or make a request on Facebook - you might just get the deal of the century:)
Ideal Work Surface
Truthfully I had never given much thought to my work surface. Several months ago now I was watching Jane from velocityvette08 on YouTube build a photo album and as I watched I became envious of her work surface. It looked like a granite counter top to me, it may not be, but it sure looks like my kitchen counter. Whether she's stamping, painting, or blending ink she works right on top of the counter, sprays it with a little cleaner, I'm guessing Windex, and it wipes right up. Amazing! Of course I hinted at the possibility of a piece of counter top for my work area; the husband just shakes his head and smiles.
If you have been scrapbooking for any length of time you probably have a self healing cutting mat. These mats come in a variety of sizes and are relatively in expensive (especially compared to a granite counter top). I work exclusively on my cutting mat. Actually I've gone through a few because when I ink or glue a piece no matter how careful I am the mat surface gets dirty and I can't seem to keep it clean. About a month ago I was roaming around a Hobby Lobby,www.hobbylobby.com ,and I spied it, a product put out by Ranger, Inkessentials, a resuable non-stick craft sheet which measures 15" x 18" - this is one of the best things I've ever purchased. Now you can not cut on this craft sheet, but ink and glue come right off it. I place mine right on top of my cutting mat so I have a smooth, firm work surface and when I need to cut something I simply slide it to one side. Works like a charm. Now my work surface remains clean and so does the paper or book I'm working on. I believe the craft sheet retails for approximately $18.00 -- don't forget to use a coupon.
Two other options come to mind for a work surface if the above doesn't appeal to you. Before I switched over to the cutting mat and the craft sheet I was using a piece of glass from one of my end tables. This was another easy to clean surface, you just have to be careful that you don't drop anything on it, like a paper punch. I think a piece of Plexiglas would work too, Plexiglas is available in a variety of sizes at Lowe's.
Of course there is nothing wrong with just working on a table covered with a plastic type table cover. Whatever option works best for you and your budget, go for it.

Shed a Little Light
To quote author Wendelin Van Draanen, "proper lighting is everything. . ." Whether you are taking a photograph, staging a room, removing a splinter, or crafting . . . lighting is everything. I my opinion you need a proper light source to be successful. You just cannot work comfortably or efficiently if you cannot see what you are doing.
Crafting is in my bones, it's a large part of who I am - I knit, crochet, paint, color, scrap, and dabble in floral design. You may be thinking, ah Jack of all trades master of none (term famously used by Robert Greene) well you may have a point, but I strive to do my very best in all these areas of creative expression and I have found I cannot be successful if I'm not working under proper lighting.
Many years ago a dear friend, who is an avid knitter told me about her OttLite. So about five years ago I requested an OttLite for Christmas. They come in a variety of styles and sizes. This is one area I would strongly recommend you spend some of your craft budget dollars. The OttLites can be expensive depending on the size, but worth the price. Your local craft store will have them on sale occasionally and you can find them on Ebay.com and Amazon.com too. The OttLite is by far one of the best gifts I have ever received. I now own three - a floor model, a desk model, and a small portable model that I can carry in my knitting bag. The OttLite is described as a TrueColor Portable Lamp. It provides a light source that mimics natural daylight, it does not distort color and reduces eyestrain, I use it every day - it's wonderful!

Rollup Your Sleeves - Time to Get it Done
Your craft supplies will determine how you might organize your space. Right now I'm heavy into scrapbooking so that is my focus for this article. But an outline to organize your craft space, regardless of craft genre, might look like this.
1. Allow yourself at least a 15" x 18" work area.
2. Keep frequently used tools close at hand.
3. Have your trash bin handy.
4. Store like supplies in clear, see through containers.
5. Label, label, label.
Mostly in this section I would just like to encourage you to think outside the box. In our everyday lives there are so many things we can find a second and third use for . . . I hate throwing things away. I know that can be dangerous, but it can also be a good thing if you can re-purpose an item.
Crafting in general requires a lot of supplies whether it be paint, paint brushes, yarn, knitting needles, fabric, buttons, ribbon, etc. Unless you're Martha Stewart most of us need to find practical and inexpensive solutions to our craft storage needs - it's a good thing:)
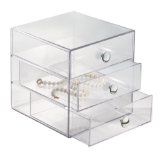
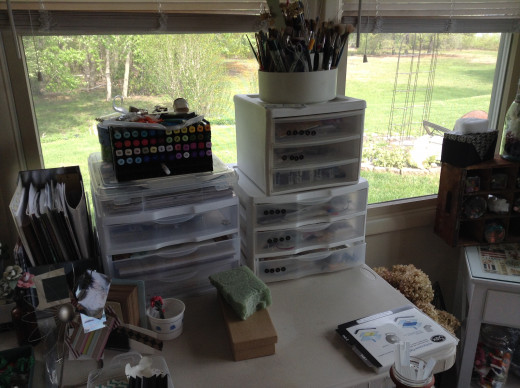
Of course you can go to any container store; Walmart, Target, Michael's, you name it, and find ways to store your craft paper, glue, embellishments and the like. But like I said earlier - most of us don't always have the budget for these things, at least not all at once. So I suggest you start small, maybe your budget can handle one item a month. Don't forget to check out yard sales or thrift shops. I found a three drawer plastic unit at a Goodwill Store for under $5 - it holds 12" x 12" paper - I brought it home and gave it a good cleaning and it's perfect.
If you have access to baby food jars put them to use - they are a great place to store buttons, ribbon, bits of lace, bells, anything small. Store these jars in a shoe box, upside down so you can see what is in them. When you're looking for a particular color button, just pull out your shoe box and you will be able to see all you have available in a glance. My baby food jar days are long gone, but as a lover of vintage things I have many canning jars with zinc lids available. I am going to store some of my embellishments in them and then display then an old crate - this will not only be functional but will also add some charm to my craft space.
I haven't labeled my storage areas, I don't know why I haven't, it makes perfect sense. I spend more time looking for a particular embellishment and I get so frustrated when I can't find the desired trinket. If you are like me, you have hundreds of little items - who can remember them all, but if I would label my storage drawer - by color - by season - by theme - I'm sure my frustration would be cut in half, maybe even be eliminated all together.
Another source of irritation for me is ribbon! I never take the time to secure the loose end and the ribbon I want always seems to be at the bottom of the box which ends up a tangled mess. But I have a plan - I'm currently in the market for a paper towel holder, one that stands upright so that I can stack my ribbon on it - easily seen and easily accessed.
Under my craft table I have a plastic bin that was created to hold Christmas lights - I purchased it off season for just a few dollars however I'm not using it for Christmas lights - I'm using it to store scrapbook paper. There is a small ledge around the perimeter of this container where you are supposed to hang the Christmas lights, instead I inserted hanging file folders in which I can safely store my paper. The paper does not get bent, I have the paper color coded and it holds lots of paper. For a small investment I feel I'm getting a big return.
I hope you find some of these ideas helpful. I would love to hear how you address your craft room/space clutter. I'm off to organize my space and I will post pictures when I've finished.
The WorkBox
Click thumbnail to view full-size

A Crafter's Dream
I always thought that once the kids were grown and had their own lives we would downsize and I would have a craft room. Well the kids are grown, they have their own lives and we did downsize. Unfortunately our downsizing turned out to be a necessity due to the loss of employment. We have a lovely home, two bedroom, two bath - but the reality is I'm not willing to give up my guest room for crafting. We live a distance away from our family and I want the guest room to always be in a state of ready to receive guests. At some point we may be able to convert the garage into a craft room - but I'm enjoying the view from my four seasons room while crafting and I'm not sure I can give that up; what a quandary. Well there is a solution - but I'll need to get a job before it becomes a reality.
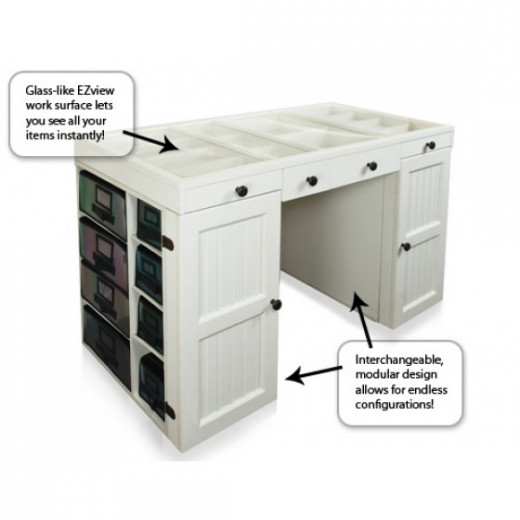
While doing a little research for this article I discovered a product I had never seen before - well actually they have several products that make the heart skip a beat. I'm talking about The WorkBox, theoriginalscrapbox.com. To me, if your space is limited, well even if it's not, this is a crafter's dream. This product is literally a craft room inside a cabinet. They have a varitey of options to meet your crafting needs. The WorkBox measures 3' wide by 2.58' deep by 6' high, closed; fully open it is 9' wide by 1.5' deep and again 6' high. In my mind this is the ultimate, - I'm also in love with the desk. Take the time to check out these products, prepare to drool!


Check Out My Progress
My craft space is certainly not ideal. I work in our four seasons room which unfortunately is visible from the rest of the house. Unless we're expecting guests it's just my husband and me, but he would prefer the space look tidy most of the time and I agree. Here are a few changes I've made.
I have re-purposed a vintage crate for some of my small "bobbles". We had this crate in our last home in a bay window with empty vintage jars. We no longer have a bay window so I thought it would not only look charming in my craft space, but could serve a purpose. So how it houses buttons, bits of lace, bells, etc. stored in vintage jars (lid side in so I can readily see the contents) and it does add a bit of charm to the room. I also filled a few larger vintage jars (love the zinc lids and bale closure jars) with lace and embroider thread. Another charming but useful addition.

Label, Label, Label
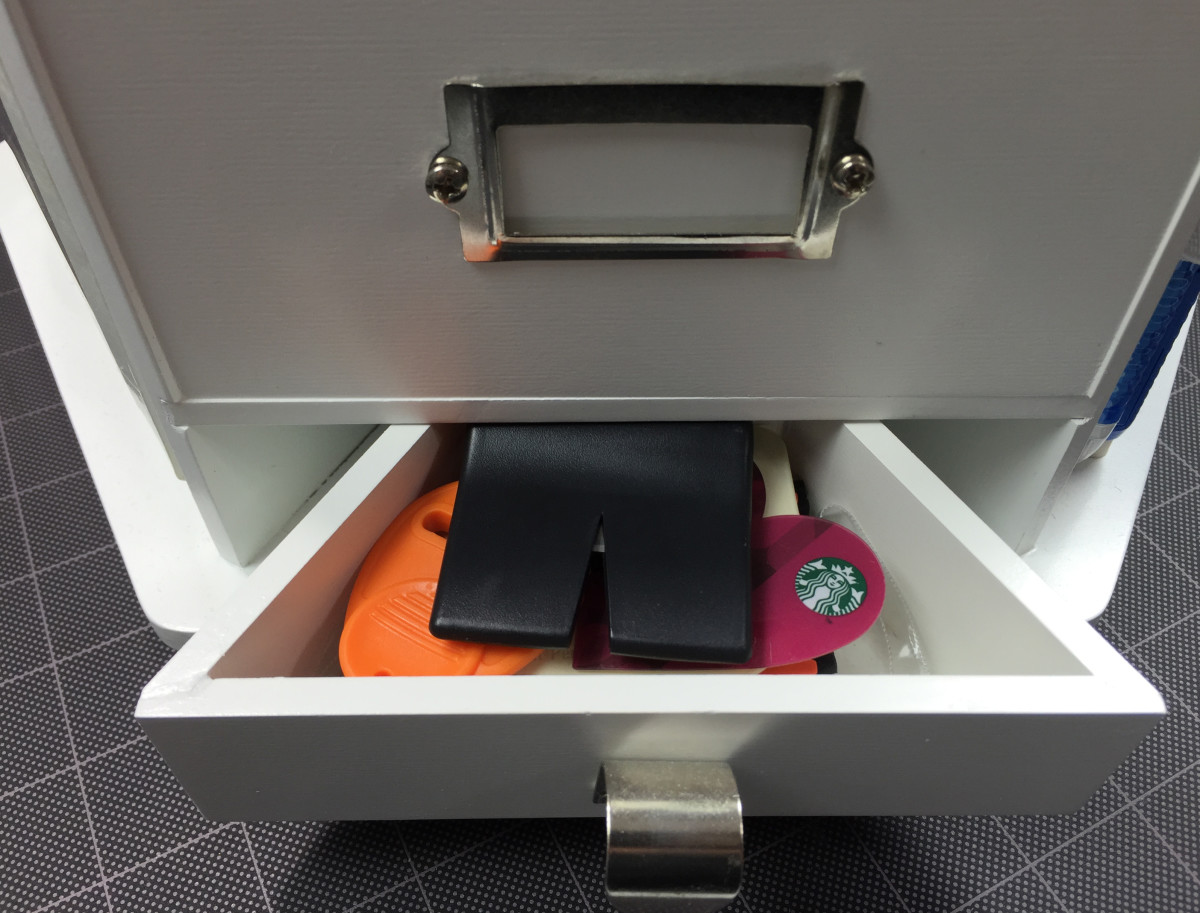
Next I used some leftover alpha stickers to label my storage drawers. I didn't have all the letters I needed (hence the term "leftover") so some of my labels are weird. For instance, in the drawer labeled "data" I have all my letter stickers. In my mind it doesn't matter what you label them as long as you know what each label represents.

Easy Access to Supplies
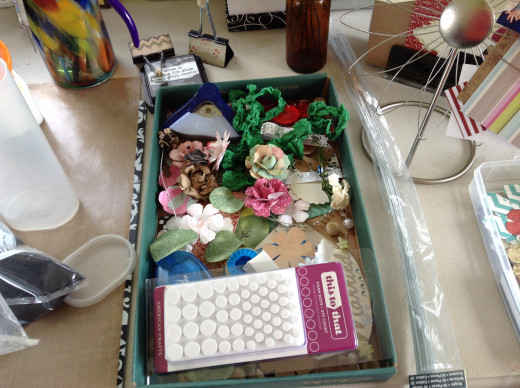
When working on a particular project I like to keep a "working tray" right next to me. Okay, it's the lid of a shoe box, but "working tray" sounds much better. In it I keep my corner punch, small tape runners, and/or the embellishments I plan to use (and anything else that is small) and need easy access to while working. Loading my "tray" has saved me so much time because I'm not stopping every couple of minutes searching for an accent piece or spending several minutes digging through my embellishment drawer. I've taken the time at the front end of the project to plan and think through what I might need for my project and i have placed it in my tray. Love it!

Re-Purpose, Re-Adjust, Re-Use
This note holder sat on my office desk for years. It held pictures of my kids. Last weekend while getting ready for a yard sale I found it in an unpacked box. It now has a new purpose, it holds bits of paper and photos of whatever project I'm working on . . . it keeps those small items handy and up off my work surface.
While shopping at Marshall's I stumbled upon a few reasonable clearance items. A tin bin that now holds some coloring books, cardstock, and larger pieces of scrapbook paper that I like to keep in an arms reach. I also found a plastic divider for $2, which now holds the envelopes I use to make album pages.
These items have helped me cleanup my work area. If you keep an open mind you will be amazed at how you can re-purpose, re-adjust, and re-use items around the house, found at yard sales or on the clearance table. Brilliant!

Save Those Plastic Containers
We've already established that not throwing everything away can be a bad thing or a good thing. In this case it is a good thing.
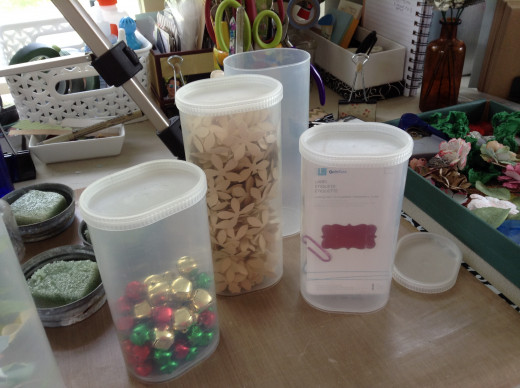
So many times I find myself thinking, 'I might be able to use that' or, 'man, I wish I hadn't throw that away I could really use it for . . . ' Often I have to force myself to throw things away but in the case of those plastic containers that hold powdered drink mix (like Crystal Light) I peel off the wrapper and use them to hold small items I can use to decorate a craft project. Sometimes you open an embellishment package, use one item then what do you with the rest of them? Most embellishments don't come in a resealable bag. If you toss them in a drawer they get bent, dirty or damaged in some fashion. What's the solution? Use all those plastic powdered drink containers.
The plastic used in these containers is not clear, but you can see through it, they keep your treasures free from moisture, are easily labeled, the lid has a tight fit, they come in two sizes, they are not an extra purchase, need I say more? Right now I have mine stored on their sides in the top of a shoe box (love those shoe boxes) but I'm sure I'll come up with a better plan for them down the road, but for right this works.


There Is No Place Like a Clean Space
There is nothing like a neat work space. It doesn't take long, after looking at my photos, my craft space is not large, but I have plenty of room to do almost anything I need to do. I move to my kitchen counter only if I'm building a larger album cover and need extended space. And if I'm honest, even then I usually stay put and work from the smaller space, I am comfortable there. I'm not saying I wouldn't like more work space - I would - but that's not a reality for me and the work space I have allotted myself is just fine, it's really my comfort zone. If I stay the course and I put my scissors back in their rightful place, return my corner punch to my "work tray" etc. I have more than enough room to create. Sweet!
I would love to hear some of the things you do to keep yourself organized - leave me a comment.

Outside the Box Idea
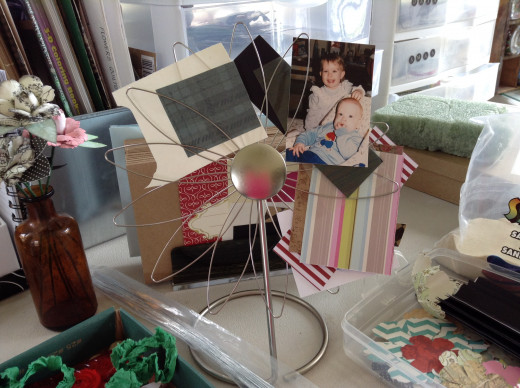
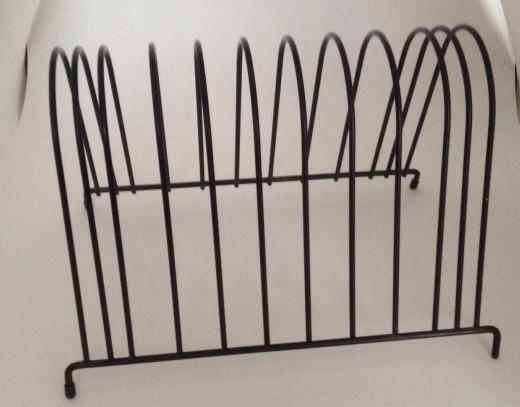
Remember those old wire record album holders? Recently I was at a yard sale and saw one for a dollar - I walked away but immediately began to ponder how I could put this item to use. As I continued to walk around the yard sale the thought of the album holder kept nagging me - there's got to be a way I can use this! Before leaving I purchased this blast from the past, then it hit me. When I am working on a scrapbook I tend to get very messy. While my "work tray" helps to keep me somewhat organized I still end up with lots of scraps of paper. I find that I waste a lot of time digging through these scraps to find just the right piece. Sometimes I get frustrated and just cut into a whole sheet - light bulb!!! - with my newly purchased wire album holder I can neatly store the paper pad and the scraps of paper for the project I'm working on. I keep the holder right next to my work tray. Easy access to both the tray and the wire holder really help me find what I need when I need find it, keeps my work space neat and I find I'm not wasting time digging through a pile of scraps. I love this outside the box idea!
Do you have any crafting "outside the box" ideas to share? I'd love to hear them.
Out of Control
My paper scraps are out of control. It is very difficult for me to throw anything away. When I first started scrapping I remember reading a helpful tip that said "save your scraps" and I do; I throw almost nothing way. I think I have enough scraps to paper the Great Wall of China. Maybe I should seek professional help. In my defense I do use my scraps, but as you can imagine they are a mess, just all heaped together and thrown in a box. The thing is, when I need a small piece of let's say green and purple paper (I know I have it) I just can't find it so I spend several minutes digging through my box of small treasured pieces of paper. Liiiight bulb!!!
When I work on a project, in most cases, I am working from a specific paper pack, a 12 x 12, an 8 x 8, or a 6 x 6. Rarely do I use the entire paper pad, so here is my light bulb idea. If I store the paper pad upside down (glued edge down) to form a file folder of sorts (having used paper from the pad creates room) there is room to store portions of paper. The scraps of paper then become well protected and well organized. Now when I'm looking for that green and purple scrap of paper I can go directly to the 12 x 12 The Chateau Lavender paper pad by DCWV and find what I'm looking for in seconds. I think this is a 100 watt idea!


Stamp Pads - Ink Pads - Blending Foam
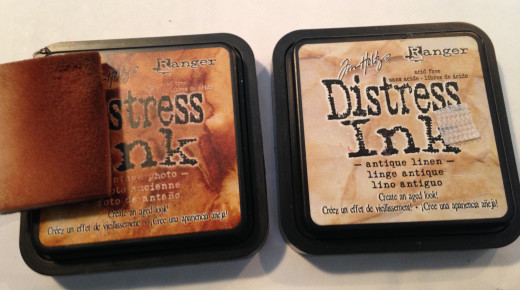
Since I began scrapping I have become fond of stamp pads aka ink pads. In just a short time I have accumulated several in a variety of colors. I am not heavily into stamping (at least not yet) but I do like to use my stamp pads to ink the edges of my work. For instance, right now I'm working on paper Easter eggs and I am inking the edges to give the eggs a vintage look. As you can imagine not every ink color works for every egg so I have several sponge (blending foam) applicators and several of my stamp pad colors are similar - walnut, antique linen, frayed burlap, coffee bean, vintage photo - so it is often difficult determine which sponge goes with which ink pad.
Initially I tried storing the piece of foam under the stamp pad lid - well it doesn't close tightly enough for my liking. To solve that problem I began rubber-banding the lid on - that works okay, but I wasn't really a fan. So the other day while using the blending tool put out by Ranger I had a stroke of genius, if I do say so myself:)
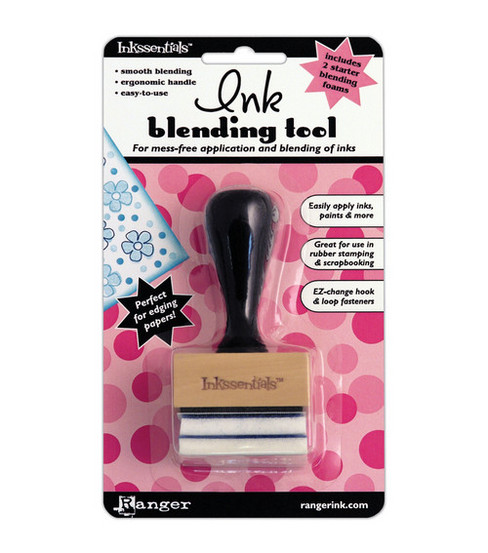
The Ranger blending tool, rangerink.com, is a small block of wood with a handle. Attached securely to the base of the block is a piece of Velcro (hook side) and the blending foam attaches to it very nicely. Of course I could purchase a blending tool for each ink pad - right now I have upwards of 20 ink pads - for my budget that's not an option (not to mention the organizational nightmare that would create). Earlier this week while edging I had an idea (my stroke of genius). I simply attached a small piece of Velcro (hook side) to the lid of each of my stamp pads - now when I'm finished using the walnut blending foam I remove it from my blending tool and attach it to the top of the appropriate ink pad.
Not only does this eliminate confusion over which blending foam belongs to which ink pad - I no longer cross-contaminating my inking colors and it helps me keep my stamp pads and blending foam organized. Love it!

