Simple one cut and one fold technique to create beautiful pop ups

How to make simple one cut pop ups
Brief introduction to paper pop ups
Pop up means something that stands out, and when we talk about paper pop ups it means the portion of the paper that pop ups once the folded paper is open. Now there are mainly two ways to create pop ups which can be applied to create paper pop ups. One is by simply using glue and attaching your design to create a pop up effect and second is by cutting and folding paper to create pop ups. This is the real way of making paper pop ups and it is also known as 'kirigami' which is a Japanese word and it means paper cut. Artist like Paul Jackson has taken it to such a high level by creating great architectural pieces pop ups that it is often called as 'Paper Engineering'.
Here I will show you how you can make beautiful pop ups by learning some simple techniques of cutting and folding. These are classified into many types like,
One cut one fold,
One cut two fold,
Two cuts two folds,
Two cuts and common fold,
Multiple cuts and folds,
These are symmetrical cuts and folds techniques and here we will learn just one cut and one fold technique. First section will show you the materials required, second section will explain the first basic and third will show you many variations using the same technique.
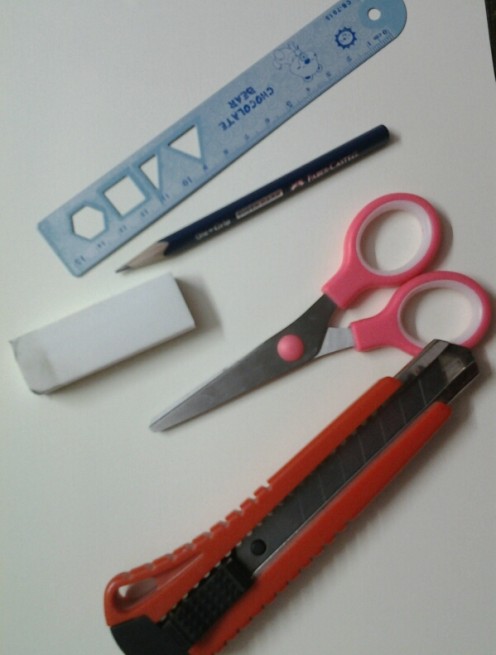
Materials required
1. Paper cutter or scissors,
2. Ruler,
3. Pencil and eraser,
4. Paper, (cardstock or pastel A4 size sheets),


Pop up basics
Understand the basics -
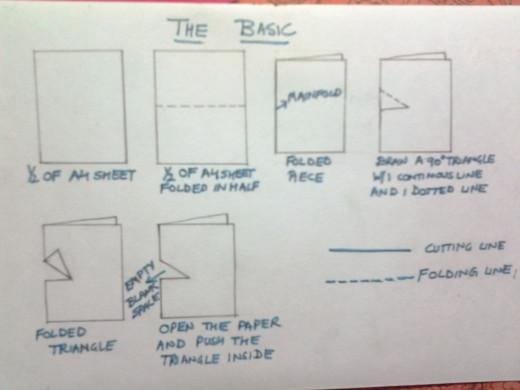
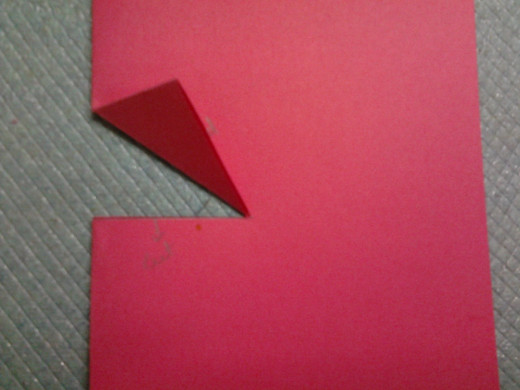
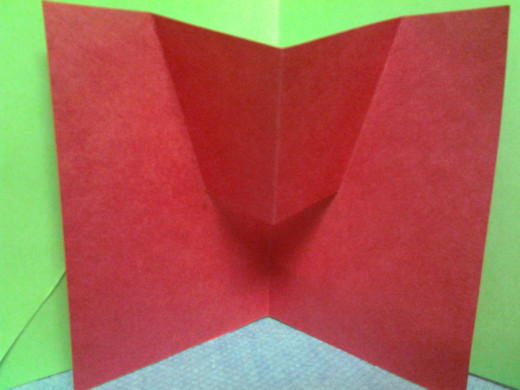
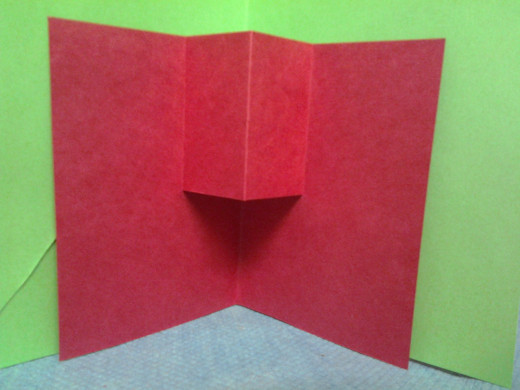
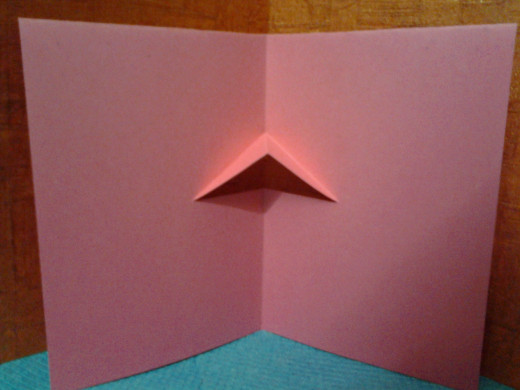
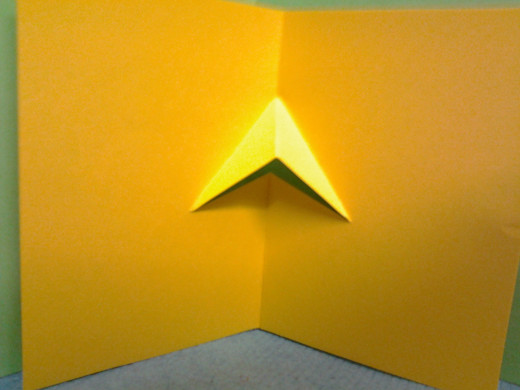
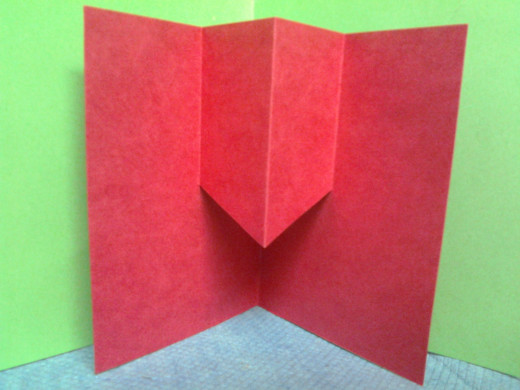
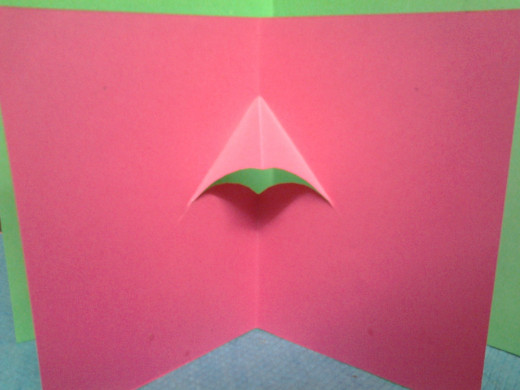
While making such single piece pop ups we first make the main fold i.e folding the paper into half. Next we make a cut onto the folded side of the paper, this cut could be of any shape or form. Now we fold this portion and unfold it to further push it inside the card to create the pop up. Such pops ups gives symmetrical designs as both the front and the back is cut equally from the main fold. So lets begin the real work.
Make your first pop up - One cut and one fold
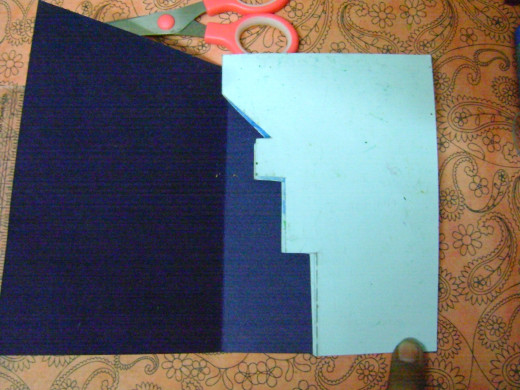
- Take a piece of paper and to save paper while practicing it will be better to cut the A4 sheet into half. So now you have 2 sheets to work on.
- Fold this paper into half which is called the main fold. Press it nicely using your fingers.
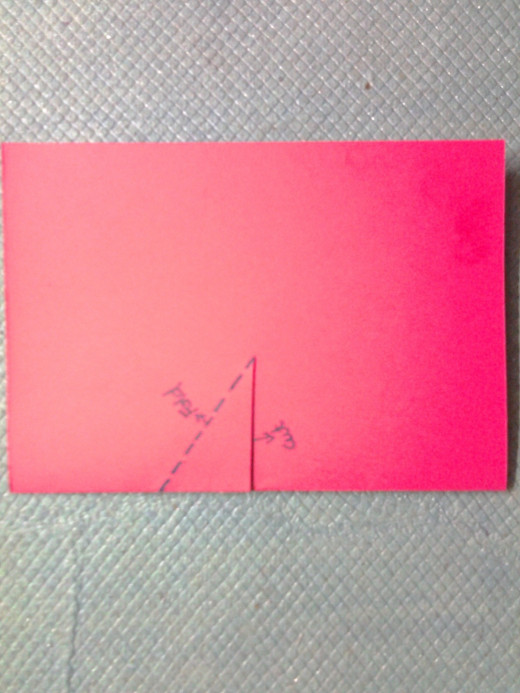
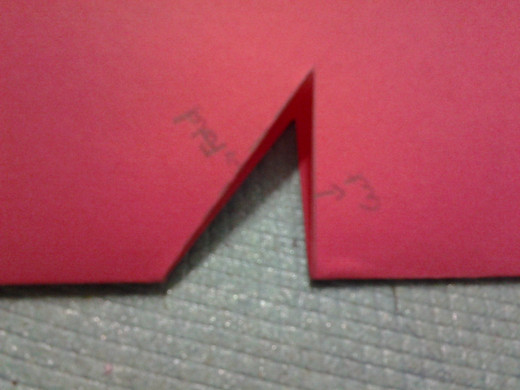
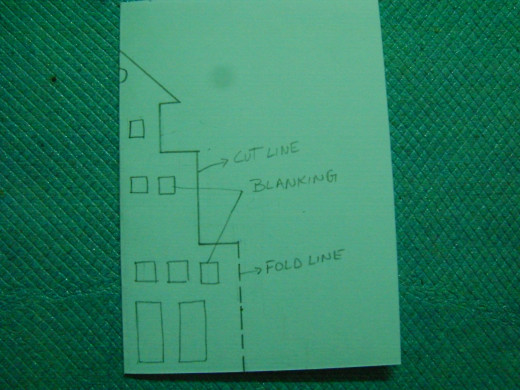
- Using the pencil and ruler make a horizontal line from the center of the main fold to a desired point. By desired point i mean you can make it slightly big or small as it doesn't really matters.
- Now draw a slanting dotted line so that this will look like triangle.
- Continuous line is the cut line and dotted line is the fold line.
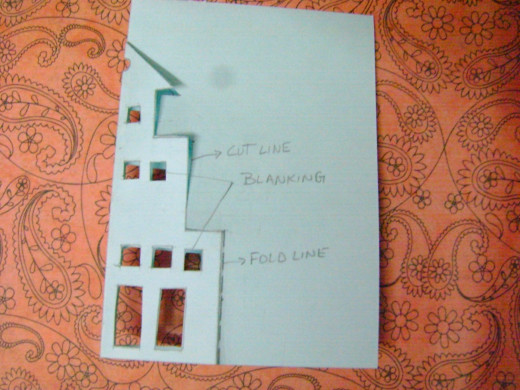
- Now using the scissors cut the horizontal line and fold the portion on the fold line, press it firmly.
- Unfold the portion and fold it again on the back side, unfold it again.
- Now open the card and push this portion inside and close the card.
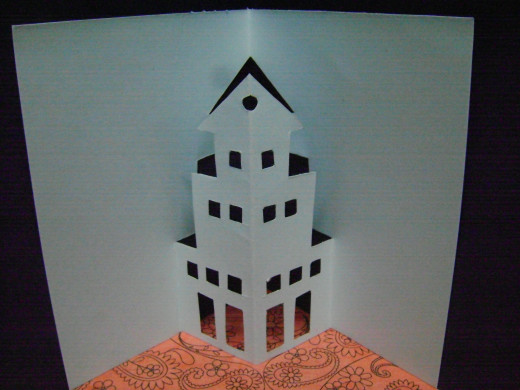
- Open the card and see your first pop up.
The image will help you in understanding the concept better. More practice will help you in proper folding, cutting and finishing. So now we will do some variations using the same technique.


Variations in one cut one fold pop ups
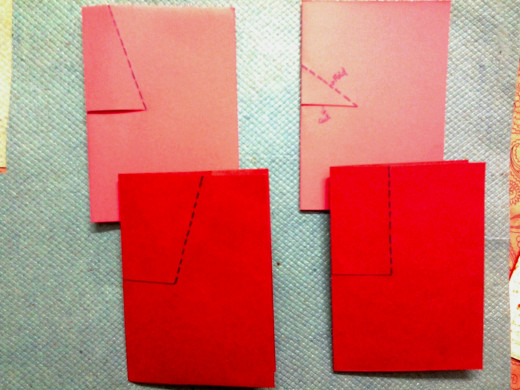
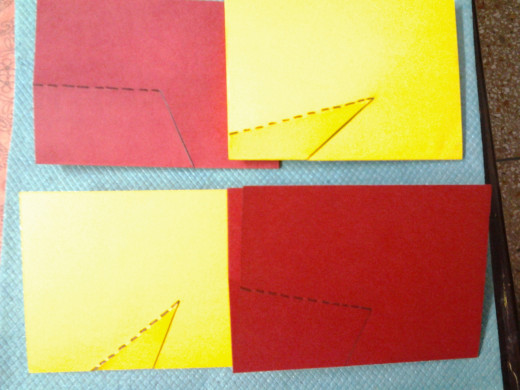
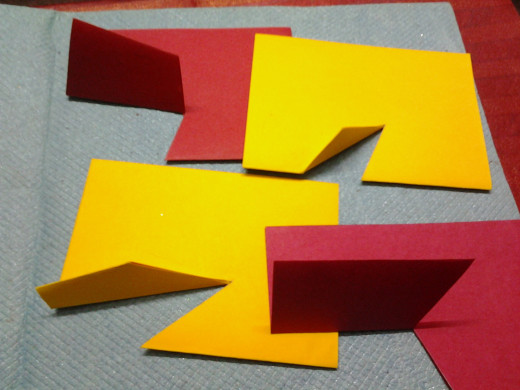
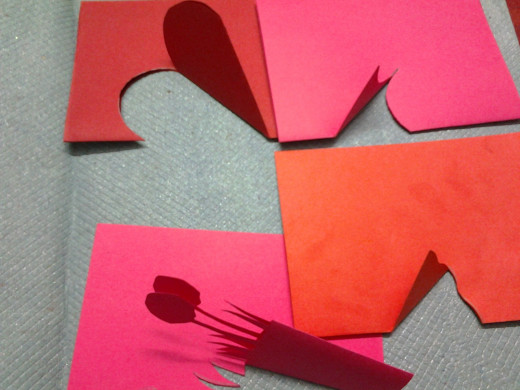
Variation I - Now to begin the variations take at least 4 sheets of paper , cut them into half and give all of these a main fold. So now you have 8 folded cards to work on.
Take 4 first and draw the horizontal line on all as we did in our first basic card. This will be your cut line and we have done no change on this.
Now draw the dotted fold line differently in all these cards and cut and fold the portion on these fold lines. This will give you 4 different shapes of pop ups.
See the images for reference.
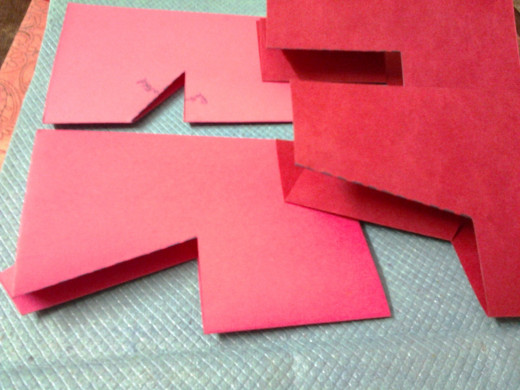
Variation II - Now pick the next four cards and this time keep the dotted fold lines the same as we did above and change the cut line position.
Cut these lines, fold them, push the portion inside and this time you will see another 4 different pop up shapes.
See the images for reference.


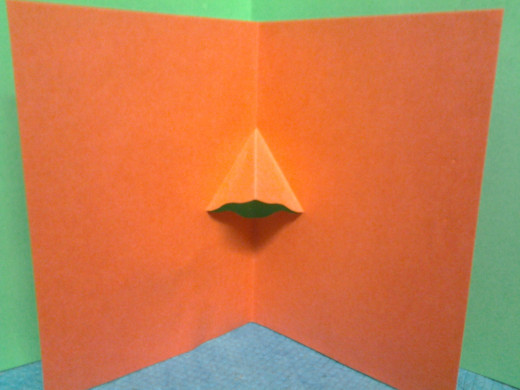
Changing the directions and shape of cut and fold line
Now what next,
Variation III - Now once you have practiced this we easily understand that by changing the direction and shape of the cutting line and by changing the position of the fold line we can make as many pop up designs as we want to.
Two important things to notice here is that the fold line remains straight always be it slant or vertical as we know it is not possible to fold a curve line, but the cut line can be of any shape or design.
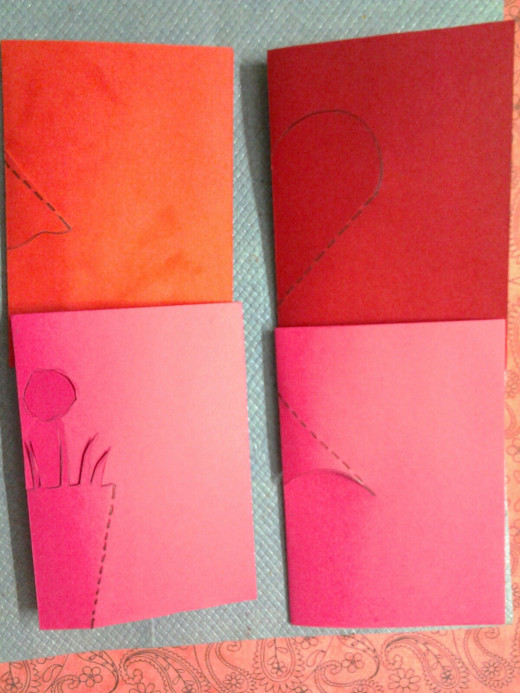
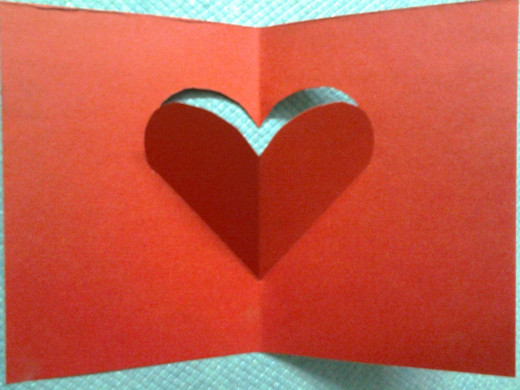
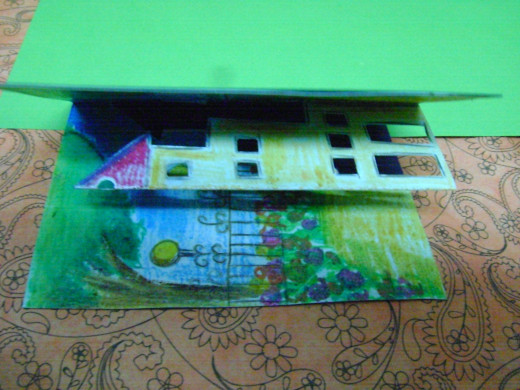
See the variations i have done using this technique, we can have blank hollow space in between to show windows or eyes, which we can cut using a cutter.
1. Heart,
2. tiger nose
3. building,
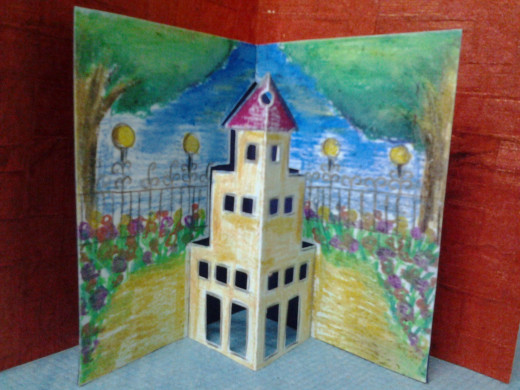
4. pot with plant


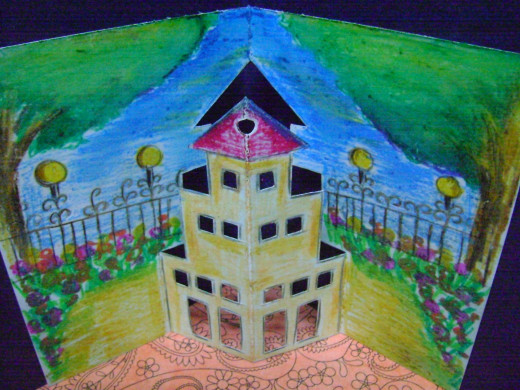
Some drawing, coloring and finshing
Coloring and applying back paper -
Some drawing and coloring will enhance the pop up and will look more attractive. So draw something related to the pop up in the background and color the pop up also. Like if your pop shape looks like a nose then draw a tiger or a lion, for the building may be a road scene and so on, its your creativity.
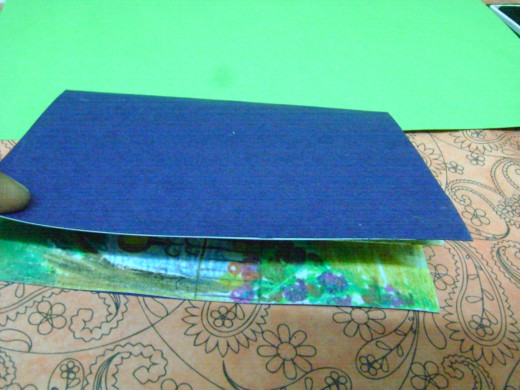
Why it is important to apply a back paper -
In such pop ups once the portion is pushed inside it leave an empty space outside which needs to be covered. So for this cut a contrast color paper of the same size, and fold it. Apply glue carefully on the sides of this ( only inside part) and place your pop up card inside nicely to fit the cover. Give a soft press and open your pop up to check the result.
Hope you guys will enjoy making this easy one cut one fold technique of creating pop ups, and i will explain all other types of pop ups in my next hubs.