- HubPages»
- Arts and Design»
- Crafts & Handiwork»
- Textiles»
- Embroidery
Stitching on Bookmark - We R Memory Keepers Sew Easy Tool - Random Stitch

Introduction
We R Memory Keepers Sew Easy tool is one of the best and inexpensive tool that helps you stitch on cards and make some wonderful designs. This product has been on market for quite a few years now. I got it last year and I can say I simply love it. From the past 2 months, I have been using it for various projects and I simply cannot end my day without using this tool once. There are a lot of negative comments on this tool - like cheap plastic, does not pierce and all that. Believe me it is not that difficult to use and it does what it says fairly well enough. I myself was skeptical of buying it reading all the negative comments, but I am so glad that I completely ignored those comments.
If you love embroidery, or you have never embroidered before and want to try some stitching, this tool is perfect for you. Buy a starter kit at amazon, it costs less than $20. It comes with the following items:
- Tool Handle
- 6x6 piercing mat
- 5 Stitch heads
- Needle
- Lots of embroidery floss (variety colors)
If you are stuck somewhere and need guidance on using this tool stay with me and I will be adding all 20 head designs with step by step tutorial.
Random Stitch
Let's begin with the first Stitch head called Random stitch or like I love to call it the Heart beat stitch because it looks like heart beats.
I am going to show you how I made a bookmark using the Random Stitch Head.
Materials required:
- We R Memory Keepers Sew Easy Random Stitch Head
- Piercing Mat
- Needle
- Embroidery Floss
- Cardstock (Colored)
- Cardstock (White)
- Pencil
- Sharpie
- Scissors
- Colored Pencil
- Scrapbook Paper scraps
- Bakers Twine
- Hole Punch
- Tape Runner
- Laminating Sheet (Optional)
- Laminator (Optional)
Gather all the materials and let's get started.
Tutorial
Let's Start with the bookmark.
- Cut 2.5" x 8" colored cardstock to make the bookmark
- With the help of decorative scissors cut on three sides of the bookmark. Leave the top edge straight.
- Take a hole punch and punch a hole on the top of the bookmark. Cut the top corners with corner punch to give it a smooth round look.
Bookmark Cut to Size

Video Tutorial For the Stitch
Making the Camel
- Draw half camel and outline it with black Sharpie.
- Color it with any medium of colors.
- Fuzzy cut the camel with sharp scissors. (Adult supervision needed for kids)
Camel Outlined and Colored


Cutting th Cactus
- Take any shade of green scrapbook paper and cut 3 to 4 cactus plants.
- Make sure they are varied in size and shape. No two cactus are the same.
Display those Cactus

Arrange and Pierce
- Arrange the camel and cactus on the bookmark and take a picture so that you have a guide when you actually stick those on the bookmark.
- Remove the camel and cactus and take your We R Memory Keepers Sew Easy Tool and Random Stitch head and the piercing mat.
- Pierce four rows with the random stitch applying even and firm pressure on both the paper and the tool.
Arrangement and Piercing


Back Stitch and Lamination
- Take your needle and thread it with green embroidery floss, and do the back stitch. Refer the video tutorial for the back stitch.
- Once all the stitching is done, the next step is to stick down the camel and cactus. Using the tape runner, stick it all on bookmark. It does not need much glue.
- After sticking camel and cactus, with the help of a fine tip marker draw the grass and color it with the medium of your choice.
- Once done laminate the bookmark. Punch hole through the lamination at the top where you previously punched the hole.
- Take a length of bakers twine and attach it to the bookmark to complete it.
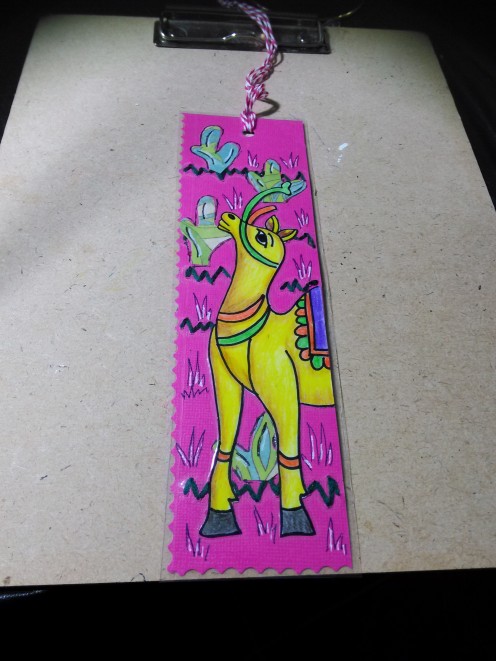
Our random stitch bookmark is ready. It makes an amazing gift for bookworms or Christmas gift or birthday gift. Handmade is always special.
Complete Bookmark


