The Real Spider-Man How to Make a Kids Toy from a Mask

Renamed Furfy after a take home school toy.

Introduction
Over the years our family have gone through more Spider-man costumes than there have been remakes of the movie. Each time I have bemoaned the silly masks that accompany the costumes. I have issues with my dust mite allergic kids pulling things over their heads. And don't get me started on the useless eye holes that obscure the kids vision to the point where it's hazardous. If you've ever had an excitable small person saving the world you'll know what I'm talking about and God help anyone who blunders across their path.
There is a wonderful saying that goes something like; Necessity Is The Mother Of Invention and quite frankly having to endure the hysteric wailing of "Why can't I wear the mask" has led this Mother to come up with this alternative.
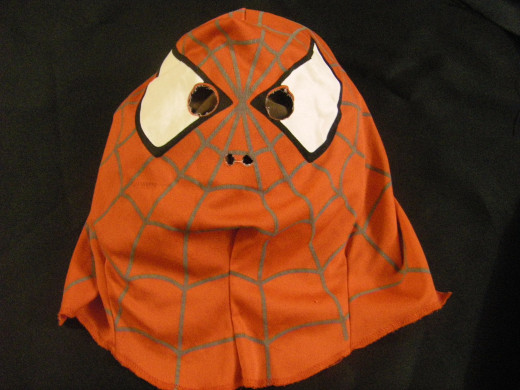
A typical Spider-Man mask
1. Start by removing the velcro closures on the back of the mask. Simply unpick the stitches and gently pull off the velcro.
2. Turn your mask inside out you will notice the eye and nose holes, also the seam you will cut along later for the legs.
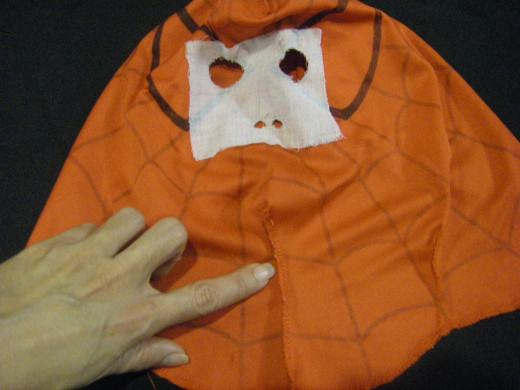
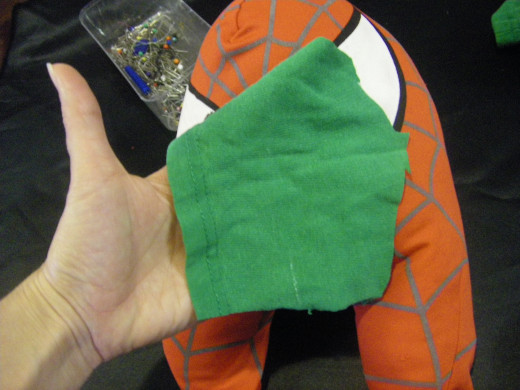
3. Cut a square of material big enough to cover the hole areas.
4. a)Pin in place and zigzag around the eye and nose holes.
b)You can either sew up the nose holes or later make a nose.
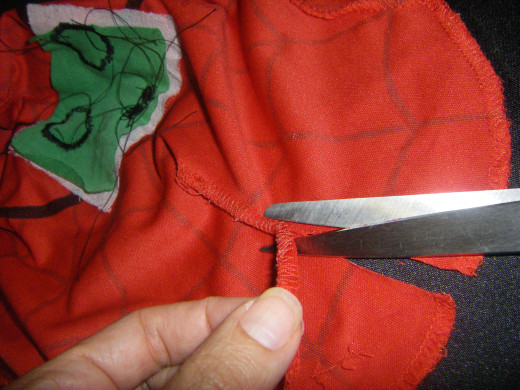
5. Turn inside out and cut along the seam line that is under the eye and nose holes.
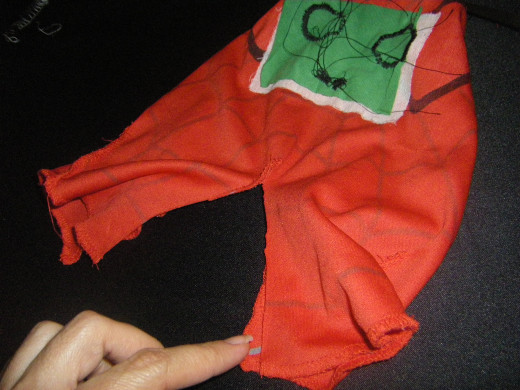
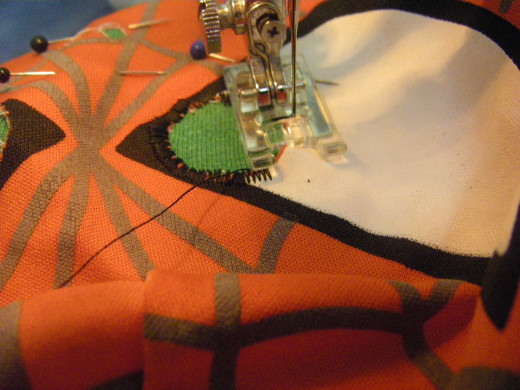
6. a)Line up the back of the mask to the front of the mask to form the legs.
b)Straight stitch around the inside seam of the legs and along the back seam of the head. Straight stitching first will give you a guide where to overlock and help you understand how it's coming together.
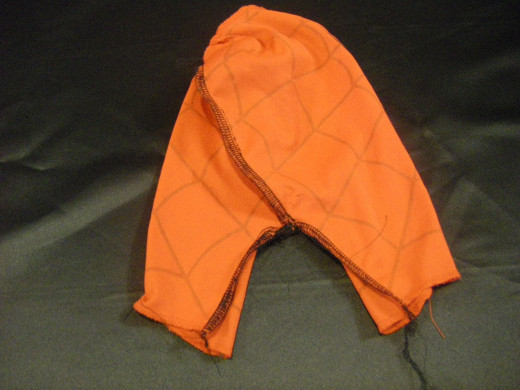
7. This is how it should look with the inside seams stitched and then overlocked for extra strength.
8. a)Pull 'right side out' through any one of the leg openings. Tah Dah!
b)Now you can stuff it via the leg openings with toy stuffing, hobby fill or anything that is non-toxic and child friendly.
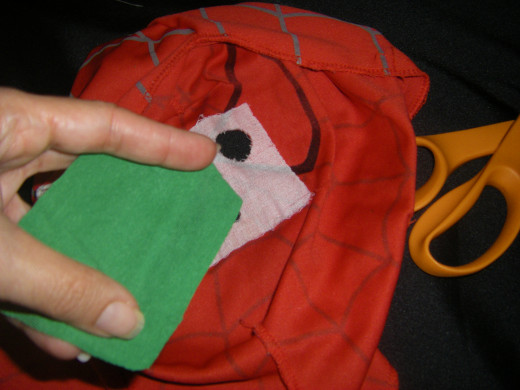
9. Making the nose. Cut a piece of material about the size of his face.
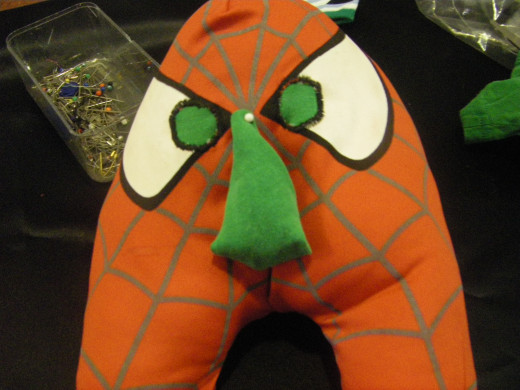
10. Shape the green piece of material into a fat triangle and hand stitch on, careful to hide stitching.
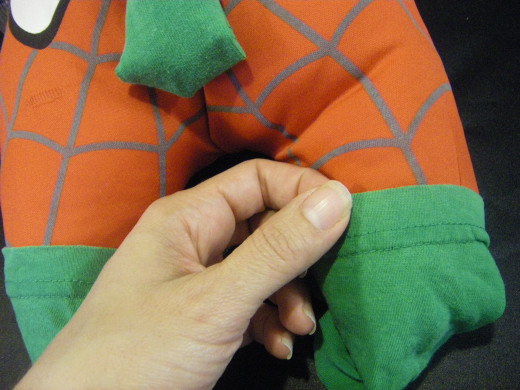
11. You can make the foot coverings from the same green material you made the nose. I've used one of the kids old green t-shirts, cut off the sleeves and attached it by using the hemline of the sleeve around the top of Spideys leg and hand stitched it into place.

12. To tidy up the back of the foot coverings fold up like you would wrap a present and hand stitch into place.
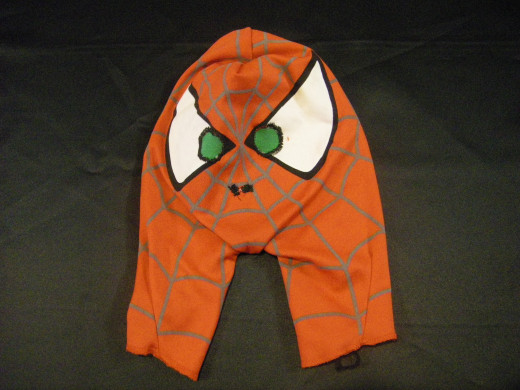
WooHoo all done!
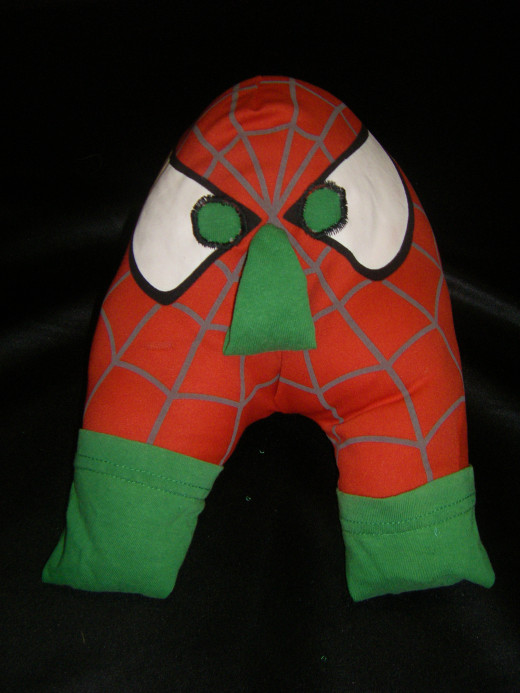
All done.
The finished product. The only thing left to do now is to explain to your children that "YOU WON'T TURN INTO SPIDER-MAN IF YOU GET BITTEN BY A SPIDER".


