Tips for Photographing Food for Cooking Articles and Hubs

What are some good tips for photographing food?
This question was recently asked by Hubber ktrapp. Since many people comment favourably on the photographs in my cookery hubs, I would like to share what works for me.
There are three factors to consider when photographing food:
1) Lighting
2) Taking the best shots
3) Making adjustments in a photo editing application
A Portable Photographic Studio

1) Lighting
Daylight Is Best For Photographing Food
Whenever possible photograph in daylight. This avoids the need for flash, which can cause harsh shadows and can reflect in some foods or dishes.
We have a conservatory (sun room) and I often photograph finished products in there. But you don’t need a conservatory to get good photos: the light from a kitchen window will be enough, providing you take your photographs close by.
The Next Best Thing To Natural Light
It’s not always possible to cook and photograph in daylight, so we bought a mini portable studio. This contains a folding box, two strong lights, a tripod and a reversible background cloth. Similar portable studios on Amazon have a choice of 4 background colours. As you can see from the photograph of the Mini Studio, the lights are positioned outside the box. This gives a soft lighting effect, with minimal shadow.
I use this equipment in two ways:
1) For a photograph of a finished meal or cake I use the entire studio.
2) For photographs during the preparation and cooking I use the lights only.
Using The Mini Studio
One of my most popular cookery hubs, and one which has won the Hub of the Day accolade, is Hedgehog Cake – a Chocolate Cake Recipe.
For the photos of the different stages of icing and the finished cake, I set up the Mini Studio, chose a blue background, placed the cake on a board and took shots between each stage of icing.
When my daughter and I had finished icing the cake I swapped the board for a cake plate and took the picture that gets people drooling.
Using The Lights Without The Box
When using the lights to photograph different stages of cooking, position them at opposite sides of your working space, and move them around until you minimize shadows. I’ve found it works best with one light above and slightly behind the food I am preparing, and the other at counter level on the opposite site of the food. I prop the higher light on a bread bin or hang it from a cupboard handle. Be careful if you do this because the lights get very hot. It is best to keep them switched off until you are ready to take photographs.
Taking The Best Shots
Choosing the Camera Setting
You need a digital camera that can take close up shots. I usually use a Panasonic Lumix DMC-TZ3 with a 10x optical zoom, or occasionally a Canon PowerShot SX210 1S, which has a 14 x optical zoom.
My camera has a food setting, which I sometimes use, but more often than not I use the macro setting. Both work equally well for getting close to the subject. I rarely use the zoom lens because I find the focus is less reliable. The exception to this is when photographing steaming food on the hob or stovetop. Getting too close can sometimes steam up the lens, so step back or take the photo from an angle rather than from straight above.
Take photos at several stages

Take More Photos Than You Expect Use In The Hub
When taking photographs expect to take up five or six for each one you will actually use. I take each stage of preparation from several angles. Sometimes what looks best on the camera’s playback screen doesn’t look best on the computer screen so it pays to have a selection. I don’t always use the photos from each stage, but having them available means I can choose those most appropriate to the clarity of the recipe and layout of the page.
While I cannot give my readers the food I’ve made, I want to give them the next best thing: confidence that they too can cook. Taking photographs at several stages of the preparation allows people to know what to expect as they cook. When photographing food in a mixing bowl I generally choose a shot from directly above. This means the focus is on the mixture, not on your pretty bowls! If you use specialist equipment include that in the shot – the names of some utensils vary country to country, and you want your recipe understood worldwide.
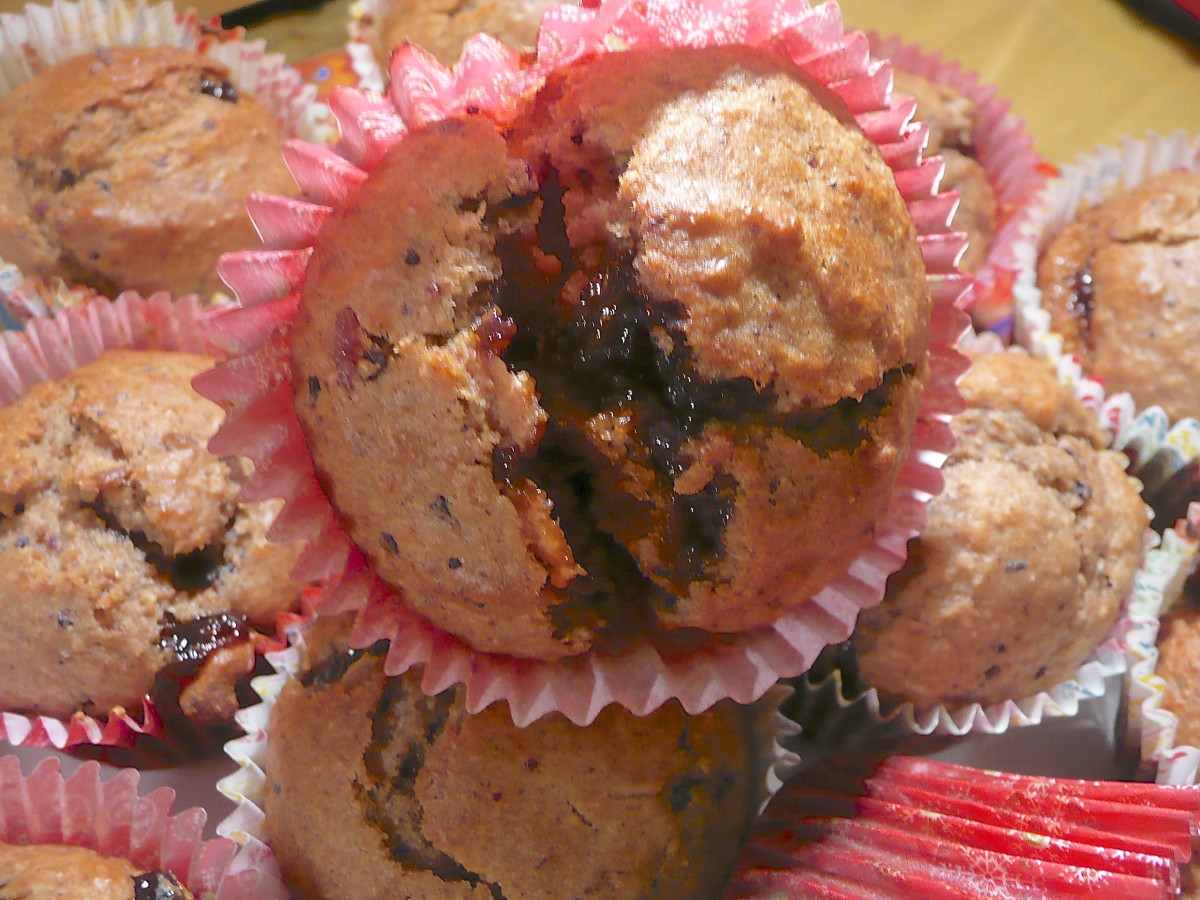
Get Close
Close up shots help people to see how the food should look, both during preparation and when it’s ready. So they are good for the reader.
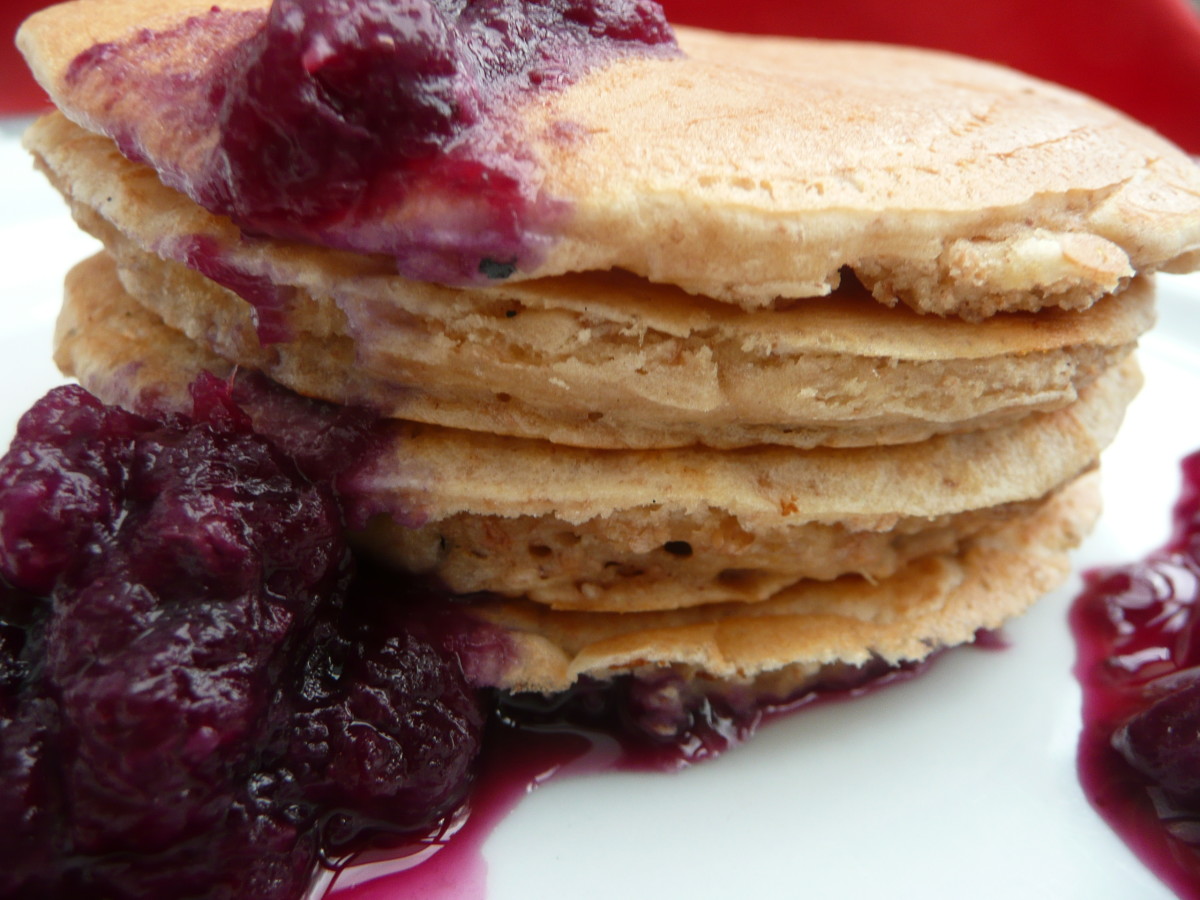
Close-ups are also good for you, the writer.Here’s what hubber Horatio Plot, wrote about a close-up on my Kids Cook Monday - Classic Scotch Pancakes recipe: “That first picture made me want a pancake so much.”
If readers want to eat the food you have showcased they are more likely to make it and may try more of your recipes.
The best way to get a good shot is to get close, especially with food such as bread or cakes. Air bubbles in bread or a cake let the reader see that it has risen well. And getting close makes the online food look much more real.
Heidi the Hedgehog Cake - the finished shot

In this photo the background was too obtrusive…

Don’t make everything too perfect
Let’s return to Heidi the Hedgehog cake. As I write this article it’s around 5 weeks since I published that recipe. A google search for hedgehog cake recipe or hedgehog chocolate cake, brings up the recipe on the first page, and it has been there since the second week. There are a lot of hedgehog cakes on the internet, so how did Heidi rise so high so quickly?
I suspect that when people look at Heidi, they think, “I could do that.” Certainly people have commented that it looks easy. I can’t say for sure, but I think this could be because the cake isn’t perfect (there’s a chocolate button slightly loose) and yet it looks cute. Some of the other hedgehog cake images available online look so precise that people probably look at them and think, “I couldn’t do that.”
But Do Clear Away Clutter
My photograph is also much closer than most other hedgehog cakes, the blue background offsets the warm brown chocolate and there is nothing else in the photo. The cake is sitting on a cake plate, but in the photo all that shows is a curve of white. This means the focus is on the cake.
Making Adjustments On Your Computer
Two considerations when making adjustments
After uploading photographs onto the computer I check through them with these thoughts in mind:
Would someone seeing this photograph benefit from it?
Is it clear enough?
Any adjustments made at this stage should be to improve clarity, not to deceive readers. I’ve read that food photographed for cookery books is varnished and otherwise tampered with. Whether this is true or not, it’s not something I’ve ever done or plan to do!
It’s not always necessary to crop this closely

For PC users
In Windows Live Photo Gallery Auto Adjust performs the same function as enhance.
On Picasa it is: I’m Feeling Lucky
Enhance and Crop
I use an Apple Mac, and edit photos in iphoto, but similar edits can be made in different programs, and I have included alternatives.
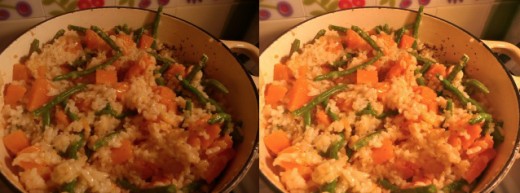
The edit I most often make is to click the Enhance button. This is because sometimes a photograph looks darker on the computer than it did on the camera screen. In the photos of risotto above you can see the difference made by enhancing. Very occasionally clicking enhance makes the photograph less clear. In this case just undo it.
After enhancing, the next most useful adjustment is to crop the photo to remove any background clutter.
Sometimes after these two edits I make more specific adjustments such as to make the color warmer, or to sharpen the focus.
After that all that’s left is to upload the photos to HubPages and fit your recipe around them.


