Tissue roll wall hanging

Making this wall hanging is pretty simple and costless too. It is a good time spending craft and gives opportunity to use your creativity. Lets see the things needed to make this craft.
Things needed
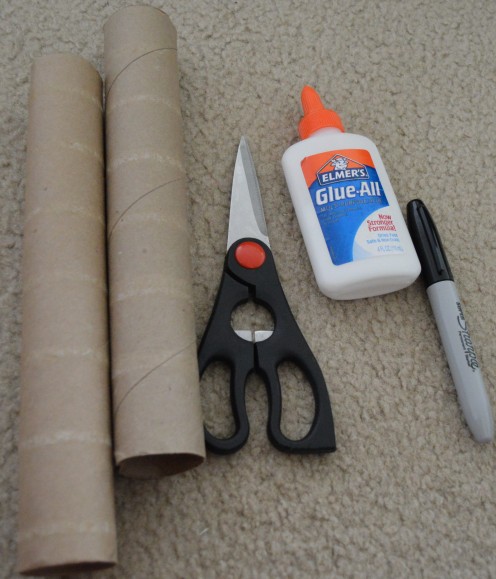
Things needed to create this craft piece are :
1. Couple of used tissue roll
2. Scissor
3. Glue
4. Pencil/Marker
5. Some glittering items for decoration
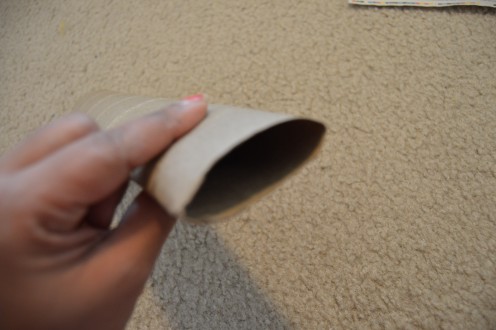
Take the tissue roll and press it flat, thus it gives a leaf shape rather than round shape. Also it comforts while cutting it into pieces.
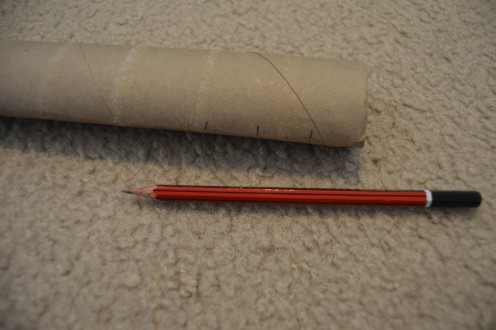
Then, mark the roll with equal distance to help cutting it into pieces of same size.
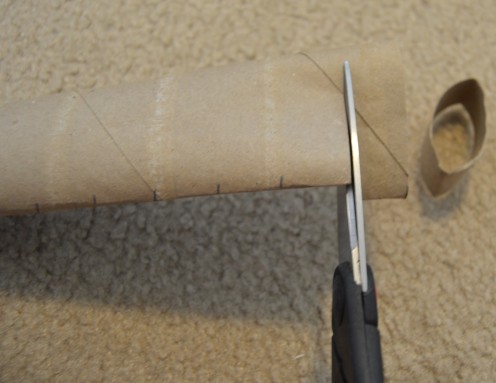
Start cutting them one by one carefully, make sure the pieces are neat and clean in the edges. Cut how much ever pieces you want.
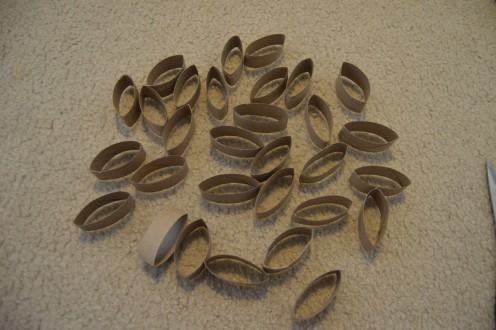
As you can see the tissue rolls are cut into pieces of same size and they look in leaf shape too. If required you can paint each pieces with some colors, to give a nice look.
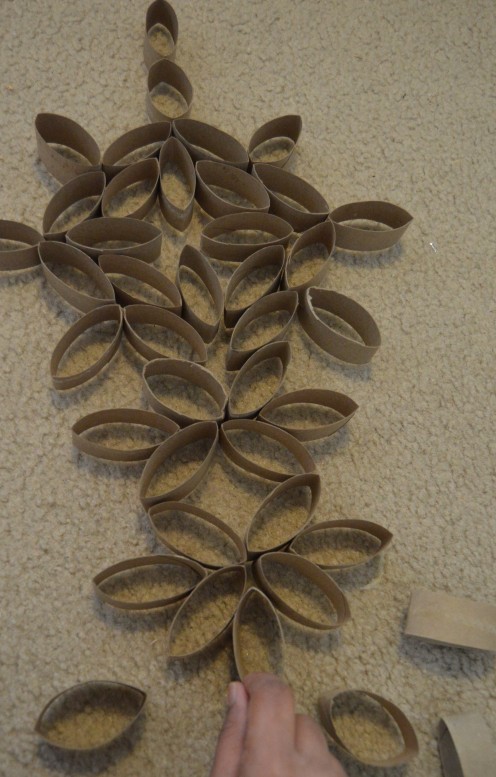
Arrange the pieces of your favorite design, later we can glue them to stick together.
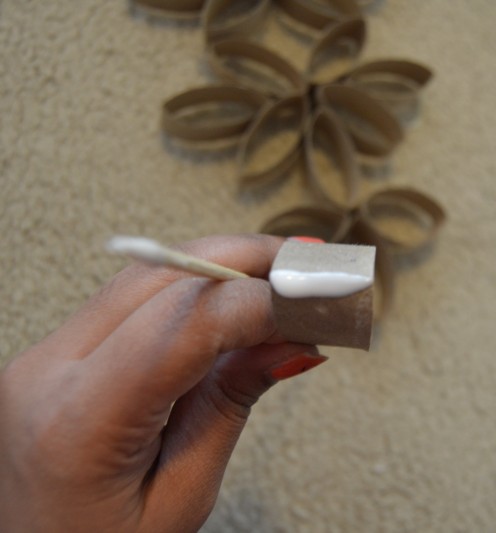
Start gluing each pieces firmly one by one. Make sure the base or floor is flat where the pieces are arranged to be glued , to give a good result.
Stick each pieces together of your desired design, and stick any glitters or beads of your favorite choice. Allow them to dry for 1 to 2 hours. Later it is ready to be hanged on the wall.
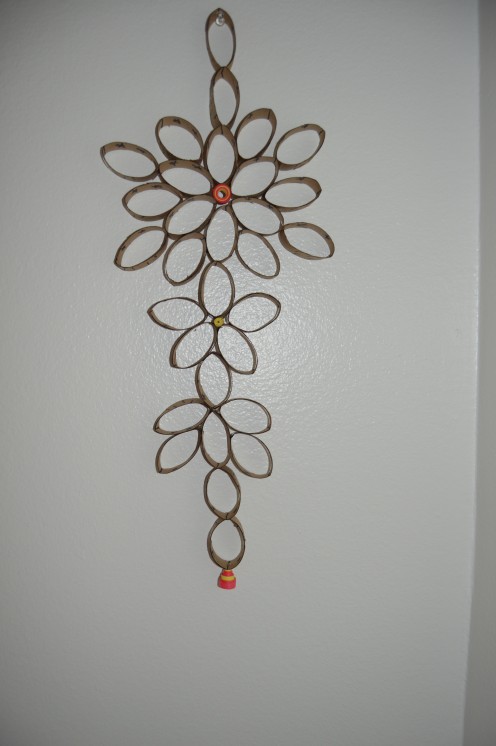
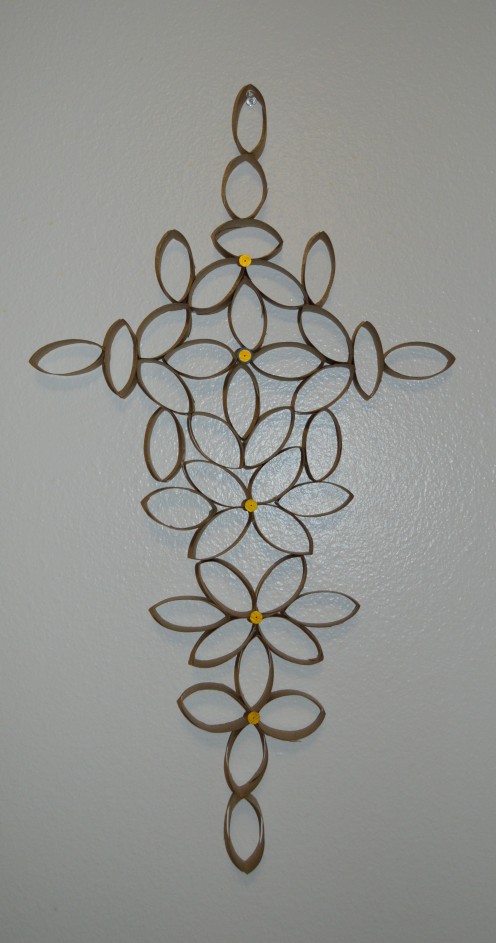
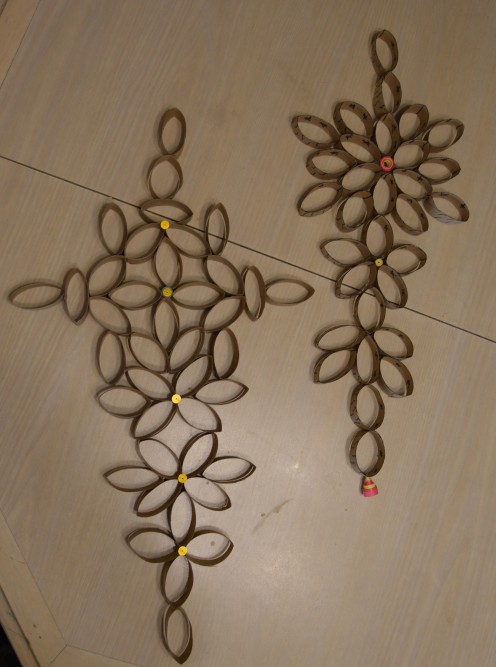
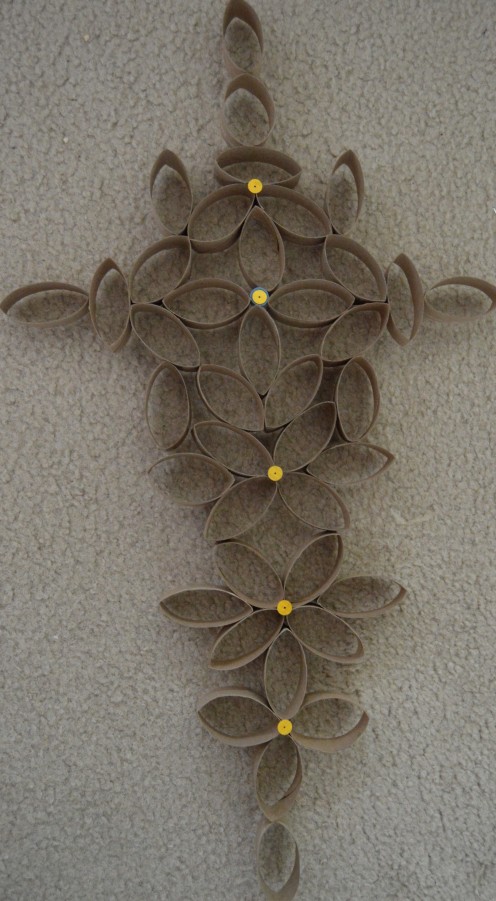
Now, you can see, these craft pieces are hanged on the wall and it looks so decorative.
Thanks , will meet you again in another craft from waste products !!! :-)


