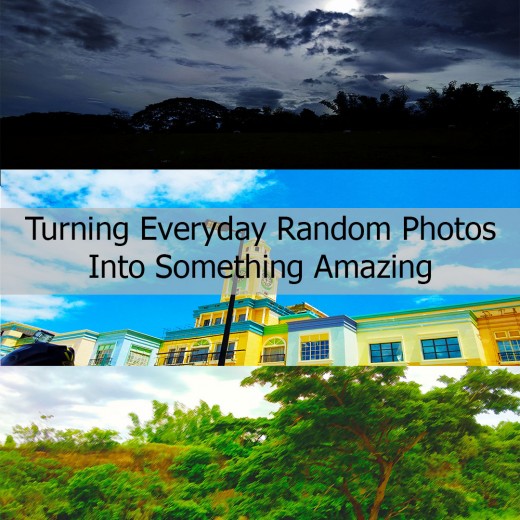
Turning Everyday Random Photos Into Something Amazing

Not all of us have access to expensive cameras or born with the talent in taking amazing photos. But that does not mean we can’t create amazing images right? Today I will show some simple editing tricks and tips in turning everyday random boring pictures you took on your phone into amazing photographs.
What you will need:
- A computer to create the magic. On my photos, I used Adobe Photoshop or you can use any editing software you have available.
- Everyday boring photos you have in your camera roll. A picture of your dog, your backyard, the sky, any photo you want.
- Hands. To use the computer. I mean if you can do it with your feet, why not?
- Patience. This is a trial and error method, the settings I’ve used for my photos does not necessary mean it’ll work on yours.
Note: I used my trusted Vivo V7+ mobile phone in capturing all these photos.
Example #1
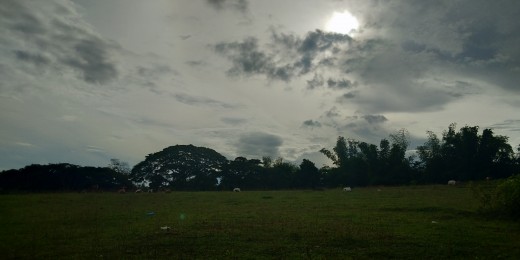
This is a photo I took months ago when I visited my aunt. This is where I got my houseplant (If you are curious about my houseplant, I suggest you check out my other article ). As you see it’s just a photo of a field with the sky, clouds and trees. Nothing special.
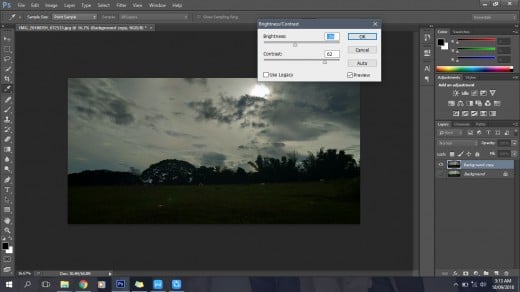
Before you begin, it’s nice if you can come up with a theme for the picture already. Here I want it to be dark and gloomy. I want it to be a bit creepy and unsettling and at the same time somehow calming. So first, I lowered the brightness and increased the contrast of the image.
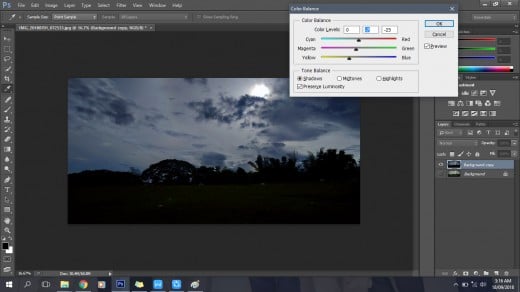
Then I gave a tint of cool colors to the image by adjusting the color balance. Here I decide to make the sky to be the main subject of the photo. I adjusted the shadows to have darker colors to really highlight the sky.
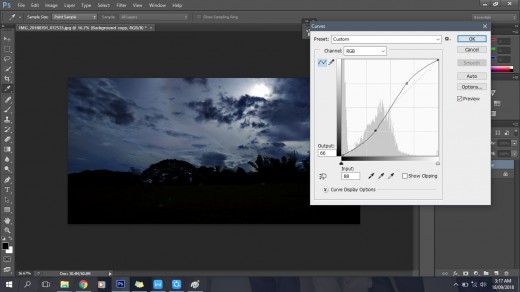
Here I wanted the ground and the trees to be darker, almost like a silhouette. I want to bring the attention to the clouds almost covering the sun.
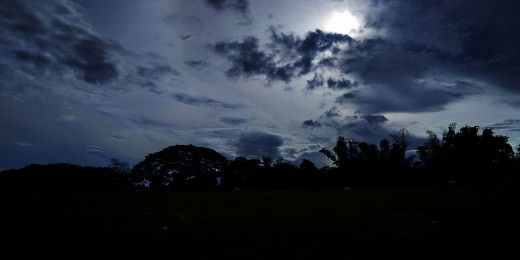
And here is the final product! The dark bluish color of the sky with the dark clouds gives the image a feel of peace and quiet but with the silhouette of the trees has the right amount of creepiness perfect for the overall theme that I want for this photo.
Example #2
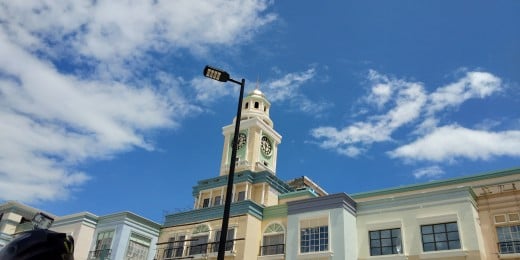
This photo was taken while I was waiting for a friend outside my previous workplace. I just thought that the colors of the building was cute and the sky is so blue. It was actually around noontime when I took this photo. I was actually supposed to take a candid shot of another friend with this background but since it was too bright and I was squinting my eyes, I didn’t notice she was out of the shot. I still kept the photo, I liked the colors and the angle and I’m sure I can just edit this to make it better.
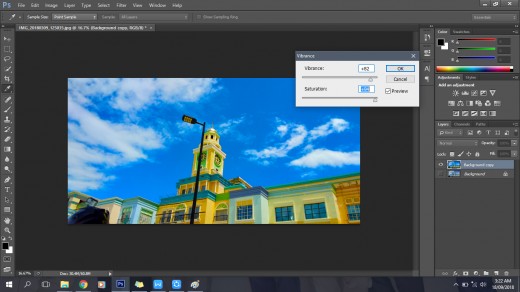
So for this one, I want it to be the exact opposite of the first photo. I want it to be bright and vibrant, full of colors, and just something that will make you feel good when you look at it. So first thing I did was to increase the vibrance and saturation of the image.I want the colors to stand out, especially the blue and yellow. Yellow is such a happy and positive color that I want it to be more prominent in this shot.
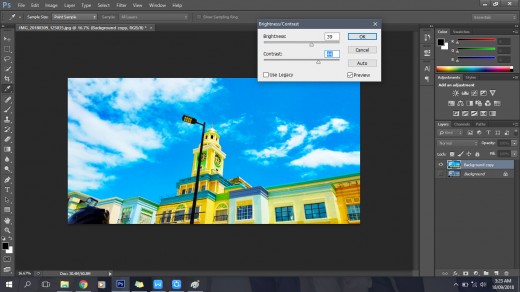
But I still wanted more. To intensify the colors, I have also have to make further adjustments and increase the brightness and contrast of the image.

The final photo! Quick and easy! This is definitely way better than the original one. It’s funny thinking about the fact that this was a failed shot but I was able to turn it to something awesome.

Now for the final photo, I’ve chosen a photo of a hill with a big tree. I did not actually like this photo because the colors are not to saturated, the clouds are looking a bit weird and the subject which was supposed to be the tree is blending too much with the background. The point is the overall composition of the photo is unsatisfactory for me. That means I need to do a lot of editing for this image to work. Or do I?
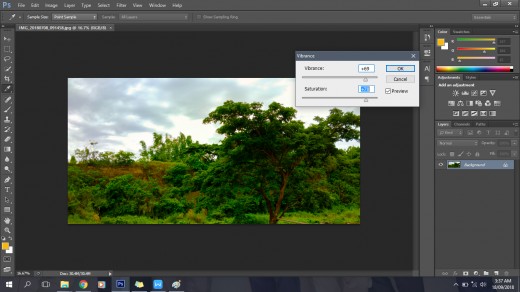
I want the greens to be more green! So I increased the vibrance and saturation of the image making it as green as possible.
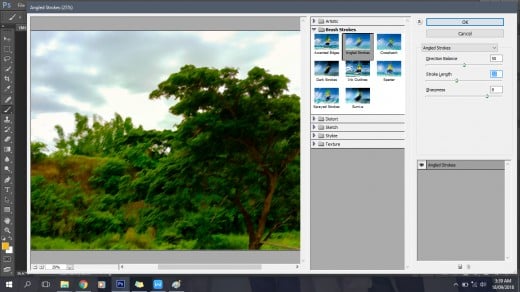
Now for the next part, I’m not sure if this option or setting is also available in other photo editing software but I added a preset filter called Angled Strokes under the Brush Strokes category. This will make the image look like a painting. I played with other filters first before I decided to go with this one. So feel free to choose whatever filter you want or what will you feel will bring the photo closer to your vision.
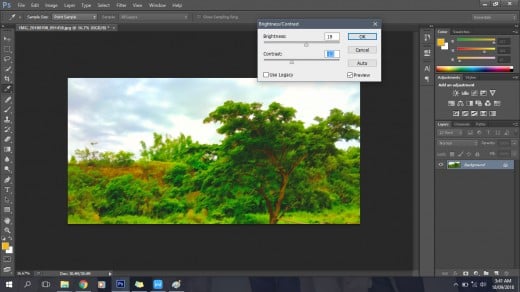
Same step like the other two photos, make some adjustments to the brightness and contrast of the photo depending on the result that you want. Adjusting this two can definitely make a huge difference in your photos.
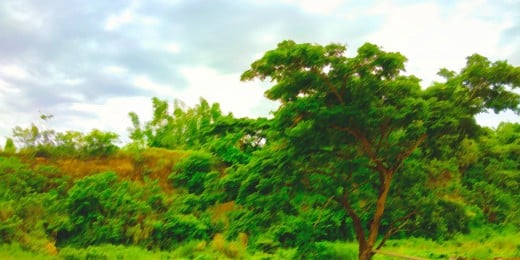
I’m quite happy with the result. I feel like I should have added an inspirational quote at the upper left of the photo. With this lighting and colors, I don’t mind if the tree is blending with the background anymore.
So that's it! Let me know if this article helped you in any way. I hope you learned something from this. Don't be afraid to play around with different setting while editing your photos!
Related

Which Is Best for Selling Photos, Adobe Stock or Shutterstock?

Hubpages Hacks - Simple Tips for Improving Your Articles

Turn an Image Black & White Except for One Area in Photoshop

How to Make Photos Black and White With a Splash of Color: A GIMP Photo Tutorial

Google Image Search Find Your Photos Fast


