Ways to Improve Your Amateur Photography

Camera Quality and Settings
Most amateurs do not have professional cameras because they are very expensive. If one can afford a professional quality camera (and they don’t mind using it for amateur purposes), then that’s the way to go. If you are stuck using more inexpensive cameras or cell-phone cameras, make sure you know how to adjust the settings. Many have fast-motion settings or night settings that can help cut down on the blur and brighten the image, even in dull lighting. You can set the camera for different conditions and effects, such as monochrome (black and white). For a mid-range price option, I recommend the Canon PowerShot series. You can certainly spend a bundle to get a professional grade PowerShot, but they also have other options. The photo below was taken with a $250-$300 model, the SX260 HS, when I needed sharp images of archive material, but could not use a flash. Tip: Search on Amazon for big discounts on cameras and equipment, just make sure you are getting it from a reputable seller.
Assize of Nuisance - 14th/15th Century London

Camera Chips and Storage
If you want high definition, then you need to make sure your camera chip is HD compatible and has enough storage for loads of HD photos and video (if you shoot video – you’ll want at least 32 GB or 64 GB). Check out something like SanDisk Ultra Plus and Extreme Plus. Depending on what you want, you can get full 1080p HD and even 4K quality. You can get these for your phone and digital camera. If you are planning to take your camera on a trip, have an extra chip ready in case you fill one up.
GorillaPod
GorillaPod
Tripods, GorillaPods, Straps, and Harnesses, Oh My!
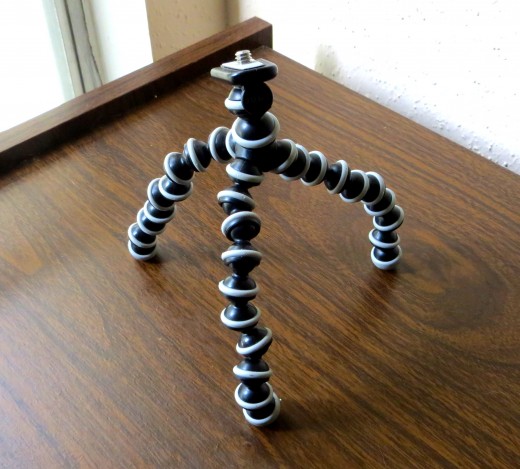
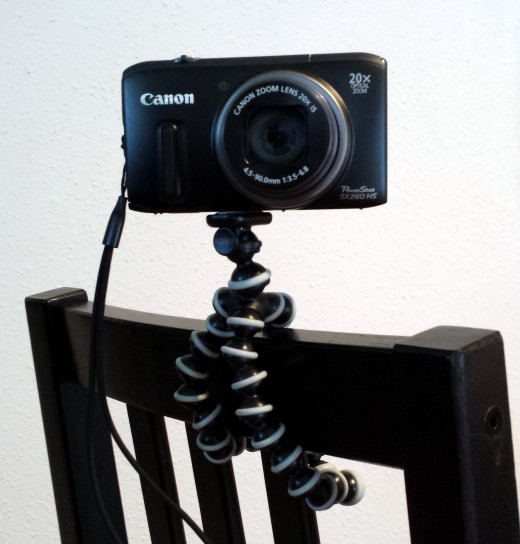
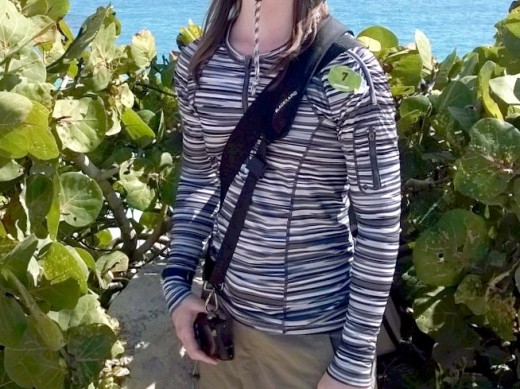
Any time you can remove your shaky hands from the camera with a still platform or tripod, it will improve the clarity. For those who don’t want to lug around a bulky tripod, there is GorillaPod by Joby to the rescue. This is a small, flexible tripod you can use as a traditional stand-alone camera mount or “grip” it onto many potential camera spots and positions. In the photo, it is mounted on the back of a chair. It simply screws into the bottom of your camera. Also, learn how to set the timer on your camera so you can snap a shot completely hands-free (and thus eliminate any motion associated with clicking the shutter button). In addition, invest in a good camera strap or harness to make it much easier to carry your camera around during trips for fast use. My preference is the camera harness, which you wear cross-body style so that it’s much easier on the neck. One is being worn in the photo below--the BlackRapid Metro Shoulder Strap.
Camera Harness/Shoulder Strap
Use a Photo Editor Such As Photoshop or Photo Impression
Photo editors can work wonders for photographs. They can easily make a dull photo look brighter and more vivid. You can easily add brightness, color, logos/watermarks, better contrast, and other camera effects, while also getting rid of red-eye, cropping, and rotating your photos. Even good photos can still be enhanced to become better, and many photo editors, such as Photo Impression, have automatic “photo enhance” features. If you don’t want to spend any money on a high level editor like Photoshop, see if you computer came with one for free. Also, many printers also come with free photo editors (my Epson came with Photo Impression). Just look at the comparison between the two photos below to see the difference it can make.
Before Photo Editing

After Photo Editing

Underwater Cameras
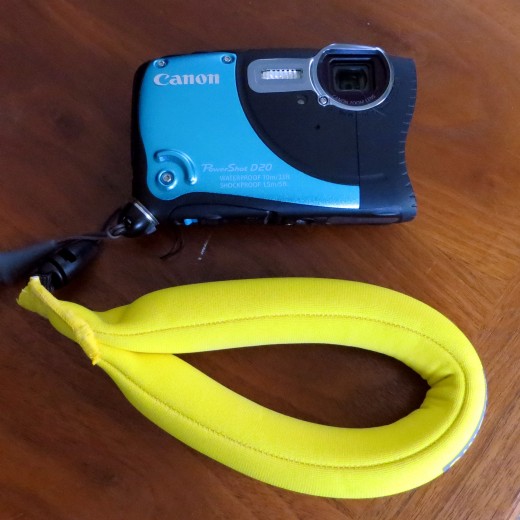
The photo above was taken with an underwater camera, an option that many amateur photographers don’t consider or don’t know about. If you enjoy water activities, such as snorkeling, consider getting an underwater camera. The one that took this photograph was a Canon PowerShot D20 Waterproof/Shockproof and is pictured below. The fat yellow strap is a Chums camera float; I recommend it so that if you lose your grip on the camera, it won’t sink to Davy Jones’ Locker.
Take a Photography Class
Of course, one way to improve your photography technique is to simply take a class. You might be able to take classes at your local university, or search for independent photography professionals offering classes in your area.
Create a Softbox
For those perfect stock photo images, you’ll need a softbox. These boxes give the illusion that your photo subject is floating in a white void. They are easy to create at home with a box, some good lights, and other basic and inexpensive supplies. The video below shows how it’s done for $10.
How to Create a Photography Softbox at Home
Frame Your Photos for Display
If you want to get more out of your amateur photography, why not frame some prints to enjoy? Use your own photo art as wall décor. If you do not like the “old-fashioned” wall and paper variety, then consider a digital frame that will display your photo masterpieces in high definition and as a slideshow where you can always add more storage to display even more photos on one device. Why hold one photo in a frame when you can hold and display a thousand!
