3 Ways to Make Your Own Jump Rings

If you're making your own jewellery, or doing chain maille,instead of buying jumprings, there are at least three ways to make your own jumprings.
Making jumprings isn't difficult to do, one of the ways to make your own jumprings is "the proper way" involving a saw and the other two are ways to make jumprings without using a saw.
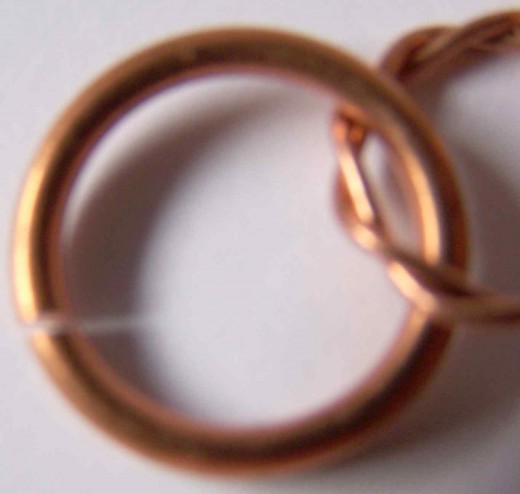
You can use your jumprings to attach pendants to chains, to make links to create your own bracelet or necklace from scratch, or even for chain maille.
Make Your Own Jumprings 1: With a Jewellers Saw
The usual, and "proper" way to make your own jumprings is to cut them with a jewellers saw. This is great if you have a workbench, a saw and saw blades to hand, but if you are a beader, making earrings and adorable pendants, then you might not have, or want, to go to this expense and learn the skill.
Make Your Own Jumprings 2: Using Flush Cutters
While not the best way to make your own jumprings if you need a lot, if you simply need to make jumprings on demand then this is a valid way to achieve that.
Make Your Own Jumprings 3: Using a Jumpring Maker
Of course, if you really need or want to make a lot of jumprings, to create unique links for necklaces or handcrafted bracelets, you'll find that the other two methods are too slow and hit or miss to work for you. The only way to go is to bite the bullet and buy a jumpring maker. While these are quite an investment, they do put you well ahead of the pack, enabling you to make piles of jumprings, easily and perfectly - in a huge range of sizes... in fact, buying a jumpring maker can pay for itself as you can produce packs of jumprings to sell to other jewellery makers for profit. There can be good profit made from producing simple components for sale to jewellery makers.
Below I've shown you these processes in detail
Make Your Own Jump Rings 1: With a Jewellers Saw
The best way to make a lot of jump rings in one go is to use the proper method - using a mandrel and a jewellers saw.
The diameter of the jump rings depends on the mandrel you use (a rod of steel); the strength/thickness of the jump rings you make depends on the wire you use. It is a good idea to keep a workbook and make a jump ring to stick into your book, making a note of the gauge wire you used and which mandrel - building up your workbook gives you the ability to make something a second time at a later date as you won't have forgotten the tiny, but important, details.
Typically, if you want to make the kind of jump rings you'd be buying online you would use wire that is 20 gauge or thicker. The thicker the wire, the smaller the wire gauge number, so 16 gauge is thicker than 20 gauge.
Steps to Make Your Own Jump Rings With a Jewelers Saw
To make your own jump rings with a jewelers saw is straight forward, once you've got the equipment, so here it is:
- Select your wire and the mandrel you will be using. There is a limit to the length of wire you can use, simply because it becomes tricky to handle. More thn 2'/60cm long and you'll struggle to keep control of the wire at the start.
- Gently fold the middle of the wire round the middle of your mandrel.
- Taking one end of the wire, continue to wrap your wire neatly and evenly along the mandrel until it's all wrapped; now do the same with the other end. You will now have one continuous coil of wire.
- Take some masking tape and wrap it round your coil. The purpose of the masking tape is to hold the coil together and manageable while you saw it into jump rings. Keep the masking tape entirely on the outside of the coil and make sure it has a good/strong grip on your wire, so it doesn't move about while you are sawing. Make sure the masking tape isn't on the inside of the coil or this will prevent you from easily removing the individual rings as you cut through them.
You now have a coil of wire ready to cut into jump rings.
Cutting Your Wire Into Jump Rings
You'll need a jewellers saw, with Size 2/0 blades. You will need some way to hold your coil while you're sawing it - if you have a bench peg then chop a bit off so there's a "point" and you can use that point to position and hold your coil. Another way is to press the coil from underneath the bench peg, It can be tricky to find your perfect position, but once you have it the way that's comfortable then you'll find you get better/cleaner cut jump rings faster.
Starting at one end, with the saw at an angle, start to saw down the coil and continue until you reach the end. By sawing at an angle you are only cutting one ring at a time.
Remove the rings as you cut through each 2-3.
While this sounds easy, it does take some practice and a "knack" - working with shorter coils is often a good idea - and expect your first 2-3 attempts to be scratched as you struggle to find your mojo with holding the coil and clean sawing.
Make Your Own Jump Rings 2: With Flush Cutters
If you don't wish to make jump rings often, then you don't need a jewelers saw - it is possible to make your own jump rings using flush cutters.
What you do need to consider, when making jump rings in this way, is that flush cutters do not produce a clean cut. When you cut wire with flush cutters one side is flat (flush) and the other is "pinched" almost into a point. Sometimes this won't matter, it depends how you are going to use your jump rings. However, you'll be pleased to know that if it does matter then there are ways round it!
If you make a jump ring with flush cutters, then you can make both ends of your jump ring flat and straight either by cutting the pinched end a second time with the flush cutters turned round the other way, or you can use a thin needle file, or even some rough sanding paper, to just knock that end off the wire.
The start of this way to make your own jump rings is identical to using a jewelers saw as the only difference is in the way you actually cut your wire.
- Select your wire and the mandrel you will be using. There is a limit to the length of wire you can use, simply because it becomes tricky to handle. More thn 2'/60cm long and you'll struggle to keep control of the wire at the start.
- Gently fold the middle of the wire round the middle of your mandrel.
- Taking one end of the wire, continue to wrap your wire neatly and evenly along the mandrel until it's all wrapped; now do the same with the other end. You will now have one continuous coil of wire.
- Take some masking tape and wrap it round your coil. The purpose of the masking tape is to hold the coil together and manageable while you saw it into jump rings. It is a good idea, when using wire cutters, to leave an exposed strip of wire coil so that you can see where you are cutting.
- Take a sharpie and draw a line along your exposed strip of coil, so you know where you're going to cut.
You now have a coil of wire ready to cut into jump rings.
Now, for each coil in turn, simply snip with your flush cutters. It is important that you follow a straight line down the coil or your jump rings will be odd sizes, that's why you should draw a line before you start - or, you could follow the edge of your masking tape if it's straight.
If you want to get rid of the "pinched" end, then simply snip each pointed end with the wire cutters turned the other way round, creating two flat ends to each jump ring from your coil.
There are wire cutters which will give you a good clean edge first time round, but they are quite a bit more expensive than regular wire cutters, so probably not worth your investment at this point in your career.
Pepe Jumpring Maker
- Pepe Jumpring Maker Review Video
Watch this video to see just how a jumpring maker works.

Make Your Own Jump Rings 3: Using a Jump Ring Maker
There comes a point when you realise that you simply have to buy a Jump Ring Maker. Typically a jump ring maker will consist of
- A selection of mandrels of various sizes
- A manual wire coiler, enabling you to quickly coil your wire
- An adjustable coil holder, which holds your coil during the cutting process
- A power drill cutting bit.
To use a jump ring maker you select your mandrel, use the manual coiler to produce your coil, then drop the coil into the coil holder - then simply attach the drill bit and a fixed guide lets you move the drill bit along a slot on the coil holder, cutting each jump ring perfectly - and all in a matter of 1-2 minutes from start to finish, rather than 30-45 minutes if you're sawing by hand.
One of the best jump ring makers in the market is the Pepe Jump Ring Maker - used by thousands of jewelry makers worldwide.
Tips When Making Your Own Jump Rings
Here are some tips for when you're making your own jump rings:
- Square wire and square jump rings. Jump rings don't have to be round - experiment with mandrels of different shapes and using square wire. A square jump ring, made from square wire, could make a spectacular bracelet!
- Make more than you need - label your extras (gauge wire and diameter) for future projects.
- Take your time and cut in a straight line so your jump rings are the same size.
- Keep any offcuts of wire from your other projects as they can be turned into jump rings when you need one.
- Take some lengths of wire and a mandrel with you on your daily commute, or for your lunchtime - and you can at least have ready-prepared coils to hand.
- Try using different wire gauges and mandrel diameters to get different sized jump rings. Also, try making jump rings with twisted wires.
- Try hammering and texturing your jump rings to give them a more unique look.
- Experiment and enjoy!
- You can even make jump rings for other artisans, by selling them on sites like Etsy.


