Sewing Pullover Draping Neckline Blouses

What we are doing productively!
I am going to try to write an article a day.... maybe two. This is my make a thing article.
I am seaming(ha spelling) really seeming to have a long list of maintenance items that need to be done on a daily basis. I will also be doing an article today on my plumbing adventure and maybe my landscaping adventure. I won't get anything done if I just write all these articles, so I am going to write this one about what I am going to sew.... sew one blouse. I need to run up the street... literally run to the Mad City Coffee and get a cup of coffee (motivation for running). I am soooo out of shape so I have to have a routine set up or I will have to sew a whole new wardrobe.... nope... not happening. I love my clothes... I have 15 suits in the closet of different colors all out of poly poplin. So easy to take care of throw in the washer and dryer and colorful. Then I have this pattern that we are going to talk about today.
This is an old Butterick 3131 which it shows a draping neckline in the picture.. Well, you know how that is.... No I am not one of those cartoon drawn chicks. I am rather curvy... so when I first made this there was no drape. The pattern itself only has a front and back and sleeve with a small back neck facing. Quick easy... so I worked with it.... so I sliced the front pattern piece up the sides and added an inserted piece of paper to make the front drape more.. I also changed the sides of the shirt front and back to give me space where I wanted it and making it curvier to fit my body. You can use the pattern with cotton if you don't make it too tight on you. I have made it fitted so that I need to use stretchy to give it the look I like and also make it comfy for me. If you use a cotton, crepe or silky fabric with a pattern like this you must cut on the diagonal to have the draping neckline drape properly. Otherwise it will poke out and look strange. When things are cut on the diagonal it is usual to give it a soft draping look. That means the arrow will not go parallel to your selvage or bound edge of your bought fabric, and not perpendicular but at a straight diagonal line like the side of a triangle. This is very important for this type of shirt.
The supplies you will need.


Your Supplies and Outcome
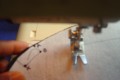
Thread... I keep black and white and some different colors. I will use black on this one today.
My Gingher Dressmaker Scissors- sharp
My pattern altered to fit the way I like
The 5 pieces all cut out and 1 piece of woven iron on interfacing for the back neckline
In this case there is an accessory scarf to make from a leftover strip down the side.
Odd pieces will be used to make a matching broach and bracelets in future articles about accessories to match
My sewing machine threaded with the appropriate thread
One Hour of time to sew (1 hour to pin and cut already done)
I cut out 5 shirts at a time.... YES I said 5. This is one that is already cut out and waiting for sewing. I will sew it before I go run. It takes me 1 hour to make 1 blouse. I cut 5 out at a time so I am ready when I have an hour and it saves me time in cutting if I do them all at once. I have a really nice pair of Gingher Dressmaking Shears I bought at G with a Living Social Coupon and when there was a 25% off sale... yes, I said it.... None the less even at full price these shears are worth it... I can cut through 5 layers at a time because they are gooooooood fabric shears. Don't let them stray to the crafts... That is my biggest downfall... I lose focus and demand immediate gratification. This causes me to grab the nearest scissors that do whatever job I need. Yes, I am a crafter, beader gluer.... and I love to make pins that match the suits for accessories... One day I will make matching bracelets and write an article about that also.
I am going to go sew it together and then run..... when I come back I will add pictures to the article.
What Really Happened Next!
I picked up the pattern pieces, turned on the iron to heat up.... I have a nice steam iron with an automatic shut off. When sewing Jersey or lycra please be sure to use the synthetic heat temp on the iron.
I threaded the sewing machine in black thread, both the top spool and wound a bobbin with black.
I changed the needle on the sewing machine to a size 12 Jersey Point machine needle.
I immediately made the scarf part by overlocking tthe edge and leaving an opening in the center for turning. If you are in a hurry to go somewhere you can always turn it and just put it on as no one will be able to tell that little opening is not slipstitched yet. That is the only part that is hand stitched. But if I do the scarf first it gives me a feeling of finishing something and motivates me to finish the top.
I took the two sleeves and stitched one row of basting stitches around the top sleeves along the stitching allowance. I then stitched the sleeves seams with an overlock stitch on the edge. Next I did the sleeve hem at the wrist. I have the pattern piece at the proper length for me to turn it up twice at about 3/8 and then top stitch... Sleeves were done...
I pressed the woven iron on interfacing onto the back neck facing and then turned under the curved outer edge 1/4 inch and top stitched. I turned under the front blouse piece front self facing 1/4 inch and topstitched... Now that took about 20 minutes... so I decided I better run to the coffeeshop while it was still early and I would have time to get home to cook dinner and make appointments with the plumber and the landscape person... so about half of the shirt was done. All I have to do is sew the facing to the back, sew the front to the back at the shoulders and the sides up. Turn under the hem at the bottom of the shirt the same as the sleeves 3/8 twice and topstitch.... Then I will inset the sleeves and I will have a new shirt... The color in the piecing picture does not show well ... It is a beautiful shiny turquoise green almost Teal and black animal print... it will be very pretty.
I got a triple shot cappacino and ran more than usual and got farther away from home... so I was gone about an hour and then low and behold the man passed me in the car as he was home early...... I ran the rest of the way home and fixed his lunch... So now it is about 3:50 and I should be finished with the top by 4:15. I always have a coffee of some kind for motivation and when I get home I have a protein shake with some fruit in it and about a tray of ice to sooth my knees. When I finish the shirt I will take a hot bath and make sure my muscles are ready to work again tomorrow. I did exercise before I did the shirt article... That was 3 60 sets of arm and leg exercises. After the shirt and before the bath I will do 30 situps. Maybe 30 standing toe touches.
I am telling you these things so we all can be motivated to be healthy while we are writing our articles, or making things.... Now I will sew and take a picture of the finished project.
Finishing the shirt
When you sew the back neck facing to the back of the shirt you then trim t about 1/8 or a llittle more but not quite 1/4 inch of seam. Hold that seam towards the facing piece and top stitch it down against the facing. This will make your facing lie flat in your shirt against your back neck.
Next you sew the back to the front matching the shoulder seams and facings. Then I did the side seams. All of these seams I did an overlock and only had to trim the shoulder seams. I topstitched the bottom. I ran out of thread so I have to wind my bobbin and then I will be able to stitch the seams into the sleeve holes.
After I have trimmed the shoulder seams that are overlocked I fold them in and match the shoulder seam to the facing seam and stitch in the ditch ( stitch into the seam). This locks the facing down and I don't have to do any hand sewing at those points where some people do hand tacking here and there.

Draping Blouse is now done with scarf