Taking Successful Photos of your Artwork for your Website Gallery

Artists Need Beautiful Photographs for their Websites
If you're an artist you need to present your artwork to it's best effect on your website. You can hire a professional photographer to photograph your work and you'll get beautiful results but it's expensive. Taking your own photographs that look great takes some time and work but it can be done.
This is photographing for web presentation, I don't have experience photographing for presentation in a traditional portfolio so if that's what you want I can't guarantee these methods will give you all the results you want.
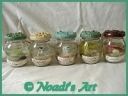
To see more photos of my artwork check out my website Noadi's Art.
Links on Photographing Artwork
- How to Photograph Your Art
Tips on photographing art - Photographing Works of Art, Tips & Techniques by Hawkinson Photography
As a service to the art community, we have produced this beginner's guide to photographing art. - How To Photograph Artwork - Artists Resources Wiki
How To Photograph Artwork From Artists Resources Wiki. On this page are described 2 approaches to photographing artwork successfully. - How to Photograph your Artwork for a Portfolio or the Internet
Every artist needs to keep visual records of their work. In this tutorial I'll explain exactly how to take great photos of your artwork, and cover a few basic steps in Photoshop that will get your images ready either for print or for uploading onto t - The Handmade Business Blog: Photographing Your Work Part I
Basic Equipment - The Handmade Business Blog: Photographing Your Work Part II
Backdrops and props.
Photo Ideas for Selling Online
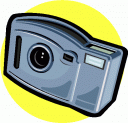
Step One: Equipment
I recommend a good quality digital camera, which in the last few years have become very affordable. You could use a traditional film camera just as well but you get faster results with digital and can see immediately if you need to tweak your setup.
If your work is small you should make sure your camera has a macro setting (usually indicated by a flower symbol).
Second to a camera the most important tool you need is a tripod. No matter how steady your hand is it still will shake a little bit so to get a good crisp photo you need a tripod or at the minimum something to set the camera on to steady it like a cardboard box or table. I can't overstate how important it is to be able to stabilize your camera.
Equipment Links
- $1 Image Stabilizer For Any Camera - Lose The Tripod - Video
Don't be a slave to your tripod. Build this stabilizer and see how much better you photos and video can be. Get professional results. This instructional video shows you how to build your own stabilizer in 5 minutes for less than $1. It is super light - Make your own Gorilla Pod - Instructables - DIY, How To, photography
The title says it all. If your unfamiliar with gorilla pods, they are tripods made with bendable coolant hose also known as segmented hose. They cost $22 to $55 to buy, but you can make your own for only a few dollars worth of parts. Lets get started - DIY - Pocket Camera Tripod | DIYPhotography.net
The following article will demonstrate how to build a useful tripod that's easy to make and fits in your pocket. It uses stiff wire wrapped in electrical tape as legs, and taped to a bolt.

Step Two: Lighting
Natural Light: The most beautiful lighting you will ever find is going to be from the sun, however the weather doesn't always cooperate. Try to avoid early morning, and evening sunlight as it's a bit reddish, and while it's very pretty it warps the colors of your work and you really want to try to capture it's true colors. Strong direct sunlight will also wash out the colors. Best is more diffuse light such as through a southern exposure window or on a slightly overcast day.
Creating your own lighting: Since Mother Nature doesn't always cooperate (and living in New England like I do that's frequent) you are going to have to create your own lighting sometimes. The best way to do this is to use a light tent. You can buy one or use one of the following links to find plans to build your own (don't worry it's easy).
Build your own Light Tent Plans
- White Trash Light Tent
Practically free temporary light tent plans. - Super Simple Light Tent - Instructables
More elaborate permanent light tent but still very simple and easy to construct. - lactose: Hobo DIY Softbox for Perfect Portraits
lactose: Hobo DIY Softbox for Perfect Portraits - Light Box / Light Tent Photo Gallery by Bill Huber at pbase.com
Light Box / Light Tent Photo Gallery by Bill Huber at pbase.com - Photographing small objects.
Some notes on taking pictures of hard-to-light, small objects such as jewelry.
Step Three: The Backdrop
There's really just one basic rule of creating a good backdrop for your artwork: it shouldn't distract the eye from your work.
The simplest backdrop you can use is often the best, a piece of matboard or fabric. Keep it simple, it should be a solid color that doesn't distract the eye. Neutrals are great, black, white, beige, are never going to detract from artwork. If you must have more color don't go really bright, you want your art to pop not the background so keep the background less vibrant in color than the artwork. Bedsheets work well so long as they are ironed well. My personal favorite is to use either bleached (white) or unbleached (creamy tan with darker flecks) muslin fabric which is typically only a couple dollars a yard and since it's a staple of sewing can be found at any fabric store. Another great alternative however a bit pricey is to use black velvet, it is just about the blackest fabric you can get and absorbs light well so you don't get the areas of light and dark in the background that you get with other fabrics.
Step Four: Taking your Photos
This is the simplest part. Set up the tripod in front of your work, position it and your artwork to the angle you like best. For a digital camera you should be taking photos at a high resolution even though you will be scaling them down for use on a website. Most digital cameras do a good job of automatically adjusting for the lighting but if you are using a film camera you may need to make camera adjustments for the lighting. If you are shooting from less than 3 feet away turn the macro setting on and take your picture.
Photo Studio Walk Through
Free Photo Editing Software
- IrfanView - Official Homepage - one of the most popular viewers ...
Simple program for batch conversions, cropping, and resizing images. - GIMP - The GNU Image Manipulation Program
Powerful opensource image editing program. - Picasa
Find, organize and share your photos. Picasa is a free software download from Google that helps you: Locate and organize all the photos on your computer. Edit and add effects to your photos.
Photo Editing Tutorials
- How to edit product photos for a white background
After taking photos of your product, you'll need to edit your photos. Here's how to edit product photos for a white background in ONE minute. - Tutorial: How to Photoshop e-commerce product photos in 3 simple steps (Isolating on white backgroun
Virgo Web Design is a Chicago Web Design agency offering creative, cutting edge web sites. We aim to provide customers with the ability to scale their business and accomplish vast growth. - GIMP - Tutorials
- Make your Photos Sparkle with GIMP
- Using Photoshop’s Healing Brush, Smart Blur, Despeckle Filter, and Color Replacer
In this tutorial I'm going to show you the Photoshop tools that I use when fixing problems in my digital images. You may have used some of these tools before (like the Healing Brush) but it's more than likely that a few will be completely new to you.


