Beginner's guide: Basting a Patchwork Quilt

The (really) easy Jan T way
Good, well-made patchwork quilts have been successfully basted to make the quilting step easier.
I have invented a fast-piecing system, and love 'big bits and fast', but there are some things that you MUST NOT take shortcuts with, or disaster will befall your quilt.
Basting your quilt properly is one such thing, and makes for hassle-free quilting.
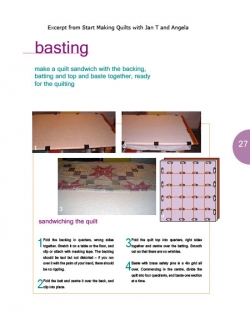
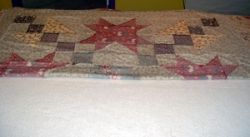
The picture is the page from my latest book, Start Making Quilts with Jan T and Angela.
Basting a quilt
ready for (machine or hand) quilting
A quilt is defined as having three layers held together with stitching.
To prevent the layers from shifting as you work,
imperative when machine quilting
you need to layer the quilt correctly—ready for basting.
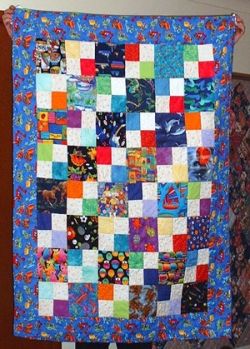
That's Bob hiding behind Tyler's quilt!
This quilt photo is just for you to enjoy
The quilt sandwich
To prepare for quilting, you need to sandwich (layer) the quilt.
- A sandwich is two pieces of bread with a filling in between.
- A quilt sandwich is two pieces of fabric — pieced or not — with a filling in between.
To make a quilt sandwich, you need:
- batting, backing, the quilt top, plus
- a large enough surface which will not be damaged by the safety pins. A table, a laminated bench or a ceramic tiled floor make ideal basting surfaces.
Batting
(sometimes called padding or wadding)
Batting can be 100% cotton, wool or polyester or a mix of these, and is manufactured in varying thicknesses.
If you buy a batt which is too thick, you will find quilting it very frustrating.
I suggest that you start with a thin batt, designed for machine quilting, for your first few projects.
Various brands of batting have been especially manufactured with a scrim on one surface to make machine quilting easier. This is a fine, almost invisible non-woven fabric welded to the batt, and should be layered to have the scrim against the quilt top.
These batts are also suitable for hand quilting, but you can buy batts without the scrim for hand quilting.
Cotton batts shrink when washed, so I like to wash mine (in the washing machine, on the gentle cycle, with soft soap) before I use them.
Allow for this when you buy your batting and purchase enough.

Read the instructions that come with the batt you purchase, to see if washing is recommended.
Dry the batt either flat or in the dryer on very gentle.
What size?
Measure the quilt and cut the batt a little larger than this on each side — at least two inches.
A quilt made for a friend - who has breast cancer

Backing
What size?
The backing or lining should be at least two inches larger all around than the pieced top of your quilt — approximately the same size as your batting.
You can use almost any fabric — including sheeting, if you are machine quilting. Not if you are hand quilting, because sheets have a high thread count which makes hand quilting tedious.
Special wider fabrics that are produced for backs are available at quilt shops.
For your first few quilts, use a (busy) floral or patterned fabric to disguise any not so perfect stitches. Prevents frustration!
Directions for making the quilt sandwich, with the backing, batting and the top
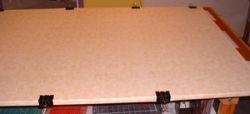
1 Fold the backing in quarters, wrong sides together. Centre it on a table or the floor, stretch to smooth, and clip to the table or attach to the floor with masking tape. The backing should be taut but not distorted. If you run over it with the palm of your hand, there should be no rippling.
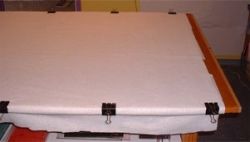
2 Fold the batt and centre it over the back, and clip into place.
3 Fold the quilt top into quarters, right sides together and centre over the batting. Smooth out so that there are no wrinkles.
4 Baste with brass or rustless safety pins in a 4" grid all over. Commencing in the centre, divide the quilt into four quadrants. To do this, put a pin in the exact centre, and work out to the centres of each side in turn. Baste one quarter section at a time
Pin closers - plain and fancy
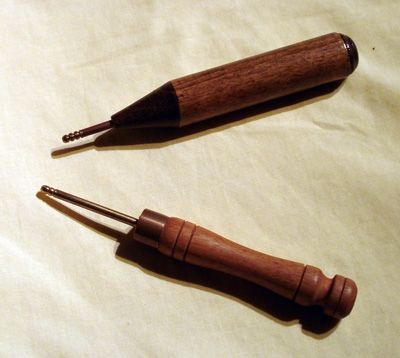
Years ago, a friend at a quilt retreat gave me a Kwik Klip™ safety pin fastener (top) because she thought it would help me when basting, as I have part of my left hand missing from an accident.
I can baste a single bed quilt in half an hour and no sore fingers using a tool like this.
Another good friend asked her dad to make me a fancy one (bottom), using his woodworking skills. It's really beautiful, and fits into my hand so nicely.
One of these pin closers will help you when you are basting.
The creator's website - A great tool
I can't baste without mine.
- Paula Jean Creations
The finest quilting tool for safety pin basting quilt layers. Kwik Klip ends sore fingers, reduces basting time, and ends bunching. Using Kwik Klip, safety pins close effortlessly, preventing broken nails, stuck fingers (blood on quilts)


