Beginning patchwork: perfect quarter inch seams

No fuss quarter-inch seams and perfect pressing
Because patchwork made by machine is usually based on what is known as a 'template-free' method, perfect ¼ seams are imperative for accurate piecing. It is essential to press your work as flat as possible between seams.
This is a lesson on how to achieve a perfect ¼ inch seam with no fuss.
In addition, you will learn how to press the Jan T way — for success!
Lesson 1: Perfect seams
for perfect patchwork
You are going to make a three strip patch with a light centre strip, and then you'll test for the accuracy of your seam.
You'll learn how to make adjustments to achieve a perfect ¼ inch seam for your patchwork.
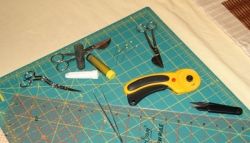
What you need: Equipment
for sewing your test piece
Sewing machine
Iron and ironing pad or board
Rotary cutter
Rotary cutting board
Quilter's rotary ruler
Those are some of my old friends, my quilting tools.

What you need: Fabric
for the practice piece
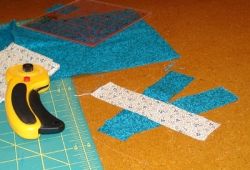
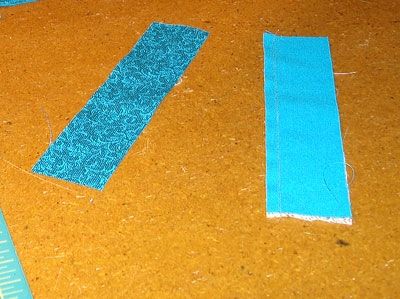
Cut strips of fabric:
1½ inches x 5 inches
2 strips of dark coloured fabric
1 strip of light coloured fabric
Sewing your seam practice piece
With the ¼ inch foot on your sewing machine, follow the steps below:
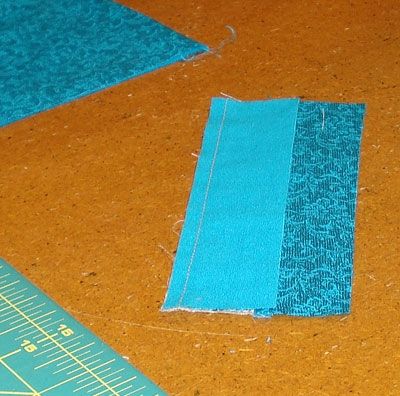
- Place one dark strip (right side down), onto the light strip (right side up), matching the long edge.
- Sew down the long side keeping the edge next to the guide on the machine foot.
- Press the seam towards the dark strip.
- Take the second dark strip and place it right side down on the light strip, on the opposite edge to the other dark strip.
- Sew the next seam at ¼ inch as before.
- Press towards the new dark strip.
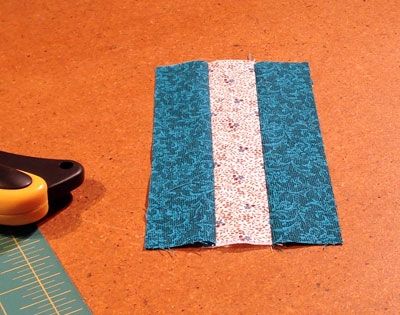
1: Place a dark strip on a light strip - Right sides together, sew with a quarter inch seam
2: Press to the dark strip - Follow the instructions in Lesson 2: Pressing (below)
3: Attach the other dark strip - On the opposite side
Press to the dark as before
4: Press to the dark as before - Test piece ready for measuring
5: Place your quilter's ruler on top - so that the light centre strip can be measured
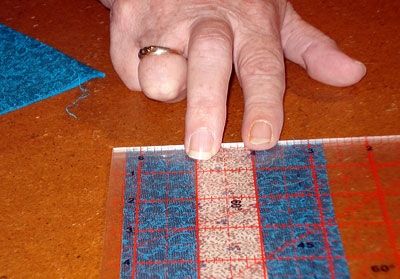

6: If your centre strip is EXACTLY 1" wide
You did it!
Perfect seams.
Congratulations!
Troubleshooting
How wide is the centre strip?
Is the strip less than 1 inch wide?
The seams are not EXACTLY ¼ inch.
Turn the work over, and measure the seam allowance.
Cut some more strips and try again. This time, make sure you are keeping the edges right up beside the flange on the foot of the machine, or that the edges are exactly at the side of your patchwork foot.
Is the strip more than 1 inch wide?
You will need to keep the edges just shy of the edge of the foot.
Once you are familiar with how your machine performs, then you will be able to get perfect seams every time.
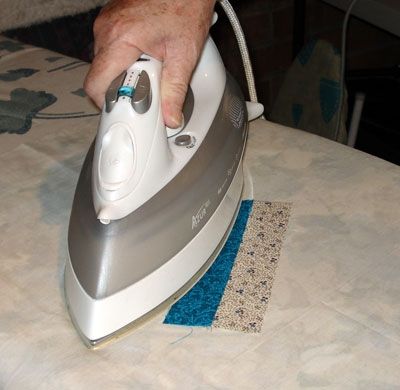
Lesson 2: How to press patchwork
the Jan T way
The secret to successful machine piecing is to press your work from the right side. This way you get no little rolls on the seams.
Follow the steps below to get perfectly flat piecing.
IMPORTANT!
Do NOT pull the 'lid' or you will roll the seam allowances, causing problems when you are joining blocks together later in the quilting process.
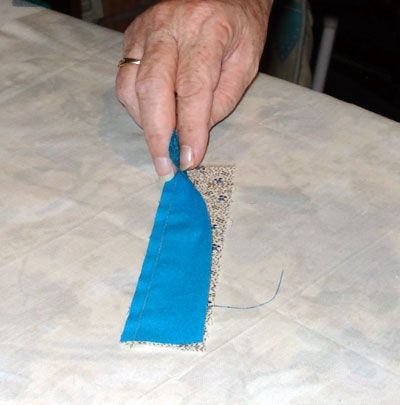
1: Place the sewn patches - on the ironing surface with the darker patch on top.
2. Lift the 'lid' slightly - just enough to get the iron under
3: Glide the iron sideways - out towards the darker patch
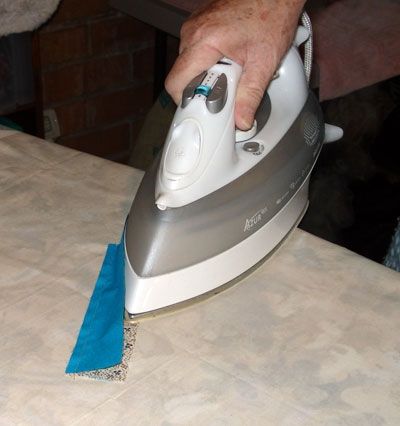
4: Complete the sweep with the iron - without pulling

See how flat the seam is?
That's how to get great patchwork by machine
Press the Jan T way, you can't lose!
© 2009 Jan T Urquhart Baillie


