DIY Button Rings

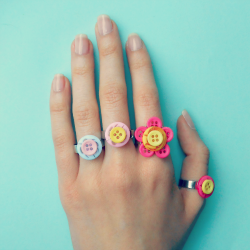
Accessorise yourself with buttons
I have been making quite a few button crafts lately as I got the most beautiful pack of buttons. As the number of my larger buttons is running low (I really need to buy new ones) I was thinking what could I do with the few that I have got left and it hit me - accessories! Rings!
This is a perfect project if you have an odd button or two lying around and just don't know what to do with the but you don't want to throw them away.
I made these for myself and will be making them as gifts for my friends. They would work great as a party favor too!
All photos on this page are taken by me unless otherwise stated.
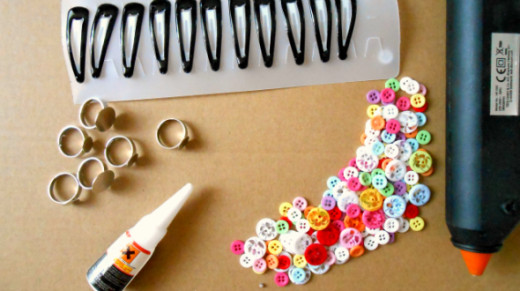
You will need - Supplies to make your accessories
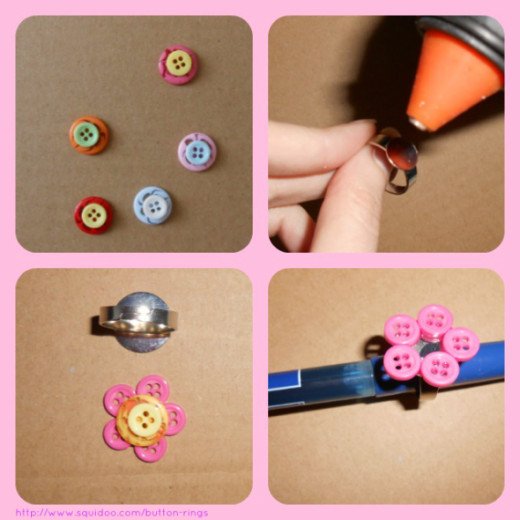
It's easy to make them - And fun too
If you have many colors to choose from I suggest you first try out the combinations before you start making the rings. This way you will see how color work with one another and find out what works best for you. For my rings I used two sizes, 13.5mm and 6mm diameter ones.
First I made two button rings. I pluged in my glue gun, had a cup of tea while the it was warming up, and when it warmed up applied some glue on the ring and stuck on the 13.5mm button. I added some glue on top of that and topped it with a smaller button. I made 3 rings like this (and will probably be making more as I love them).
My next ring is a flower one. This one was a little bit more tricky as I wasn't sure the glue gun would stick I decided to use super glue. I have a lot of respect for this one as I already had a few things stuck on my fingers so I advise to handle it with a lot of care (and just for the record while I am writing this my finger pads are as hard as rock as naturally I managed to spill it over my fingers). Back to the project. Carefully glue on the small buttons forming a circle (flower) on the ring. Let it dry, for more than a second as even if they advertise the super glue will dry in a second, it won't. When you are sure it is dry it's time to use the glue gun again. Apply the glue in the middle of the circle and be generous. Finish up your flower with one or two buttons.
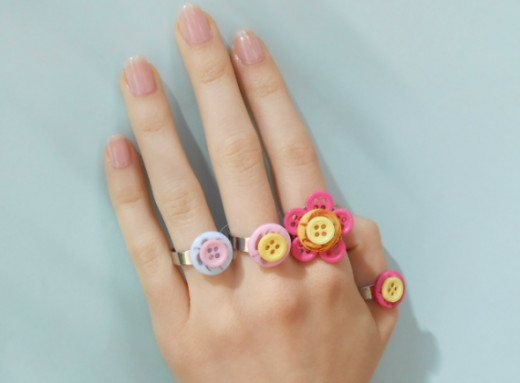
I hope you liked my idea and that your old buttons (or new ones) will be given a new life as fashionable accessories.
The larger buttons I used
I really like these buttons. I stumbled upon them by accident on eBay and it did take a while for them to arrive but I love the colors and pattern they have.
DIY Button Flip Flops (with tutorial)
I turned a pair of dollar store flip flops into something super adorable with buttons.
How To Make Crepe Paper Flowers
Crepe paper flower bouquet - these will last you a while.
Making a Button Letters Canvas
You don't have to be particularly crafty to make a gorgeous button letter canvas, it's easy and it's fun!


