Cardmaking Tips And Ideas

Getting Started
Making greeting cards if fun and rewarding even for beginners. Making a card for families and friends brings joy to both the giver and the receiver. You are giving a gift of yourself.
- So, how would you get started? Well, first think about the occasion that you want to create a card for. Is it a birthday, a graduation, a new baby?Of course, you do not need a special occasion. You can say hello, encourage a friend or family member. There is unlimited reasons to send a card !
- Select a card form and card size that you would like to use. There are many to chose from.
- Create the card layout. These are the blueprints for your design, This could include the colors you will use, what embellishments you will use and what sentiments you will use.
- Gather your supplies
- Put it all together
- Add a sentiment on the inside of the card.Keep your inside message simple with a one liner. Use a poem or a saying. Use a song title or line. Use a title or saying from a movie. Use a sentiment stamp.
Pre- cut multiple card shapes at the same time. You will always have the right shape when you need it and it will save time !
Prep Card Stock Ahead Of Time
If you like to get ahead of yourself, you can prep some basic card stock base shapes ahead of time. A scoreboard will help you do that. You measure ahead and scrore the lines you need. You can then keep them in a box, ready for the next time you feel like creating something special.
Resources For Getting Started
- How Many Cards Can You Make From a Piece of Cardstock?
Use this guide to determine the number of handmade cards that can be created from standard-sized cardstock, either 8.5-by-11-inch or 12-by-12-inch. - Greeting Cards | Printable Templates & Coloring Pages | FirstPalette.com
Free greeting card templates to print out and craft into greeting cards for birthdays, Mother's day, Father's day, Valentine's day, and other special occasions. - Change Your Greeting Card Formats to Add Diversity to Your Card Making Style
Get various greeting card formats from creative ones to unique styles. Then use them to transform your card projects. Includes tips and tricks on how to create your own formats.
Card Making Kits
You can purchase card making kits which have everything included except the glue or adhesive tape to out it all together, They often include the card shaped for you. Other elements that could be included may be ribbon, gems and other embellishments. Prices vary depending on the elements. Sometimes these kits are subscriptions that you may get periodically. These kits are good for beginners.
Card Making Supplies
Here are some common supplies that you will need to make your greeting cards:
- Card stock or Paper-this is the base of your card. Card stock comes in different weights and colors. For the base of your cards you need a minimum of 80 lbs, but 110 lb weight gives you the strongest base. you can also use other papers like water color paper. The card stock can also be patterened paper.
- Envelopes-they come in different sizes and weights. You can buy them or make them yourself with an envelope board or from your cutting machine.
- Cutting Mat/Craft Knife/Scissors/Paper Trimmer- these are the tools that will give your cards a professional look.Trimmers make all your lines even and crisp.
- Liquid Glues-Are used to adhere embellishments. A strong quick drying glue is perfect to adhere elements onto the card. One feature of using glue is that you have a few minutes to reposition before it dries. The only real trick to use the glue is that you need to make an even coverage. An old credit or gift card is perfect to get an even coverage.
- Adhesives And Tapes- they come in different widths. They come in permanent and repositional tapes. They come in refillable tape runners which id the best and most economical way to buy them. You need a selection of different types and styles.
- Bone Folder-A must have for every card maker. When you fold a card, you use the bone folder to make a crisp even fold,
- Inks And Ink Pads- These are used to stamp elements on your cards.Start with the basic colors and build on your collection. Always buy the refill ink with the pad so that if the pad is discontinued, you will still be able to use it.
- Stamps- They come as rubber stamps and acrylic stamps, There is a huge selection is size and theme. They usually come as a set of several in the same theme. Start with basic themes and then build on your collection. The nice thing is they are reusable in so many ways.
- Craft Knife-A good sharp craft knife is used to cut shapes and other embellishments
- Decorative Punches and Scissors- Punches are used to craft embellishments and make decorative borders. Decorative scissors are used to make decorative edges on any card.
- Stencils- Are most often used to make decorative backgrounds
- Die Cuts- These are metal shapes that are pressed between rollers to create shapes, words, sentiments outlines and more.
- Embossing Folders-Used to embellish a card base. They have a built in design that creates the design by pressing it into the paper.
Select A Greeting Card Size

It All Starts With A Card Base
Any card that you make starts with a card base. There are two things to consider when creating a card base- the size of the card and the type of card you want to create. Once you have made those decisions, you will be able to select the other supplies that you need.
You really need a good sturdy cardstock to create your card base. I highly recommend using at least 80-110 lb cardstock on all of your bases. You will see the card weight on the outside of the package, usually in one of the corners.
Simple Fold Card
This is the easiest and best card to start with as a beginner. You decide on this card and cut the size that you want. Then you fold it evenly and create a crease. Use a bone folder to go down the crease to make a crisp fold. You can have the opening on the top or on the side.
Easel Cards
Now take it to the next step with an easel card. Easel cards are a simple variation of the standard card fold which allows them to stand up like an easel. There are simple easel cards, double easel cards, and even triple easel cards. Click here for my favorite easel Card tutorial.
Gatefold Card
A Gatefold Card opens, as suggested, like a pair of gates parting in the middle. With three panels altogether, this type of card has two folds – each creating a flap that meets in the center
Tri-Fold Card
his Tri-Fold Card folds twice to make three panels instead of two. All three panels will be equal sizes to fold precisely on top of one another.
Aperture Cards
.An Aperture Card has a shape cut out of the front cover, folded over with a design framed in the window Folded similarly to a Tri-Fold Card, there are three panels with two folds. The hole or aperture is created in the front panel card will then open like a Standard Fold Card. There is a panel behind the opening.
Pop Up Cards
These cards do exactly as the name suggests – when the card is opened, images will pop up from the center. Pop-Up Cards use tabs inside a folded card, cut out from the card blank. The images are stuck onto the bottom section of the tabs to neatly fold down when the card is closed, popping up again when opened!
Shaker Cards
Shaker cards are a delightful form of a card that involves creating a window in the design (generally on the front) of your card and sandwiching one or more types of “shakeable” materials between two tightly sealed layers, one of which is often transparent or semi-transparent so that the shaker contents remain visible.
More Tips About Card Bases
- You can layer on top of card bases with printed or colored paper. You could make a layer on top of your base and then a layer on top of that, Measure your card base and make each consecutive layer 1/4 inch smaller on all sides.
- I tend to use double-sided adhesive tape to add layers and panels. It is cleaner to use, comes in a variety of widths. You never have a problem with glue stains.
- Raise a layer of your card base with foam tape. This adds so much dimension to your cards
There are more card shapes and bases that you can create, Just head on over to your favorite browser and you will find more variations and other shapes you can try.
Best Cardstock For Card Bases

More Greeting Card Base Ideas
- Helen's Craft Haven...: Pile It On! Challenge - Tri-fold Card
Create a simple and easy trifold card with just a few supplies - 10 Easy Shaker Card Ideas That Are Perfect For Beginners
10 shaker cards that you can create no matter what your experience level - Shaker Cards for Beginners -- From Start to Finish Tutorial Using the Cricut! - YouTube
* Get the FREE templates for my easy shaker cards for beginners at https://jennifermaker.com/make-shaker-cardsLearn how to make shaker cards for beginners to...
Parts of A Greeting Card
There are just a few things to understand about the parts of a greeting card. Understanding these parts will help you grow and create the perfect card for your needs.
The Front
The front of the card is the very first thing that people will see When they take it out of the envelope. It can include photos or images, embellishments, and or text. Your card front will grab the attention of the person who receives it. It sets the tone for the message that you want to send.
Inside Message
Some have a blank on the inside so that you can handwrite a personal message. Others have text or sentiments to convey what the sender wants to say. It can also be a quote or a poem On a top-fold card, the interior content generally is on the bottom panel,
Some cards can include additional inside pages like small booklets that tell a story.
Back
Your choice is either to leave the back of the card blank or include information about yourself. Often card creators use a stamp with their names or initials.
Other Optional Parts
- Flaps or windows-die cut windows can be created with or without flaps to cover the window.
- Pop Up Tabs-You can have pop-up elements or tabs that the recipient pulls to reveal a message or cause parts of the card to move.
- Embellishments-You cards may also include ribbon, charms, glitter, or other items that aren't part of the paper card.
Using Electronic Cutting Machine To Create A Card Base
Rather than cutting card bases yourself, you can use electronic cutting machines like the Cricut, Scan and Cut, and Silhouettes to create custom card bases in minutes complete with folds and envelopes in one single cut.
Most of these cut card bases. in the programs for these machines can be custom sized to meet your personal needs. The programs are easy to use. And give you options for embellishments to add to your projects.
How To Chose Your Background Color
The first block that card makers often face is what color should I use for the background or base card color?
The easiest way to think about that is to fist think about the elements that you plan to use on the card. Specifically, what picture or main element are you using should help you decide what is your main color? So you can select that main color or you can contrast the main color. It's up to you.
Another way to look at your design is by theme. For example, Valentines might be red or pink. Easter might be pastels. Masculine cards would be a deeper tone. You get the idea.
If your background is "busy" like an embossed card or a marbeled card background, you would want to keep your embellishments simpler.
A color wheel is a good tool to have. Just type color wheel in the browser of your computer. You can print the color wheel and hang by your computer.
Remember, your cards are your art ! They are meant to be who you are. Or what reminds you about the person you are sending to.
How To Erase Pencil Marks
To cleanly remove pencil marks, I use a hi-polymer white eraser. Where a common pink eraser will often leave a pink or dark smear, a white eraser cleanly removes the pencil marks with little to no residue left behind.

Embossing Folders
Embossing folders are one of the easiest ways to create cards that are actually art work.
They are plastic folders that have raised images within the folder. Card stock is placed in the folder. Then the folder is compressed within rollers of either a manual or electric embossing machine to create raised images. Not only can you make card fronts, but you can also make words and sayings to add to your cards.
What you meed to create embossed cards:
Embossing folders
Card stock
Electronic or manual embossing system
Embellishments for the card
Tips
- Embossing folders can be inked on the positive side or the negative side to create a different look.
- Placing the card with the right side up will give you a raised embossed effect. Placing the card with the right side down will give you a de-bossed effect
- An added touch to the raised effect is to rub over it with a sanding block.
- Try adding flat backed pearls or half gems to decorate Your embossed image
A Different Gesso Technique

Gesso Swiping Technique With Embossing Folders
Gesso is like a primer for paper. It is often used in art journals or junk journals to strengthen paper pages or as a base to build on other techniques. For this technique, we are going to use gesso on an embossed greeting card as a base.
So, gather some embossing folders, your embossing machine, and some gesso, and let's get started.
Remember to follow the manufacturer's guidance o how to use embossing folders.
- Cardstock
- Embossing folder
- Embossing machine
- Gesso
- Heavyweight scrap paper or cardboard (or a foam brush)
- Sanding block(optional)
- Craft mat or some waxed paper
- Cover your craft area with a craft mat or waxed paper
- Cut cardstock to fit the embossing folder of your choice
- Place the cardstock in the embossing folder
- Run it through the embossing machine
- Remove cardstock from the embossing folder
- Set the embossing folder aside
- Set the embossed paper on the covered work area with the raised area up
- Using either the cardstock, cardboard or foam brush apply the gesso all across the cardstock evenly, You do not want a heavy layer of gesso
- Remove any globs of gesso from the surface with a bit of paper towel
- Allow the project drying time.
- Leave it as is or use a sanding block to remove a bit of the gesso for an aged look.
- Use a paintbrush to dust any particles of dry gesso
- Add ink or spray ink if desired
Using Embossing Folders On Cards-Resources
- How to Use Kitchen Foil with Your Embossing Folders « Papercraft :: WonderHowTo
Learn how to use kitchen foil for your cardfronts - How To Add Texture To Cards With Embossing Folders - Stampin' Savvy
Want to know how to add texture to your cards? Embossing Folders top the list! Today's Photo Tutotial shows you how to get gorgeous results you'll love!
Two For One Idea
Anytime you are making a background for your card, cut the background on the diagonal and get two for the price of one !
Using Background Dies

Create A File Of Word And Sentiment Cut Dies
Why not get ahead of the game? Pre-cut a bunch of word dies and sentiments that you would use most often. These could include things like "Happy Birthday", "Happy Anniversary", Get Well Soon" and "Congratulations" Store them in envelopes. That way if you need a quick card, you have what you need in a flash.
Dies-Unlimited Decor For Your Cards
There are so many die choices for dies. They are only limited to your imagination. There are sets of dies that are themed. There are dies that cut stamped images out both as sets and as single purchases. There are dies that add words and sentiments to your cards and so much more.
Dies basically make a shape with a metal piece that cuts into card stock. The card stock and the die are placed between several layers of materials and then they go through rollers that push the die into the paper. When the die is forced through the paper, it makes a cut. These machines are either manual or electric.
Another way to use die cuts on your cards is to layer them. You cut multiple die cuts of the same item. Then you glue them on top of each other. Instant raised embellishment.
Outline your die cut with a thin line pen. It calls attention to your die cut no matter where you put it on your cards.
Die Cut Tips
- Always cut extra die cuts anytime you are cutting. Will save you lots of time later. Store the extra die cut pieces in the same envelope of your die
- Re cut the same paper just moving your dire cut as you cut. That way you will waste less paper.
- Use the inside piece of your die cut to create another card. Use it as an embellishment or as part of your background.
-
Your die cuts and die cutting machines have a treasury of elements that you can cut. But think out of the box. Those scraps of paper that you have sitting around can turn into embellishments with little or no effort on your part.
You can create custom embellishments in the sizes that you need for your cards.
Embossing Foiled Paper

Here is What You Can Do With A Single Die
Raise Up Portions Of Your Card
Want to add extra interest? Use foam dots and tape to raise up some elements of your card to add extra interest
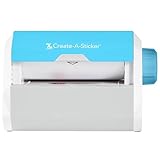
Zyron Create A Sticker Machine-Must Have For Any Card Maker
Punch Idea
Use a corner rounder punch to get a different and sifter edge to your cards
Zyron Tips For Cardmakers
- Run cardstock through the Xyron before cutting. Remove release sheet and place cardstock face down on Cricut Mat. Use "Flip" feature and cut desired shape. Yippee, a sticker shape that's easy to handle.
- I use my Create-A-Sticker to add my "logo" to the back of each card I make. I create several at a time on my computer. I punch them out with my Fiskars circle squeeze punch, and then run them through the Xyron. I end up with a strip of my logos to keep handy and attach to the back of each completed card. They are quick to apply and always perfectly sealed and flat.
- For my chipboard letters, I used my Xyron create a sticker machine and run my letter upside down. then you sprinkle your glitter over the letter and there it is.
Another Dimension Tip
Use foam tape and tabs to create dimension to your cards. Raise elements like flowers and butterflies to add some lift to your cards
Using Stamps And Inks On Greeting Cards
Stamps are a traditional way to create greeting cards. They come as rubber stamps (both mounted and unmounted ) and as acrylic stamps. You can either use acrylic blocks or stamp platforms to create your images or sentiments.
The images can be colored with markers, colored pencils , water color pencils, water colors and chalks. Using the right kind of combination of inks and papers along with your coloring tools is important.
Your images can either be stamped directly onto the paper and colored, or they can be stamped, colored and cut to be applied to your card.
Stamps usually come either singly or as a set with a specific theme. Start out by buying basic themes like birthday, get well, sympathy and so on. Gradually add to your collection.
Stamp Tips
- Make sure your stamp is clean before you ink it up, so your ink pads don't become tainted with other colors
- To avoid over-inking your stamps, always take the ink pad to the stamp, tapping it gently onto the surface (instead of pressing the stamp down into the ink pad). This will help you achieve an even coverage of ink and a clean, stamped image.
- Stamp and or stamp/and emboss an entire sheet of sentiments. You can cut them out as needed
- Use a stamp platform to stamp multiple images all at once.
- Color in stages. If you are doing multiple images, color in stages, using one color at a time.
- If the rubber on your rubber stamps are turning white, apply a light coat of glycerin over the rubber to avoid ghosting. You can find glycerin at your local pharmacy.
Ink Tips
- Always store your ink pads upside down, so the ink falls to the top of the felt pad. This will ensure your ink pad stays juicy when it’s needed.
- Always use inks on a craft mat. Keep the ink off your work surface.
- If you are using a dauber, make sure that it is saturated with ink
- Start blending off the page and then work into the paper. You will get a more even blend.
- Ink blending is more about building color. If you put too much ink on, you can’t take it off. So start light, and add more until you’re happy with it.
- If covering a large area, use a scrap piece of paper underneath your non-blending hand to hold down the card stock you’re working with. This will help avoid smudges on your projects as well as minimize inky fingers.
- Keep baby wipes nearby so that you can clean stamps in between use
- Always cover your ink pads when not in use. The ink will last longer
Keep A Mouse Pad Handy
Use the back of the mousepad to stamp, emboss foil or to shape your paper or punchies.
Basic Guide To Inks
Type Of Ink
| Best Use
| Properties
|
|---|---|---|
Dye Inks
| Good for basic stampingBecause it is water-based, it can be combined with water to create a watercolor effect in paper crafts. Most dye inks can also be used with alcohol-based inks and markers, like Copics, without smearing.
| Only use those marked as waterproof if you are going to use water colors or water colored pencils. Best used on white or pale colors. May fade over time
|
Pigment Inks
| Good for using on stickers. Works well for embossing projects
| Pigment inks are slow-drying and ideal for heat embossing, as they allow enough time for the embossing powder to stick to the inked area.
|
Solvent Based Inks
| As they can be used on any surface they are ideal for stamping on all kinds of card, acetate, glass and even metal. These are ok to use with water based inks, but NOT with alcohol ink based markers
| Solvent-based inks are quick-Some manufacturers of clear stamps advise against using solvent-based ink with their products, as the solvent can attack the clear polymer over a period of time.drying, permanent inks
|
Chalk Inks
| Is good for any project where you want a matte finish. It works well with most stamps
| Chalk inks are a pigment ink which have a powdery, matte finish once dry.
|
Distress Inks
| These inks can be used as water colors. They can also be used in embossing projects as they are slow to dry, They will blend beautifully but can also be used for stamping
| These are dye-based inks with a higher concentration of colour and a longer drying time than normal. They are designed to flow when sprayed with water, and to be blended and worked into your project. They are ideal for altered art and distress effects.
|
Alcohol Inks
| Good for backgrounds
| These are special dye-based inks designed to give a pretty, polished-stone effect. They are quick-drying and permanent, and can be used on lots of surfaces including glossy paper, acetate, shrink plastic, foil and metal.
|
Always check the manufacturers information for specific uses
How To Keep Ribbon From Fraying
Add a bit of clear nail polish to the ends of your ribbon so that it does not fray !
Think Outside The Box
Use left over gift wrap paper and gift bags to create elements and backgrounds for your cards
Glitter Tips and Ideas - Every Card Should Have A Little Bling
For my chipboard letters, I used my Xyron create a sticker machine and run my letter upside down. then you sprinkle your glitter over the letter and there it is.
- Glitter can be applied on strips of double sided tape. You can apply the glitter on one side, knock any extra glitter off, then apply the tape to your card
Make Multiple Cards
When you are making a card, why not make an extra card to keep on hand.
Glue And Adhesive Tips For Card Making
Here are a few tips on glues that are going to make your card making a breeze:
- Only put glue where the embellishment touches the surface. Too much glue will weigh the front of your card down
- Spread your glue. Do not just glop the glue down. Use your glue sparingly. Then spread the glue with an old gift card or credit card.
Made A Mistake-No Problem
Cover mistakes with embellishments, layering or adding another image on top.
Using Scraps To Make Cards
While you are making cards, it is inevitable that you are going to wind up with scraps. Scrap paper is part of the process. But you can use all those scraps rather than throwing them away. Here is how:
- Use a punch with your scraps to create small flowers, and shapes. The flowers can be used to decorate the fronts of your cards. The tiny shapes can be used for the shaker part of shaker cards
- Use small pieces to layer when you are needing a backer for a word or phrase
- Die cut a shape or word to be used later on
- Use small scraps for stamped words and images
Card Making Resources
- Cardmaking with Buttons #Cardmaking - YouTube
Hi all, come and share your creations and ideas in our Facebook group! We welcome all crafty ad creative minds!https://www.facebook.com/groups/32941702778082... - Perfect Words For The Perfect Card
Match your card theme with the right quote-what you need to know
We Have Just Scratched The Surface
There is so much more to making greeting cards than we have talked about here. There are multiple techniques and ideas that can get your creative juices flowing. We encourage you to take time to investigate Pinterest boards, You tube videos and even sign up for a few classes. The world of card making is a journey that is rewarding in so many ways. Once you get started, you will not want to stop.
© 2019 Linda F Correa

")


