Create Bread Clay Cat Pins and More


Bread Clay!
Clay is such fun to experience and create with. It has been around for thousands of years in several forms. Clay can be made with mud; clay can be made with paper. In Japan, there is a type of clay made from rice. But this clay is made of bread. Yes, bread! White bread, to be exact, mixed with regular white glue. Mixing the clay may require some help from a parent or older sister or brother but once the clay is made, you need no help to create all kinds of things.
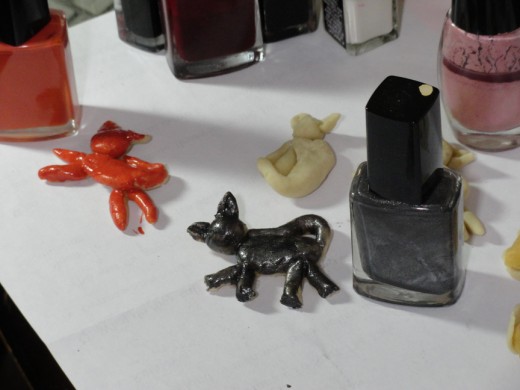
In this project, we will be making cats for pins, brooches, earrings, and other jewelry or ornamentation. The bread clay only needs to dry overnight and it should be ready to wear or decorate. You can mix the tempura color directly into the clay or paint it later with fingernail polish for a nice sheen, plus the added protection of a lacquer finish. The choices are endless.
With just a few slices of white bread and white glue, you can make almost anything. Try this fun easy project!

You will need:
a bowl for mixing
white glue
white bread
tempera paint or fingernail polish
pipe cleaners (optional)
pin backs or other jewelry finishing
ribbons (optional)
plastic bags.
Ingredients
- 3 slices white bread without crust
- 3 tablespoons white glue
Instructions
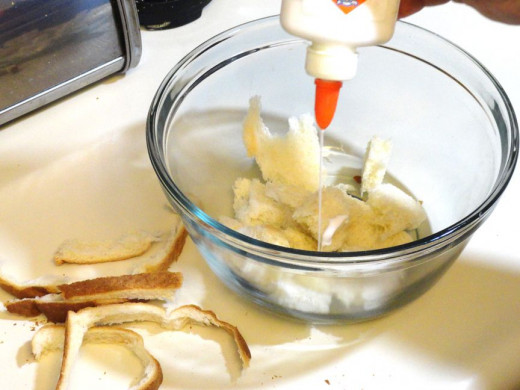
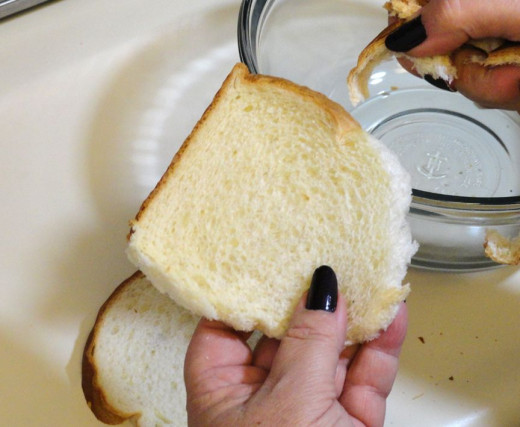
- Get out three slices of white bread and remove the crust. Then break up the bread in a bowl and pour three tablespoons of white glue over the bread. Next, you carefully squeeze the bread and glue together. It will be very sticky at first but keep kneading and it will become more and more like a soft ball of clay. If you think the clay is too sticky even after kneading for several minutes, add another piece of bread.
- The clay is ready when it doesn’t stick to your hands anymore and forms a doughy ball.
Make The Bread Clay Dough
Remove the crust from 3 slices of bread. Break up the bread into a bowl and pour the glue on top. Mix the bread with 1/8th cup of white glue. Knead until you have a soft doughy ball. The dough will be very sticky at first and will almost look as if you have done something wrong. Keep kneading until the dough becomes smooth and sticks together more. You will have to clean off your hands periodically to keep the dough from continuing to stick to them. The lump will eventually look smooth and elastic. If it appears dry, add more glue. If it appears too sticky add another slice of bread. Add a few drops of acrylic paint for color and knead until thoroughly mixed.
Keep Mixing

Perfect

Divide For Colors
Divide the dough into desired portions for colors. Add a drop or two of tempera paint to each lump and knead till the color is uniform throughout. Store in plastic bags. Outside of the bag, the clay will begin to dry right away and will be completely dry overnight (depending upon the thickness of the project). This dough will keep in the refrigerator for about a week before developing a bread mold.
Step 2
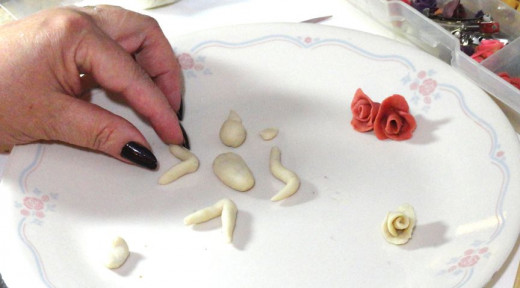
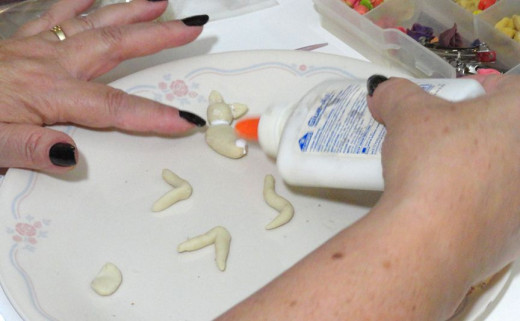
Pinch off a ball of clay and roll a caterpillar shape. Roll three worms and a ball. Fold two worms in half and attach to the ends of the caterpillar for cat's legs. Attach the third worm at one end for the cat's tail. Attach the ball at the other end and add two triangle ears. If you wish to make a necklace, attach a wire loop now by puncturing it into the clay. Allow drying overnight.
The colors will be darker after drying because the glue dries clear and allows the true color to show through.
Use Glue To Attach Pieces
Construction
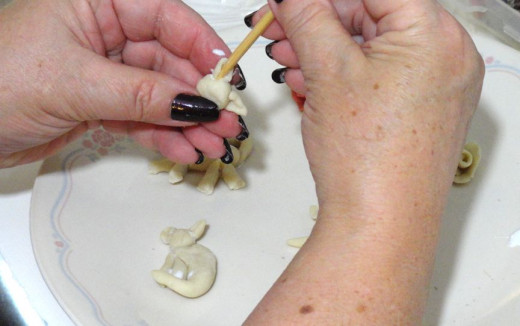
To put the pieces of the cat together make sure you use glue. The white glue helps the bread clay to stick to itself. Try using a bamboo skewer to attach the ears.
Paint Using Fingernail Polish

Step 3
Glue a pin back or magnet to the back of the cat and dry overnight. For a necklace bend a wire into a “U” and insert it into the head before drying overnight. If desired, paint with clear nail polish/enamel for shine.
Finishing

More Clay Projects
Make Some Shamrocks from Bread Clay
Be ready for St Patty's Day
Whether you are Irish or not these will be fun and useful. Use clay you have already tinted with green (and a little yellow for spring green), or use the clay white and paint it later after it dries. Both ways work fine.
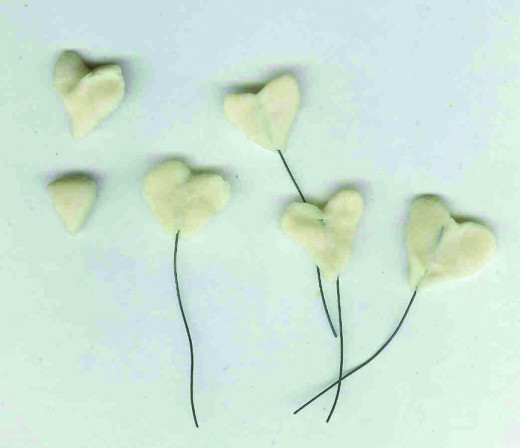
Pinch off a little ball about the size of a marble. Shape it with your fingers into a triangle. Then flatten the triangle but give it a little dimple between two of the points with your finger. This will give you a heart shape.
Stick a pipe cleaner or a 4-inch length of floral wire up through the bottom of the heart. For a four-leaf clover or shamrock, you will need four hearts.
Next Step for Shamrocks
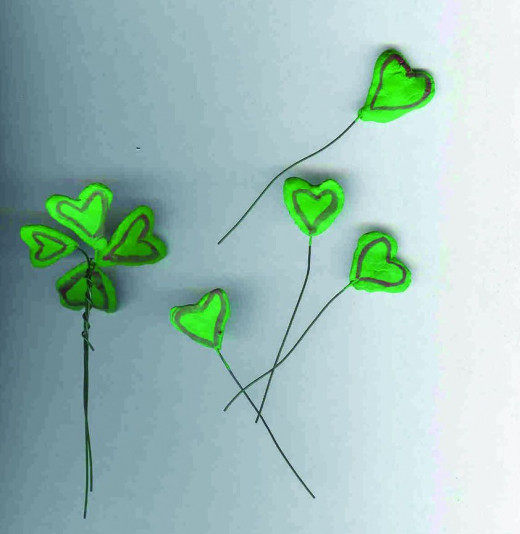
Paint the heart/leaves if they weren’t already tinted with tempera paint. Then you can varnish the leaves with clear fingernail polish/enamel. This will seal the clay and keep bugs away.
Ready to Wear
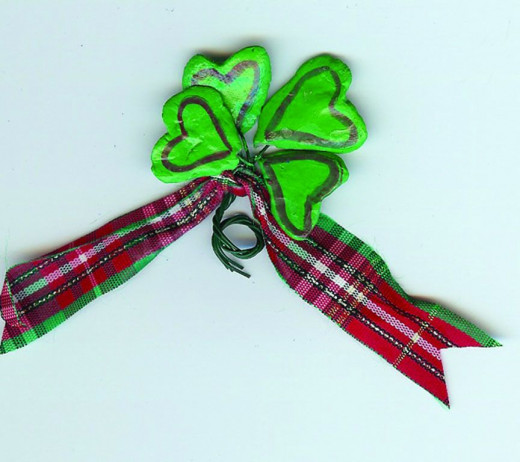
After it is dry and painted you can twist these four hearts together and add a bow and a pin. Perfect for St Patrick’s Day. You won’t be pinched this year.
Try Making Roses
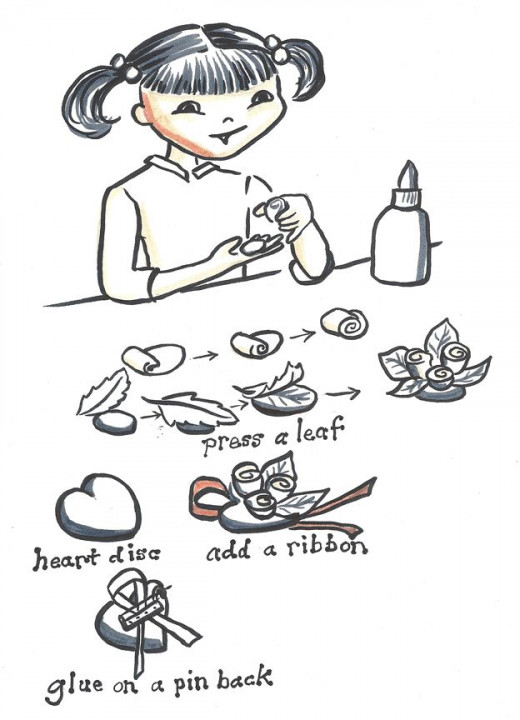
This bread clay lends itself to many different crafty forms. I love the roses especially. Roll a little ball of clay. Squish it between your fingers and then roll it up. Add more "petals" as desired, then cut off the excess and attach it to a disc or ribbon.
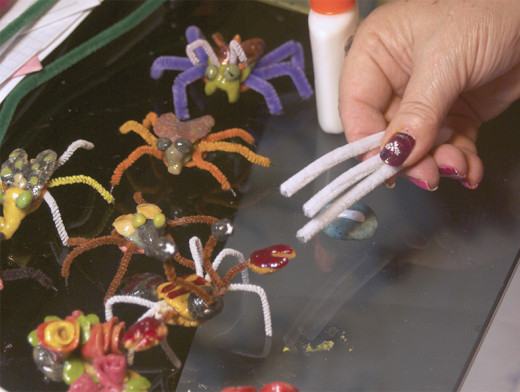
Boys, Wanna Try Some Clay Bugs?
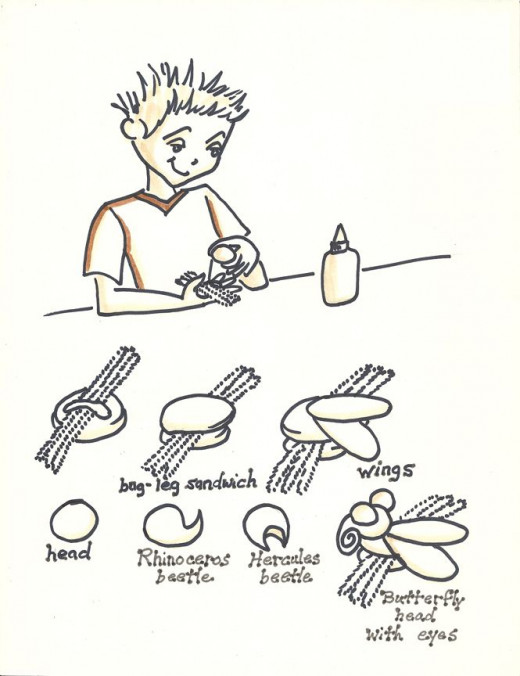
Bugs
You will need three pieces of pipe cleaner about 4 inches long each. Cut the pipe cleaners to the right length with scissors. Squash two balls of clay into little cookies. Don’t make them so flat that they are tortillas. Then put a little glue onto one of the cookies, place all the pipe cleaners on top of the glue, put more glue and then the other cookie on top of the pipe cleaner-legs. And what you have made is a bug-leg sandwich. The legs should be sticking out both sides of the sandwich.
Make one more marble of clay, any color you like for the wings. Break it into two pieces. Roll the two pieces into two caterpillar shapes, then squash them flat and glue the two flat caterpillars to the back of your sandwich. They should look like wings.
For the head, you must think about the kind of bug you want to make. Bugs come with all different kinds of heads. Some have big bodies with small heads; some have small bodies with big heads. Some have a horn, like the Rhinoceros beetle.
Some have pinchers for a mouth, like the Hercules beetle. Some have a long curly mouth/proboscis like the butterfly or the mosquito. Whatever you decide, shape the head and glue it onto the bug-leg sandwich near the wings.
Now you will need eyes for your bug. Make another ball of clay and pinch off little pieces to roll into balls for the eyes. Then glue them onto the head of your bug. With the clay that is left, you can make extra details, like dots on your wings or a stinger, etc. With an extra pipe cleaner or florist wire add antennae.
At last, the bug must dry untouched for a day. You can’t play with it or bend the legs until it is completely dry or it will begin to crumble and then it will be ruined. When it is dry, bend the legs, add a magnet to the underside and attach it to the refrigerator to scare your Mom.