Create Your Own Sparkle Skull Decorations
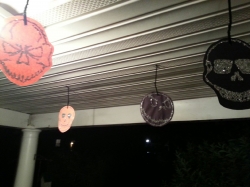
Do-It-Yourself Glitter Skulls
Recently, I've been on this skull kick. I can't stop drawing them. And all of a sudden, WHAM! I came up with this idea for Halloween decorations using the skulls I've been drawing.
They're pretty easy, actually, and I don't think they take too long, either.
The first part, you need to draw out the skulls on pieces of colored construction paper. I've got a number of different looks, everything from very simple to a couple more advanced. All you need here is paper and pencil.
The second part is where the actual decoration construction comes into play. This involves cutting, gluing, sparkling and generally turning the drawings into the decorations.
I made this up specifically for Halloween, but I'd bet these would be perfect for Day of the Dead, or just anytime you're in the mood.
So, come on. Let's get started!
Photo Credit: All Photos Taken or Drawn By Me
What You Need For the First Part - Getting Started Drawing the Skulls
The first part is drawing out the skull designs on construction paper, so you need to get the basic materials for this. All you need here is the right colored paper and sharpened pencils. This stage will get you ready for the actual decoration creation.


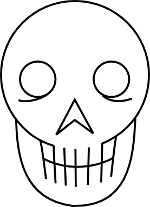
Simple Front Facing Skull
This is the easiest one to draw. It's a front facing skull, with pretty simple shapes to it. It's mostly ovals, circles, and lines. If you want to make it easier, you can find plates or cups in your house to trace to get the perfect circle, and a ruler for the lines.
Take your time, darken the lines you want, and try not to erase too much. Construction paper doesn't do well under erasers. Most importantly, have fun.
Time required: Any time
Difficulty: easy
Cost: Not much
Materials:
- Construction Paper
- Pencils
- Sharpener
Instructions:
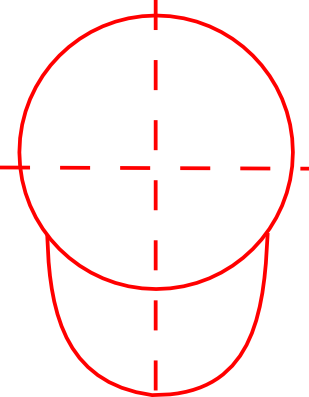
1. Grab a piece of construction paper, and start with a large circle. It should be nearly as large as the top half of the paper. Use a plate in your house, if you need to, to get a perfectly round circle.
Then, add a large cross, for guidelines, one line from top to bottom, and the other from left to right.
Finish it off with a rounded jaw, that joins at the bottom.
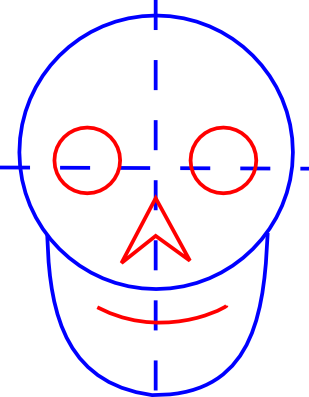
2. Add the eyes, nose and mouth.
The eyes, should be on either side of the center line, and positioned on the crossing line. They should be basic circles, and again, if you can find cups, or something like this, to make the perfect shape, go ahead.
The nose is sort of a triangle just under the eyes. In fact, the top of the nose, should be exactly where the bottom of the eyes are. Begin the triangle with the top two sides, but at the bottom, connect two more lines, in triangular shapes.
Finally, add a smiling mouth line. Use the circle line for guidance.
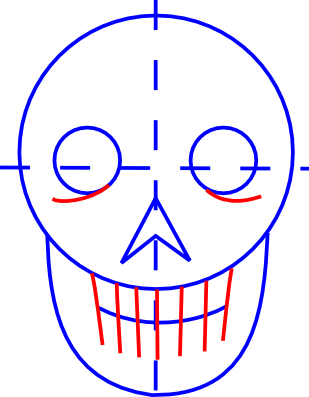
3. Add lines of depth under the eyes.
Next, add the teeth from the circle to the mouth line. Add as many teeth as you like, but make sure they're even from right to left.
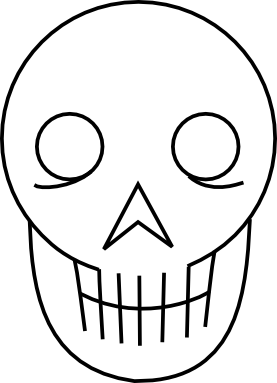
4. Now darken the lines you want to place glitter on. The idea is to make it apparent where the glitter should go.
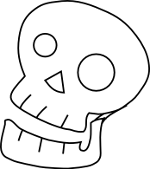
Silly Skull With Three-Quarter Turn
This one's kind of a cartoony version of the skull. It's twisted in a three-quarter view, showing an opened jaw, and one eye larger than the other.
It's a little more difficult than the previous skull, but still not too tough. It just takes a little more effort, so take it step-by-step.
Time required: Any time
Difficulty: medium
Cost: Not too much
Materials:
- Construction Paper
- Pencils
- Sharpener
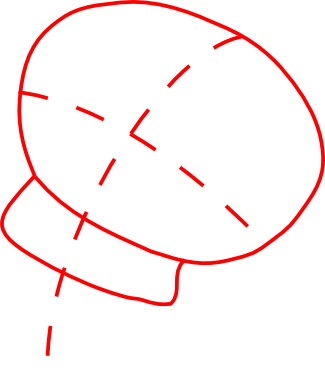
Instructions:
1. Start with an oval-shape, arced up to the left. This is the top of the skull. Add a cross, just like the simple skull, but this time, start from center of the skull, and angle it down. Then cross it from left to right, again giving the line a subtle bend.
Now, add the top of the jaw just below the oval-shape. Add it as just a simple rectangle-shape, with rounded corners, making sure it's center is at the center of the crossed-line.
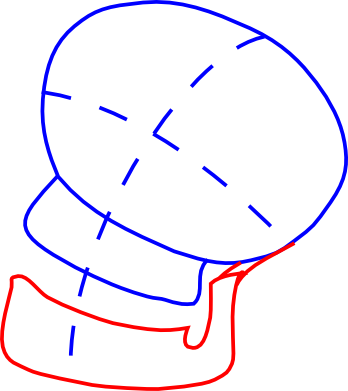
2. Now, add the lower jaw. This is kind of a tricky part, because it should stick with the initial cross guideline, but it should be in sort of an L-shape, with a definite gap to demonstrate a skulls jaw.
Connect the jaw by a separate piece.
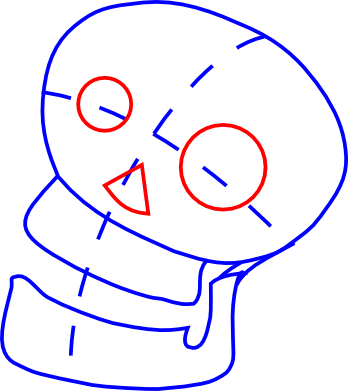
3. Now add the features.
Add the eyes, along the guideline. Make the close eye much larger than the far eye.
Add the nose, as a triangle with a curved base. Also, it should be leaning towards the viewer, so having it slightly to the side of the cross line, and not right in the middle.
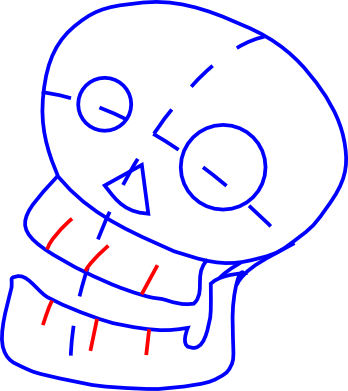
4. Add some teeth, as just three lines on both the top and bottoms of the jaw.
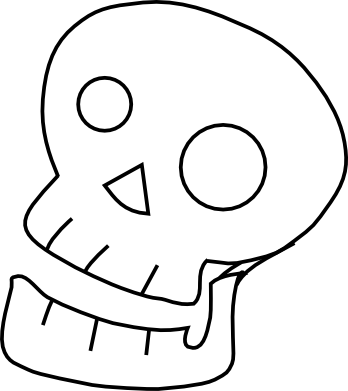
5. Go back, and darken any lines you'd like to keep. These are the lines that will be getting glitter. Don't worry if this one looks a little more sloppy. Part of its charm is it's kind of sloppy cartoony look. It's supposed to look like it's laughing maniacally.
Day Of the Dead Skull
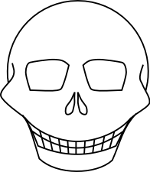
This one's based on a number of Day of the Dead skulls I found online. I thought a bunch of them looked really cool, so I came up with this.
It's very symmetrical, with eyes that look more like sunglasses than eyes. And teeth that look like a big grin.
Time required: Any time
Difficulty: medium
Cost: Not too much
Materials:
- Construction Paper
- Pencils
- Sharpener
Instructions:
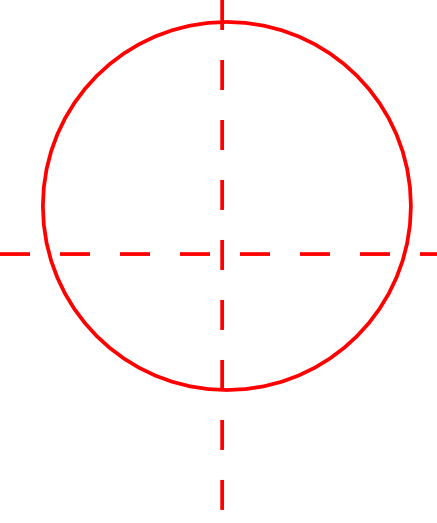
1. Start with a circle that covers nearly the entire sheet of paper. This circle with be almost the entire drawing, so go big. Use a plate in your house if you want.
Add the cross guidelines for facial features. One going down the middle, and another from left to right.
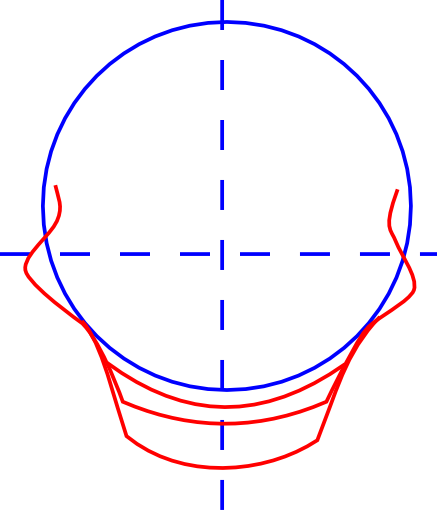
2. Add the jawline. It should start right about the top of the eye-sockets, and curve in then out, to give widened cheek bones. Then down to narrow into the teeth. Add another line as the grinning teeth line.
The jaw-bone should connect to the teeth, not the chin. Add another line from the smile, under the grin, to the other side, to add the chin.
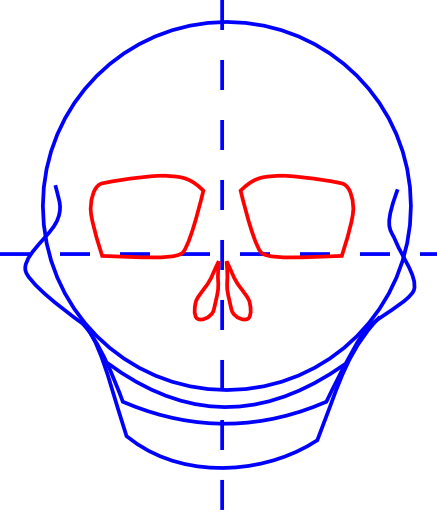
3. Give this one the facial features. I know it's strange, but think fun in the sun. Give him big sunglasses eyes, and then two nasal holes.
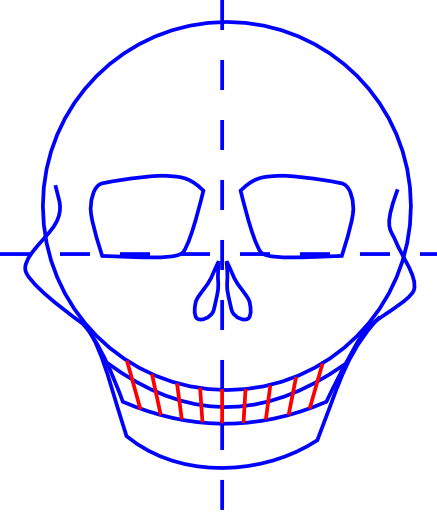
4. Add the teeth, as just lines. Add as many as you'd like.
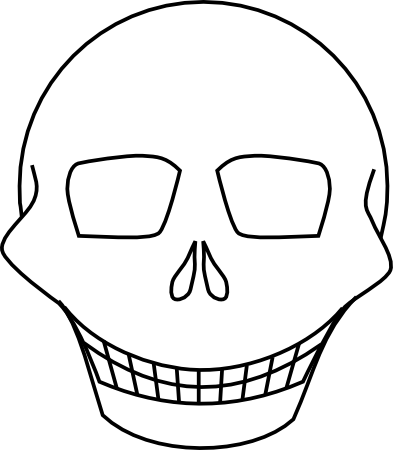
5. Go back and darken the lines that you need for the glitter. Make sure to separate the jawbone form the skull, and the chin. These are different parts, and you will get a better look.
Evil Looking Skull
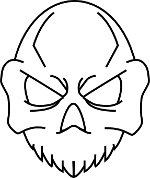
This is the first skull that's maybe not so PG. This guy will take you down a dark path. This is also the first skull with some difficulty. It's a tough one, but after the previous three, I know you can do it.
This guy starts with an oval-shape, and requires adherence to the guidelines. He's got a lot of depth, and a lot of crevices to his look. It can come out great it you stick to the pattern.
Time required: Any time
Difficulty: hard
Cost: Not too much
Materials:
- Construction Paper
- Pencils
- Sharpener
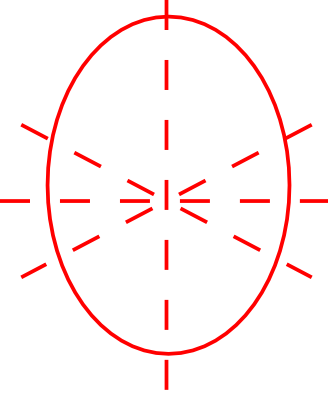
Instructions:
1. Begin with just a simple oval-shape from top to bottom.
Add the guidelines. One from top to bottom. One from left to right, and two that criss-cross the center.
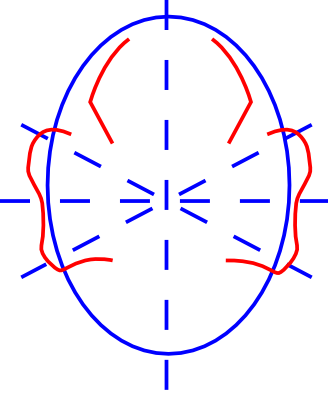
2. Now, it's time to add the depth.
Add something similar to ears on either side beginning with the top criss-cross lines, and ending with the bottoms. Make sure the ears begin and end inside the oval-shape.
Add some more depth by adding some crevices on the scalp.
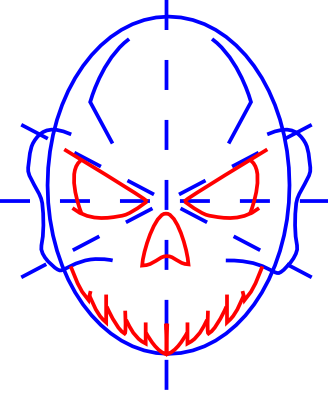
3. Add the facial features.
The eyes are just curved triangles. Start just off the center line, and draw an angled line up. Start the bottom line of the eyes at the same place, but curve them until they nearly touch the guideline going left to right. Now connect the two with a curved line.
Add the nose, as a curved triangle. It should also have a bend at the bottom, to have a small triangle bending up.
The teeth can be tricky. Start at the center, and draw them as two-line teeth--down, and out to the side. Then do it again following the bottom of the oval-shape until you've hit the ear-shape on either side. If the teeth don't come out perfect on both sides, that's OK. I skull like probably never went to the dentist.
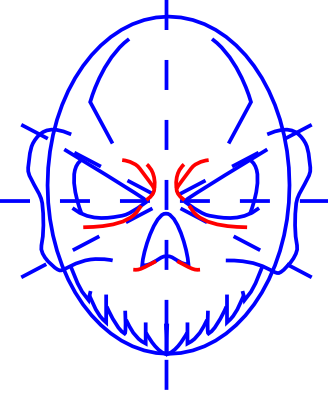
4. Now, it's time for some real depth. Add some grizzly brow lines, and under-eye lines to the eyes. Then add some more depth lines to the nose.
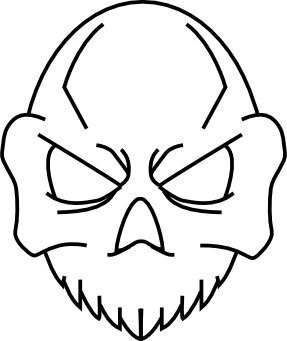
5. Darken any lines that you want to add glitter to. This guy should look like he has some severe depth to his face, so the lines should have at least a little space between them--enough that the glue won't bleed together, and make it just one big line.
Anyway, this is clearly the bad guy skull of the bunch.
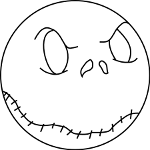
Jack Skellington, The Pumpkin King
Whoa, wait just a minute! We got one more! Who's the most famous skeleton of them all?
Jack Skellington, of course, the Pumpkin King. And why would anyone draw a bunch of skulls for Halloween, and leave him out? I mean come on!
The truth is, Jack's not all that hard, anyway. He's really just a circle with a great set of features. And who doesn't recognize him? Nobody, that's who.
Time required: Any time
Difficulty: medium
Cost: Not too much
Materials:
- Construction Paper
- Pencils
- Sharpener
Instructions:
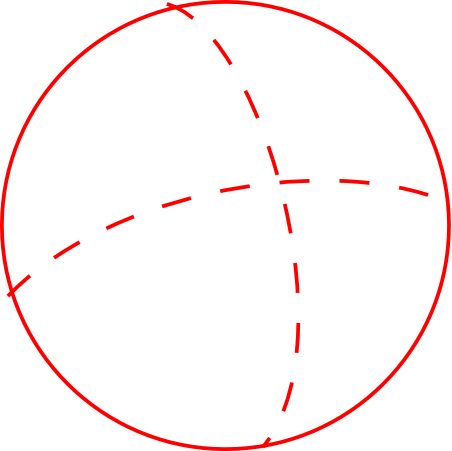
1. Start with a giant circle, the size of the paper. This is the whole drawing, so take up the entire sheet, if you can. You can use a plate, from your house, if you want.
Add some guidelines. Start from the top center, and arc down, to the lower-right corner. Then add another from the right, exactly halfway down, to the left, arcing slightly downward.
2. Add his features.
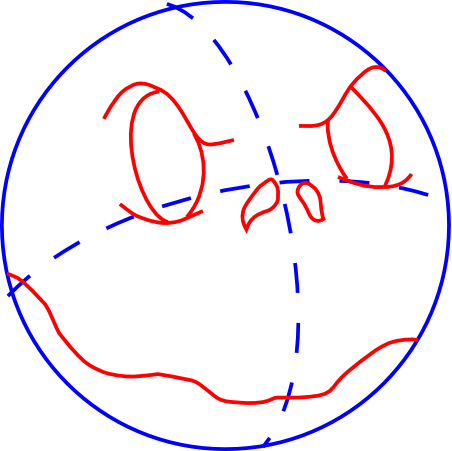
His eyes are ovals. The bottoms should touch the guidelines, but clip them with brow lines on top and bottom, to give him some expression.
Then add nostrils, that are sort of ovals that end in points. The close one should be distinctly larger than the one farther away.
Add his mouth. It begins on the left, just above the guideline, and ends to the right, about three-quarters of the way down the face. It's a smile, but it should wiggle the whole way, making it a bit devious.
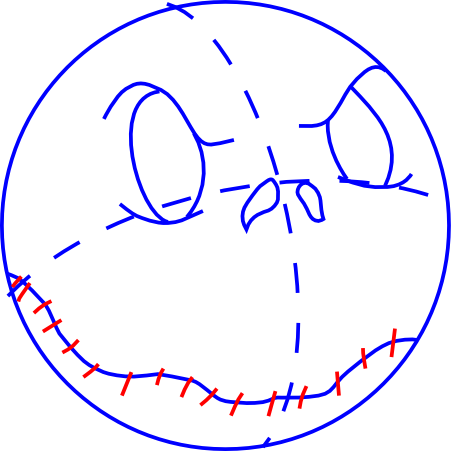
3. Add the teeth, like stitching, as just lines that walk along the snaking smile.
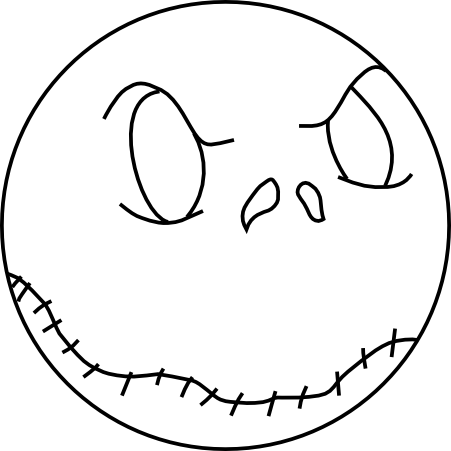
4. Darken the line you want to hit with glitter. Make sure to get the teeth, as well as the brow lines.
This is a distinctive face, so it should really pop.
What You Need For the Second Part - The Actual Decoration Construction
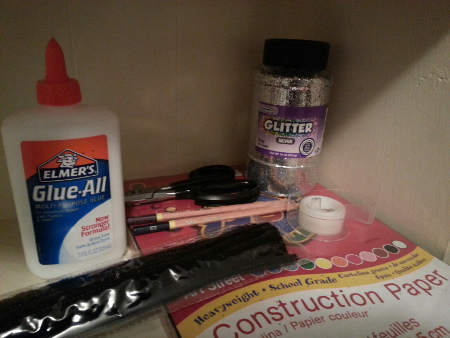
The second part of this craft is really the part that will take the longest. It's the actual construction. It'll take the drawn out papers, and cut them, glue them, glitter them, and prepare them for hanging. So, here's what you'll need.

Construct the Decoration - Here's Where It Starts To Get Interesting
This is where the design goes from a drawing to an actual decoration. You'll cut them out, glue the sparkles, and get them ready for hanging.
It's great! Let's Go!
Time required: Two-Days
Difficulty: medium
Cost: Not too much
Materials:
- Scissors
- Glue
- Glitter
- Hole Punch
- Pipe Cleaners
Instructions:
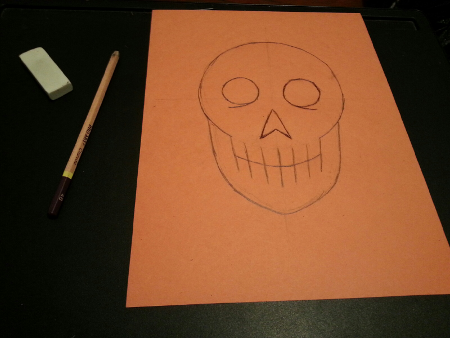
1. Darken the pencil lines that need glitter.
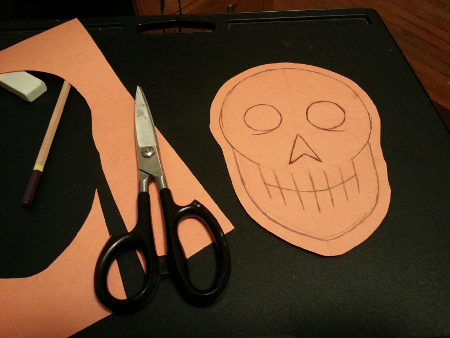
2. Cut out the skull. Make sure to give at least a quarter of an inch on all sides of the outside line, so that there's enough room to add the glitter all the way around.
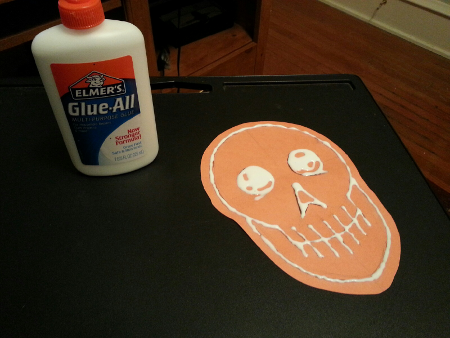
3. Add glue to anywhere on the face that will need to get glitter. Make sure to fill in the eyes, if you want them completely glitterized.
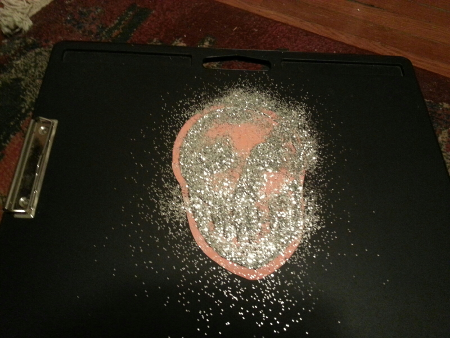
4. BOOM! Hit it with the glitter. And don't skimp. Make sure all the glue is completely covered with glitter.
After this, you'll have to wait. You should allow it to sit over-night, after this.
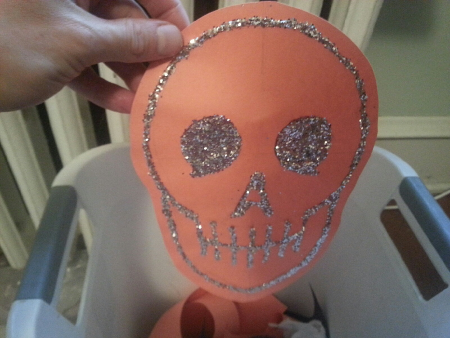
5. After you've waited for the glue to dry, hold it over a trash can, and let all the excess glitter fall off. You should be left with a beautiful skull face. Isn't it amazing?
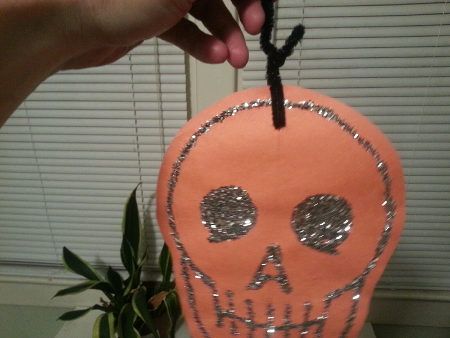
6. Now, at the top of the skull, just under the glitter line, use the hole punch to add a hole, for hanging. Then slip a pipe cleaner through it, and twist it around until it's tight enough. Now, you have something to hang it by.
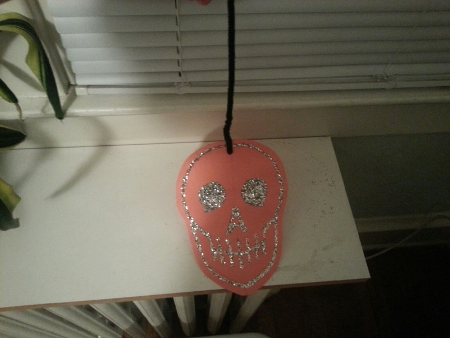
7. Take a close look at what you've made. Isn't it great? Now, it's time to find the perfect spot inside or out, to hang it for everyone to see.
Enjoy!
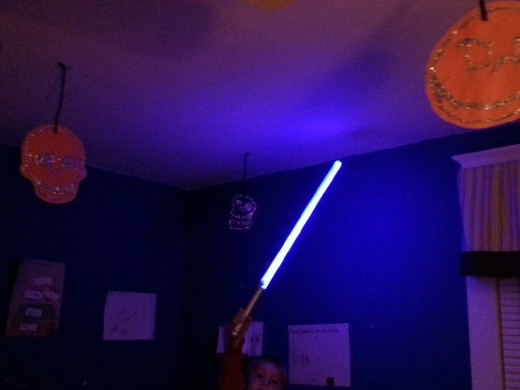
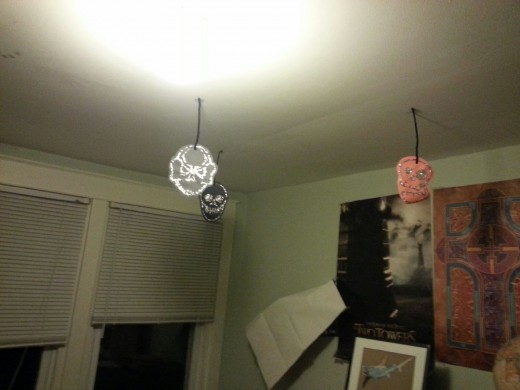
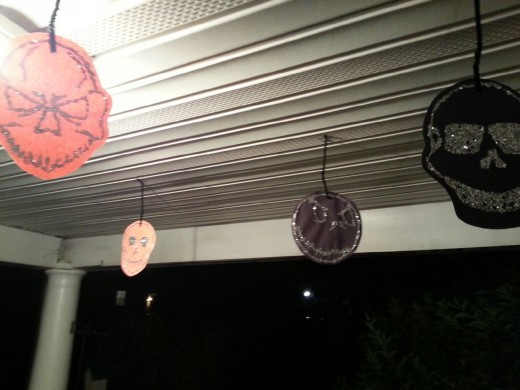
The Finished Product - Check out these sparkle skulls!
Click thumbnail to view full-size


Skeleton T-Shirts on Zazzle
While you're here, why not check out my latest skeleton t-shirt Skeleton Rising For Holidays on Zazzle. It's great for the holidays, or anytime, really.
