- HubPages»
- Arts and Design»
- Crafts & Handiwork»
- Textiles
Crochet Amigurumi for Beginners, Can Beginners Learn to Create Adorable Soft Animals?

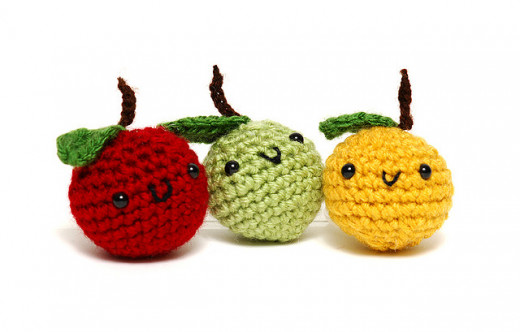
Cute Easy to Create Amigurumi Apples
Can a Complete Beginner Learn Amigurumi?
The short answer is yes you can.
If you love the Amigurumi soft stuffed toys you can learn to do what without worrying about the other types of crochet. All you need to do is learn a few basics and you can start to create your own simple crochet animals.
How do I know this?
A year ago I couldn't care less about crochet of any kind. Then something happened to change my mind. My sister had started to learn. On Christmas day while at my mums my sister asked us both to close our eyes and she dropped a crocheted animal in our hands.
I loved it. I was smitten. I wanted to do it. I did a full 180 degree turn about on crochet.
There were only two problems. I couldn't crochet. I am left handed. This makes it very difficult for others to teach me and for me to follow instructions which are all back to front to me. (This page is right handed instructions)
So with a lot of help from YouTube and the fantastic tutorials on there and some lovely patterns I attempted to learn Amigurumi.
After several failed easy peasy mice, and the occasional throwing of yarn across the room. I gave up and decided to create a bear instead. (I have included the bear pattern I used later on the page) 45 minutes on row one!
This page will take you through some of the things I have learnt in order to help you. You will learn what you need to get started in Amigurumi. I will share tips that I have picked up that will hopefully save you time. And show you where to get some fantastic and easy patterns for free.
There are, however lots of pages on crochet stitch basics so they are already well covered and do not need to be again. So while they will be mentioned, only those specific to making your stuffed animals will be shown in more detail or have a video.
Crochet Stuffed Animals, Roly Poly Cat
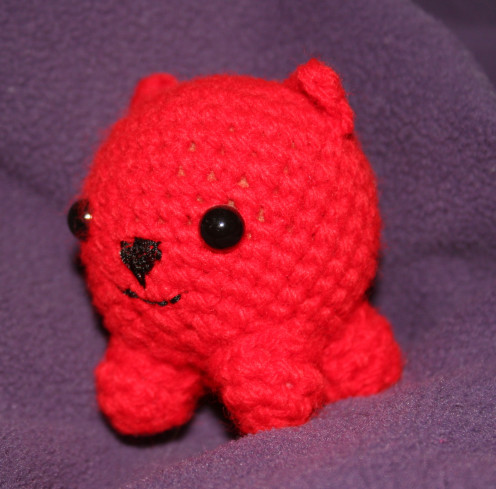
Start with Simple Roly Poly Cats
Start with something simple like these Roly Poly Cats. All the basic elements that you use in creating different Amigurumi animals are included. You have your rounds, your magic circle or ring your increasing and decreasing. And your SC or single crochet (double if you are in the UK) And sewing together.
They come complete with your basic round for the head, legs or arms ears and tails. They are fairly small so quick to do, but the smaller elements may be a bit fiddly until you get used to it.
Note: the pattern has used and adjustable loop instead of a magic ring (MR) to start. You can decide which you prefer to use.
Simple Apples
Begin with the Simple Apples
If you would prefer to start with the simple apples from the picture at the top of the page I have found a similar pattern on The Craft Frog. Remember to add the eyes before stuffing.
You can sew the eyes if you don't have any safety eyes using a strong black embroidery thread.
Stitches and Abbreviations You Will Need to Create Your Stuffed Animal
Below in the table are some basic stitches you will need to create your first Amigurumi animal.
This page will use US right handed stitches because there are more people using both of these. If, like me you are left handed you can find the left handed equivalent videos on YouTube and I have created a beginners left handed how to crochet page to help you as well.
You will find that most Amigurumi uses these main stitches, but you may have others as they get more complicated. I have included stitches and techniques that will make your Amigurumi progress more smoothly like the magic ring and the invisible increase/decrease. These may not be mentioned on your pattern, however you should be able to use them instead if you want to.
Table of Basic Stitiches and Abbreviations Needed for Most Amigurumi
US Abbreviation
| US Stich
| UK Equivalent
| UK Stitch
|
|---|---|---|---|
SC
| Single Stitch
| DC
| Double Crochet
|
sc2
| sc with the number after is is single stitch and then how many
| ||
MR
| Magic Ring
| MR
| Magic Ring
|
inc
| increase
| ||
FLO
| Front loops only
| ||
dec
| decrease
| ||
inc
| increase
| ||
fo
| finish off
| ||
BLO
| back loop only
| ||
sc2tog
| single crochet 2 together, decrease
| ||
ch
| chain
| ||
sl st
| slip stitch
| ||
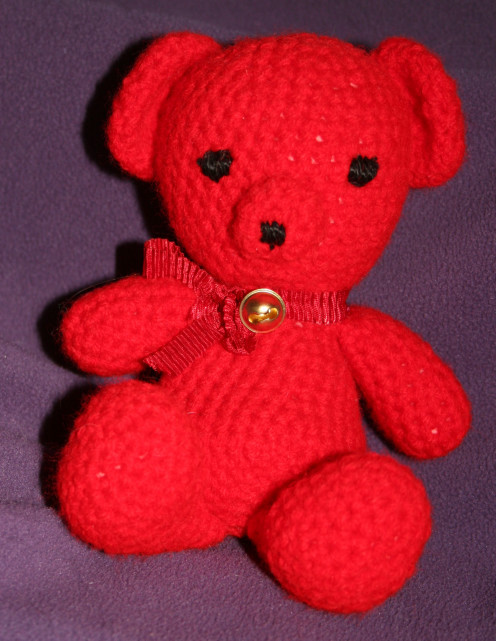
Meet Jingle My First Successful Project
Six Useful Tips
- Use light yarn it is easier to see the stitches.
- Don't start with too small a project, these can actually be harder to do.
- Use a reasonable size hook.
- Always mark the start of your row so you know how many you have done and where to go back to if you get it wrong. If you don't have a stitch marker use some yarn but be careful not to accidentally pull it out. I think most people mark their last stitch but I admit I mark my first stitch.
- Don't give up. Sometimes it can take a while to get it right.
- Make a note of what round you are on, it can be easy to forget.
What do You Want to Make Poll
What do you want to make in Amigurumi?
More Useful Tips
- The back or inside of your project is the part with the beginning yarn hanging down.
- Do not cut the yarn too close to this.
- From the front of the project, just behind the hook you can count how many rounds you have completed.
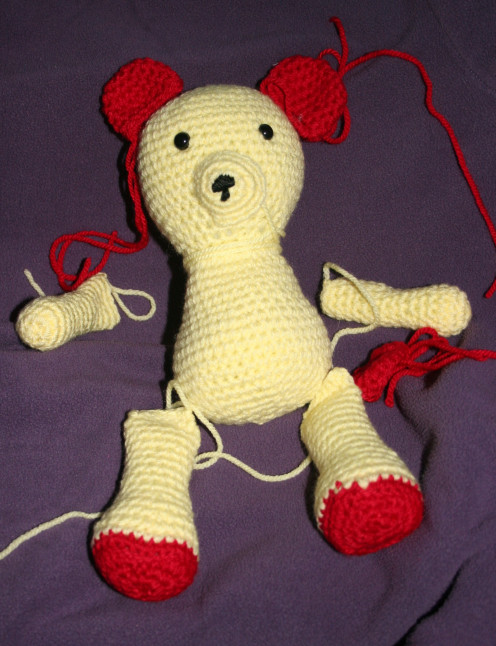
Yellow Bear Parts - My Third Project
Crocheting in the Round and the Magic Ring
Most patterns creating soft toys work in the round. That is rather than working in a row you start off with only a few stitches in a circle and increase and decrease as you go. This creates the heads, bodies, limbs and tails of various creatures.
Tip: If you are new to crochet, I recommend you start off with something simple to do. An animal that grows fairly quickly means that you will be able to see what you are doing more easily.
The video below shows you some starting methods.
Creating A Magic Ring
The Invisible Decrease
The invisible decrease is very useful in Amigurumi as you spend a lot of time either increasing or decreasing on your round to create your body parts. You don't have to use this method, however by doing so it creates a smooth finish and as it says on the box, it is invisible.
The invisible decrease is worked in the front loops only (FLO).
Beginners tip: It may be just me, but I find it difficult sometimes to see where the next stitch is after the decrease. The yarn tends to pull to one side. Until you get the hang of it it may help to pop in a marker or take note of where the next stitch is so you don't accidentally go back into it.
Note: Planet June, the creator of this video does a left handed version as well.
Invisible Decrease for Amigurumi (Right Handed version)
Great Places to Get FREE Amigurumi Patterns
Amigurumi Freely or Amigrurmi to Go does some lovely patterns that are easy to follow, clear and creates beautiful animals of all kinds. I have linked to the bears as they are more straight forward. Also there are video tutorials that are really in-depth so if you hare having difficulty you can see what you need to be doing.
Ravelry is a great place to go to love for many patterns as most people put them on there even if they have their own site. There are lots and lots of stuffed animals including the ones on the site above. Everything from pumpkins, ghosts, cats, mice etc. If you register on this site you can keep the patterns you like in your own library. On the right hand side of the pages with a pattern on there is a green bar that shows you how difficult others think that pattern is. It is worth noting, however be careful as an experience crocheter might think it is easy but you may not to start with.