Cropping and resizing images for the web


Today, a fellow-writer here on this site asked me how to create uniform square images such as the ones you see on the right. In fact, it's very easy following a few simple steps.
I often use Photoshop but don't worry if you don't have that program on your computer. The steps are the same on any drawing program, even the free ones you can find on the internet. For the purposes of this step-by-step demonstration I've used a free web-based service, Pixlr. (www.pixlr.com)
The first thing you need to do is to save the images you want to crop. If I'm making them for a specific article, such as the one you see on the right, I create a new folder and save them there.
Then it's simply a a case of proceeding like this. See the step by step instructions.
Materials:
- Computer
Tools:
- Simple drawing program
Instructions:
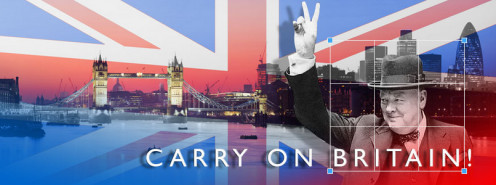
1. On the right, you'll see the image I want to crop. I simply add it to the drawing program (file > open > new). I like the idea of cropping Churchill and the word 'Britain' into a square.
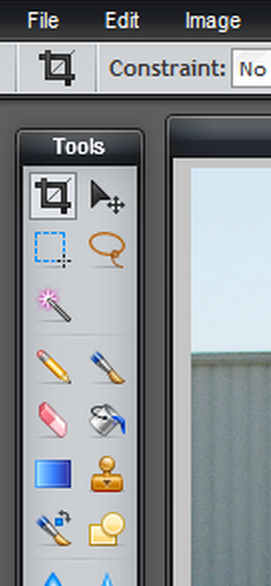
2. I'm going to use the cropping tool which is the one you see in the image - the square which is located top left on the tool pane.
It might a in a different location depending on the program you use, but just look for the square with the overlapping edges.
Click that icon to use the tool. You can see in the image above how I have dragged the tool to form a square. As you drag, keep your finger on the SHIFT key and that will ensure that the proportions are correct and the square is ensured.
If this doesn't work in your drawing program, don't worry and simply create the square by eye. The important thing is that all your images are the same WIDTH in order to get the uniform look you see above; slight variations in height won't matter.
If you're using Pixlr,set the constraints (you'll see them at the top when you select the cropping tool) to 'width 1' and 'height 1' - this will ensure a square.
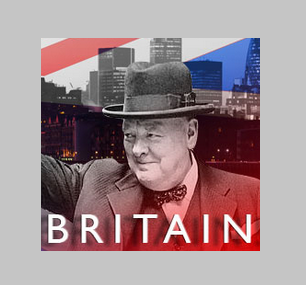
3. Once you have the square outlined,as shown in the first image, click the crop tool icon again. You'll find that the image is instantly cropped to square. See the image on the right.
If you find that the image isn't exactly right, hold down the CTRL key and then press the Z key.This will undo the crop and you can try again.Now we just need to resize the image.
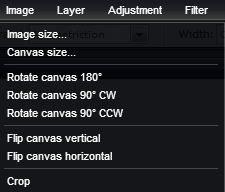
4. t the top of your screen, you'll see the word 'image'. Click on that and a drop down list will appear. As you can see there are several options but the one we need here is IMAGE SIZE.For this demonstration, I am saving all images to 90 pixels square. Remember, don't worry if the height is slightly different - 89 or 92 - it's getting the widths correct that makes the images on the page look uniform.
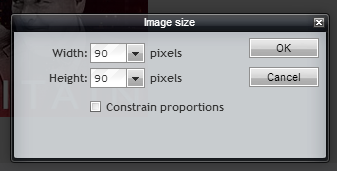
5. This box - or something similar depending on the program you're using - will now pop up. Originally the dimensions shown here were much larger but you can see that I have adjusted them both - width and height - to 90.In the next step, you'll see that I now have a tiny image of the right size.

6. Here you can see the final cropped and resized image. This is now the perfect icon to add to my page.Now it's simply a case of saving the image.
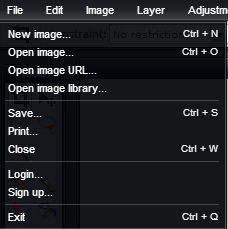
7. I think that everyone is familiar with file > save.
If you prefer, which I do because it means I can work faster, simply hold down the CTRL key and press the S key.
A dialog box will pop up and you can name your file and choose where it's going to be saved. I usually save them in the same folder as the originals but add 'crop'.
For example, the original may be 'churchill.jpg' and the new image 'churchillcrop.jpg'
Photoshop is incredibly expensive but if you're looking for the 'lite' version, take a look at the program below. For simple editing, such as cropping and resizing, plus other simple image manipulations, it's excellent.Have fun and if you have any questions, just ask.


