Design Your Own Monster - Monster Stuffies

Design a Monster Softie, Monster Stuffie, Monster Plush
Monster stuffies are also referred to as monster softies, monster plush, etc., but it doesn't matter what you call them. It just matters that you make them and make lots of them. The beauty about monster stuffies is the fact the homlier they are the better. If your completed monster stuffie resembles a young childs art project, then you know you made the perfect softie.
So don't worry about your skill level. Design your own monster with peace of mind. You truly cannot do anything wrong. There is no such thing as a monster mistake in this project.
(Photo credit Pam Irie)
Making Monster Stuffies
The Makings of a Monster
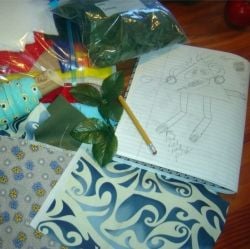
If you design your own monster, it may be helpful to start with a sketch. Then gather up all the available material and supplies you can find. Now you can begin to design your monster stuffies.
Of course, don't be tied down to a sketch either. The important thing is to let your creativity loose. You may notice my finished monster looks nothing at all like the sketch I started out with.
(Photo credit Pam Irie)
Design Your Own Monster Softie
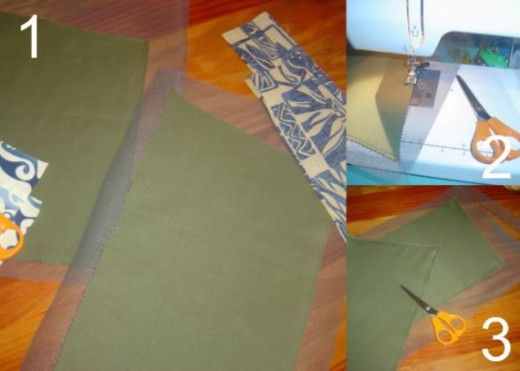
In the picture above, you'll see I used fiberglass window screen to "cover" the front and back fabric pieces of my monster's body. Fiberglass window screen is very soft and is a dream to sew. See example project here.
I laid my fabric on top of a larger piece of window screen, sewed close to edges on the machine using a basic straight stitch and then I trimmed the window screen with craft scissors. (My sewing scissors are only used for fabric.)
(Photo credit Pam Irie)
Design Your Stuffies - Monster Arms and Legs
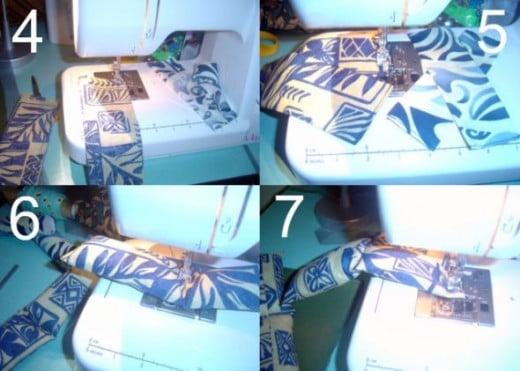
Arms and legs for my monster softie were created out of rectangular pieces of remnant fabric. Fold fabric in half lengthwise, right sides facing. Sew 1/4" to 1/2" from edge of fabric. (4)
Turn arms and legs right side out. With your hand, finger press one open end together with seam from step 4 in center. Now finger press raw edges UNDER (to inside) approximately 1/2" (so raw edges of arms and legs are now showing). Sew 1/4" from edge. (5)
Stuff arms and legs. Sew a straight seam across the stuffed appendages and backstitch. This will allow the appendages to bend. (6)
Sew raw edges together on each arm and leg 1/4" from edge. (7)
(Photo credit Pam Irie)
Design a Monster Stuffies Face

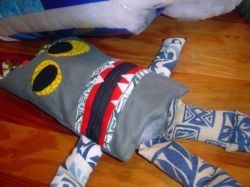
Yellow and black felt pieces were sewn directly onto the face. I freehand cut the felt. Next, I used a salvaged black zipper, some red felt and odd pieces of bias tape to create the monster's mouth. (8)
Sew the mouth onto the face lengthwise first across the face. (9)
Sew along the side edges of the mouth. Trim excess fabric and zipper so edges are neat. (10)
Three strands of red embroidery floss gave my monster softie his bloodshot eyes. You can opt to use the machine with red thread, but hand stitching this part was easiest for me. (11)
(Photo credit Pam Irie)
Pause for a Poll
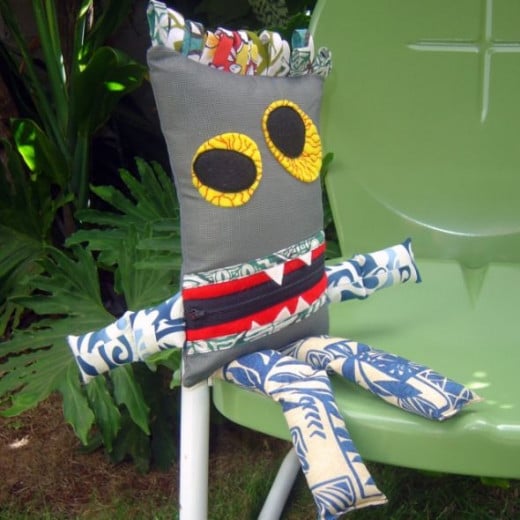
If you were to design your own monster, what would you call them?
Design Your Own Monster Softie
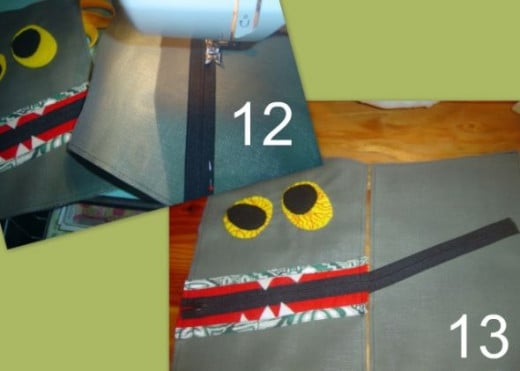
I used the leftover section of zipper to decorate my monster's back. (Sewn into position with a straight stitch along the edges of the zipper.) Just for fun, I aligned the front and back. (12 & 13)
(Photo credit Pam Irie)
Monster Stuffies Need Hair
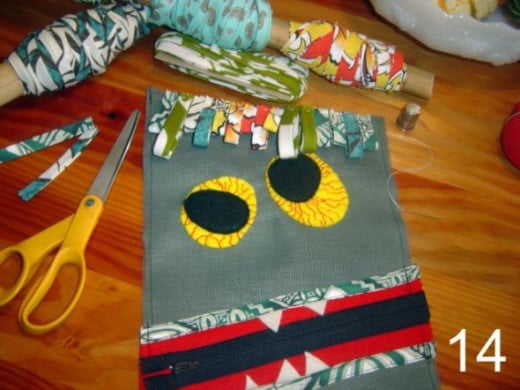
Think my stuffie's hair is a little wild? That is exactly what I intended. Creating a full head of hair for this monster softie was easy. I used bias tape I had made and I have put together a whole page on making your own bias tape here.
All you need for monstrous hair is a variety of cool fabric prints and a bias tape maker kit. They are very easy to use. I use mine often for sewing and crafts.
Cut varying lengths of bias tape and attach as shown to the FRONT (right side) of your monster. I like to hand baste the hair in place. Then I use my sewing machine to secure tape into place with a 1/4" seam.
(Photo credit Pam Irie)
Monster Stuffies - Attaching Arms and Legs
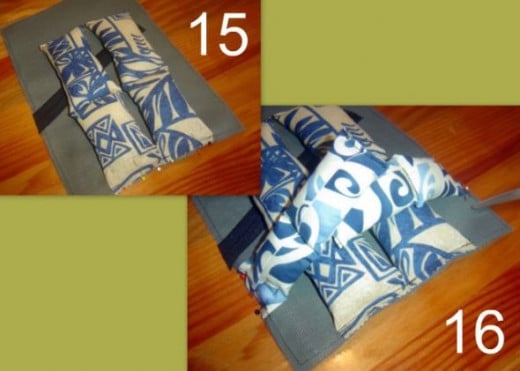
Attach arms and legs as shown above. First, attach the legs making sure the center back seam is facing you. Pin into place and sew on machine. (15)
Repeat this step for the arms. (16)
(Photo credit Pam Irie)
Front & Back View
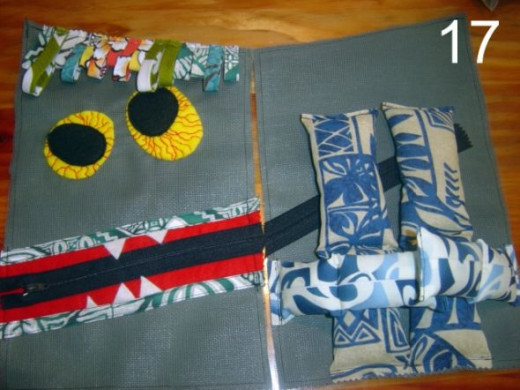
Before assembling, lay the front and back pieces as shown right sides up.
(Photo credit Pam Irie)
Assembling Monster Softie
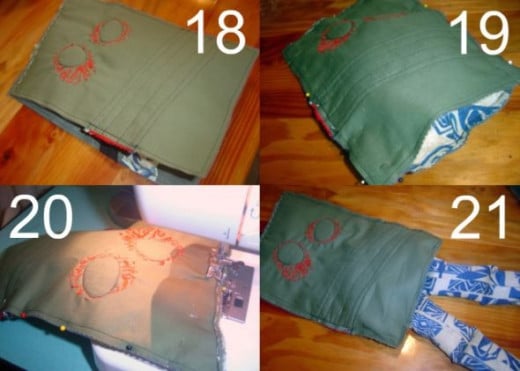
Right sides together with arms, legs and hair tucked inside. (18)
Pin edges together leaving opening at bottom edges for legs. I had some thicker sections where the zipper was positioned so I hand basted those edges together, just where it was thickest and to make it easy to sew on my machine. (19)
On sewing machine, sew 1/2" from raw edges. (20)
Taper cut all four corners with scissors, reach in and pull out legs first and then turn monster stuffie right side out. (21)
(Photo credit Pam Irie)
Stuffing Monster Stuffies
Time to stuff your monster softie.....
I like to use polyester fiberfill and insert it through the opening at the bottom of the monster. When fully stuffed, I slip stitch the opening closed by hand.
(Photo credit Pam Irie)
CloseUp - Monster Softie

Photo credit Pam Irie)
More Monster Makers - More Monsters Mean More Fun!
Having trouble designing your own monster? Here's more talented monster makers online with monsters sure to inspire.
- Sewing Monster Softies for Charity
One pattern - 9 different looks. - Monster Softie at Viola and Pearl Blog
Wool felt and fleece monster especially made for a birthday gift. - Revoluzza Shares Their Monster Magic
Download this free pattern to make a simple monster softie. - Teachers Pet - Monster Softie
An art teacher transforms her students monsters from paper to fabric. - Fleece Creatures
Cute monster stuffies with bulgy eyes and made of fleece. - 5 Free Mix and Match Monster Patterns
Patterns include FREE interchangeable accessories. Part of Share the Love projects via It's Always Autumn blog. :)

