Teaching Children How to Draw; Techniques and Ideas

Using Graphs, My then 8 Year Old Daughter Drew Elsa

Basic Drawing Lessons
I love arts. I was lucky to have an older sister who was really great at line drawing. She was always drawing something, copying figures or objects around, shading and scribbling on paper surfaces with a simple pencil (not a charcoal pencil). She was indeed my inspiration in having interest in drawing, painting and craft. I started making line drawings as early as 5. The images you will see here are my output when I was young (9 to 15, maybe).
These days, with the use of too many drawing and art software, the beauty of a handmade art seem to be overturned or maybe left aside. But, it is still valuable to encourage your little one to draw. It helps in developing his or her cognition. Remember, drawing involves fine motor skills - eye and hand coordination.
Children find drawings as a way to express themselves. If you wish to know what your child feels or thinks, you might as well give him a pencil and a blank sheet and let him draw what he wants. In prep school, most of the children's activities are creating line drawings. It is oftentimes exhausting for parents especially if this is not their line of interest. You can help your child enhance his interest in arts even if you cannot make great drawings yourself.
In learning how to draw, practice makes perfect. As a child, I literally wasted reams of bond paper in my attempt to make great drawings. Positive remarks help a lot. On the part of parents or guardians, never criticize a drawing even if it does not make sense to you or it is not aesthetic at all. In the eyes of the child, that was his best. Further, find time to help your child compile his drawings - it is the greatest way of encouraging him to do his best.
Ideas on what to draw is like quantifying the water of the ocean. You may start from what you can see around you. When you are teaching your kids how to draw start from something that interests him or her. Encourage him drawing pictures of your family or his favorite toy or his friend. Take pictures of drawings he make and compile these files online for back up.
Our Live Sessions, Teaching Kids How to Draw
Teaching Kids How to Draw, A Page of My Workbook Prepared for Kids Below 9 Years Old
Essentials
Children find drawings as a way to express themselves. If you wish to know what your child feels or thinks, you might as well give him a pencil and a blank sheet and let him draw what he wants. In pre-school, most of the children's activities are creating line drawings. It is oftentimes exhausting for parents especially if this is not their line of interest. You can help your child enhance his interest in arts even if you cannot make great drawings yourself.
In learning how to draw, practice makes perfect. As a child, I literally wasted reams of bond paper in my attempt to make great drawings. Positive remarks help a lot. On the part of parents or guardians, never criticize a drawing even if it does not make sense to you or it is not aesthetic at all. In the eyes of the child, that was his best. Further, find time to help your child compile his drawings - it is the greatest way of encouraging him to do his best.
Essentials
Find the most comfortable grip of the medium - pencil, colored pen, crayon, brush
Lines and curves
Shapes
Outlines and color
Copying and proportions
Creativity and imagination
Choosing the Material to Buy
If you want your child to become an artist, the kind of artist he or she is dreaming to be, get hold of this very helpful book. The advantage of buying this book is that it guides the child to realize his or her potentials and choose a path to track in becoming an artist. As compared to many other art books that focuses on only one style or medium, this book introduces mixed media. This could strike more interest in your child, reducing boredom to a minimum level.
Furthermore, this book is crafted to children of all ages. With this, you are maximizing the cost you have to pay for a book since your child or children can use it for a longer span of time as compared to other art books that caters only to a particular age group.
Lines, Curves and Shapes
Find the most comfortable grip of the medium – pencil, colored pen, crayon, brush
It is always wise to start with a pencil before using other tools. There may not be a hard and fast rule in holding a pencil. A comfortable grip differs from one individual to another. For me, I find it most comfortable to hold the pencil with my thumb, the index and the middle finger. The pencil rests on my middle finger while the index and thumb grips it loosely to allow a flexible movement of the pen. I put around 1 cm distance from the tip of my middle finger to the tip of the lead. This for me allows more flexibility in manipulating curves and waves.
The trainer or parent may suggest to the child what a good way of holding the pencil is but should not insist. As mentioned earlier, individuals differ in handling the pencil to allow maximum flexibility.
Lines and curves
Basic – draw straight lines – horizontal, vertical, slanting to the right, slanting to the left. This is the very fundamental exercise in making line drawings. Achieve the most straight possible lines that you can draw. For children beginners, it is necessary to start with dotted lines. Ask the child to connect the dots. The child may find this boring and tedious so the trainer should explore his creativity in giving more challenging exercises.
It is necessary that the child achieves a level of dexterity on this exercise before moving on to the curves and waves.
Shapes
If you are drawing a figure, you are actually combining different shapes. Start with simple exercises combining different shapes to create an abstract figure. From making a human figure using circles, triangles and square – proceed to target a more realistic one by adopting more curves to approximate the real figure. This is a test on how well the child was trained in the first step above discussed.
Choosing Color Pens
This set of colored pens is one of the best options in the market. Since it is colorful, your child will have a fun time using different colors with the lines and curves that he or she will draw. While using the ordinary pencil with lead is fine, it may happen that your child feels bored with gray lines which may undermine his interest and enthusiasm in drawing.
This colorful pen is perfect not only for kids but also for adults whose hobby is coloring thus, you too can enjoy coloring books and making lines and curve with your child.
Lesson 101
Lines and curves
Photo shows the practice sheet I prepared for my son. I asked him to copy the lines and curves by following the directions shown by the arrow.
This is basically what one needs to perfect to make great drawings.
Once the child does this well, show him how this lines and curves are applied in a figure. Example - make a tree. Make those branches with slanting lines and the leaves with the curves.
Do not forget to praise your child honestly for achievements.
My daughter, 5 years old, also wanted to practice so she tried copying the figures. Her output shown in the picture below.
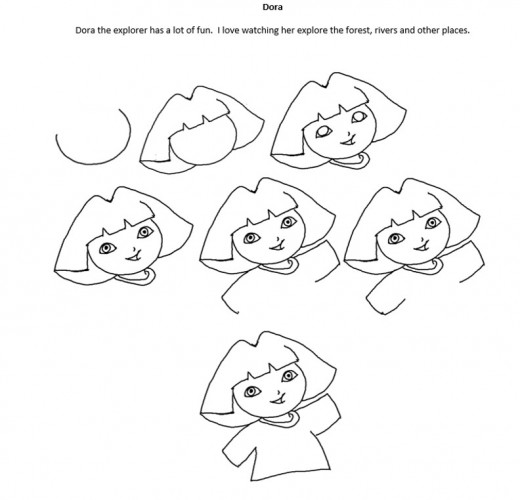
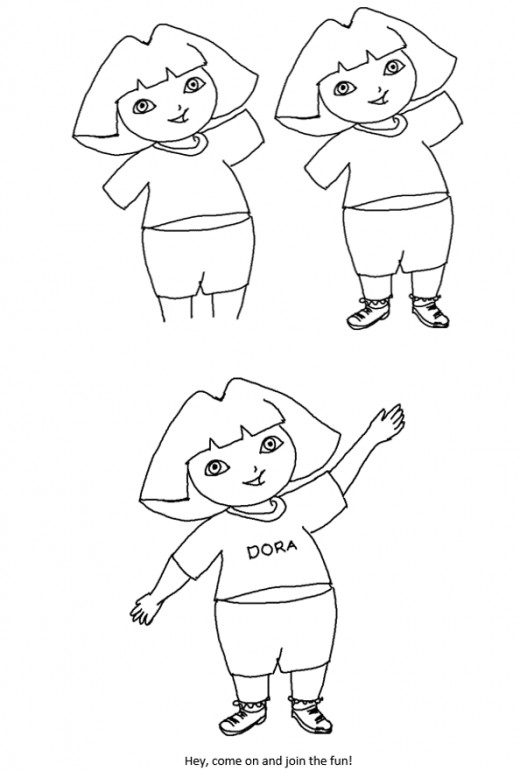
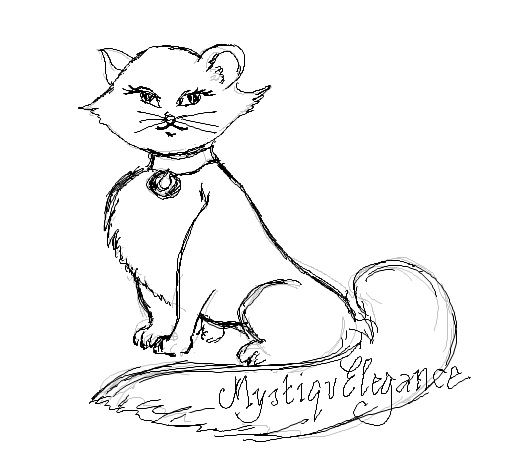
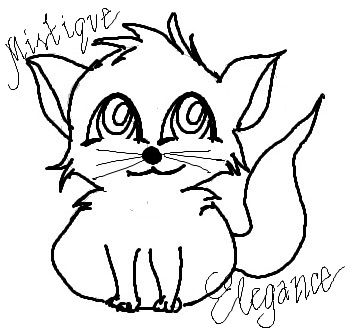
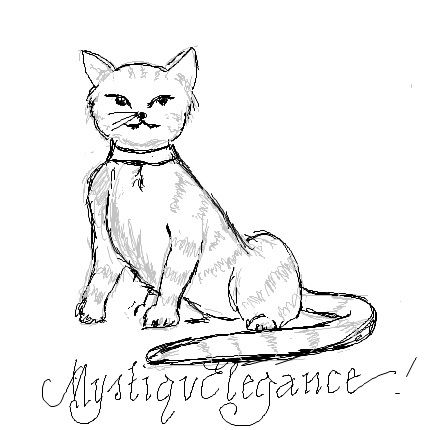
Draw A Cat
Outlines, Colors and Proportions
Outlines and color
It is encouraging for a child to come up with great output. For this purpose, it is wise to give the child coloring book of figures that he loves most, maybe a cartoon character or other figures of interest to him. To boost his enthusiasm, tracing activities can also be given. Tracing is more challenging than merely coloring a figure. When you ask a child to trace, you are encouraging him to make an outline; this would require him to draw the outline of the figure himself.
A good exercise for this is to let the child trace a figure by putting a thin sheet of paper over the sheet where the figure to be traced is printed. Let the child trace it then color it. Challenge him to re-create his work without tracing.
Copying and proportions
Now, this is a more challenging one. Get a model and let the child copy it. Start with simple objects like apples or other fruits, toys, animals. You will note that the child will have his own version of interpreting and transforming into lines what he actually sees. Be appreciative and patient.
Always start by praising the output. Then proceed to say the improvements that can be done in the language of the child.
Most often, in this stage improvements are focused on adjusting the proportions of the drawing. It is normal that the child may not be keen about this. So, if you are asking him to draw a pencil, the lead may appear too large for the body of the pencil. Work on smoothing curves too. It is expected that the child will display difficulty in creating the necessary curves in order to copy the image more realistically.
It is best to show the child how to draw the curves by doing it while he watches. Be careful not to ruin his work though. It is wise to illustrate the curves in a separate sheet; avoid overwriting on his work because it might upset him.
Creativity and imagination
This must be the most challenging part of guiding a child to draw. But, it will be totally rewarding once you get the output. Some children are highly motivated to express their thoughts thru drawings while others are a bit shy. Choices of words are really important. Children are sensitive about how other people perceive their output. Encouraging them is important but be cautious not to overdo giving praises to the point that the child will be over confident about his output that he will not strive to improve it.
Give some suggested theme. How about his favorite cartoon character or his family, his toy or his home? Focus on his interests and you will get a great result.
Observing Proportions

Using Glow in the Dark Paint or Pigment
With this glow in the dark powder, you can create different artworks that will glow in the dark. Start with a simple one - how about doing a project with your child on drawing stars and planets and make it glow using this neon green pigment. Then, you will be creating a wonderful art that you can put in your child's bedroom so that each time he or she goes to bed in the night and the lights are off, he/she will stare at the glowing drawing and feel proud. It would surely be a project done with quality time spent with your child. In addition, glow in the dark artworks will also help your child transcend his fear of the dark.


