How to Make Coasters and Bookmarks with Flowers, Leaves, and Old Cloth


Coasters and Bookmarks: An Easy Nature Craft Project for Kids
Years ago, I took care of my five year old niece twice a week. She was with me in the afternoon for 4 to 5 hours. I was constantly looking for craft projects to keep her busy.
I came across the floral iron on transfer craft project in some magazine. I modified it so that it would be easy enough for a five year old to do without getting hurt or bored. Then I sprung it on my niece.
My niece was involved in every step from collecting plants and flowers to creating the designs. The only part I did was the ironing. The coasters turned out really great, too! We enjoyed ourselves so much that we did this project several times.
I'm going to walk you through the step for creating this craft project. It's easy to do and a great way to occupy a child.
An Arrangement of Leaves

What You Need For This Project
Check out this list
You only need a few things to make these great coasters.
1. Iron on transfer paper. I used computer iron on transfer paper which I had on hand.
2. Used cloth, preferably light colored. We cut up an old pair of soft, faded jeans for this project.
3. Small flower and leaf clippings from the garden
4. An iron
5. A towel to guard against burning the transfer paper.
Optional:
Pinking shears or other fancy edge scissors for cutting out the squares
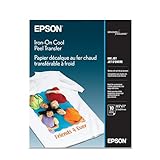
You'll need iron on transfer paper for this project. You can use the regular type or the type that is designed for computer printer.
All the coasters on this page were made using a leftover package of computer iron on transfers. It is easy to work with and seals around the bumpy edges.
Do a test first. Make sure that the transfer paper seals correctly. Let it cool, then peel off the backing paper.
First Step, Cut the Cloth

Step One: Cut Out the Cloth Squares
You or your child can do this
The first thing you should do is cut out the cloth squares. This step can be done in advance. You can save the squares for when you're ready.
Decide what size you'd like your squares to be. Then cut out a square piece of paper to match that size. My squares are approximately 4 inch by 4 inch.
Next, cut out each square to fit the template. If you would like a fancy edge, you can use pinking shears or other design scissors to cut your cloth.
Note: You don't have to make square coasters. Figure out what design you'd like to make and cut it. The shapes in this image are for a square coaster and a rectangular bookmark. The possibility are endless on what you might create.
Use thin flowers and leaves
The thinner the greenery the less likely it will rip or pop the iron on transfer paper.
Step Two: Cut Out the Iron Transfers
More scissor work
The iron on transfer paper needs to be cut into squares. Match up the transfer paper to each coaster and cut to size. Make sure to use straight edge scissors for this part.
Be sure to cut the transfer paper slightly smaller than your cloth squares. This is especially important if your squares don't have a smooth edge. Do not cut it to the pointed edges. You want it to fit without overlapping the spaces in between the points. Otherwise, when you heat them with the iron the spaces will be filled with a gooey film from the iron on transfer.
This step can be done in advance or at the time you do the project. If you do it in advance, be sure to keep each transfer with it's matching piece of cloth. Otherwise, they might not match up correctly later.
Note: You don't have to make square coasters. You can cut the cloth into whatever shapes you like. We made rectangular bookmarks as well as square coasters.
Where to Find Greenery

Step Three: Collect the Flowers and Leaves
Kids love this part!
You want to collect your flowers and leaves when you are ready to do the project.
Select small flowers that aren't too bulky. The thinner the flower the easier it will be to press them down under the transfer. Thicker flowers, like dandelions may work, but sometimes they pop through the transfer paper and tear it.
You can select large flowers if you like. However, when using large flowers, you will be using them in pieces rather than as whole flowers. You can make a beautiful design by separating the petals and placing them one by one.
Leaves should be small and flat. Different types of leave leaves make a nice design. You can also collect blades of grass and intersperse them with your petals and leaves.
Don't overlook weeds. Milk weeds, clovers, and other normal garden pests are great for this project.

Pinking Shears for Creative Edging
Want to have a fancy edge around your coasters and bookmarks? Using pinking shears or other craft scissors. If you sew, you probably have a pair in your sewing kit.
There are also craft scissors that have a variety of blade patterns. I would recommend testing them on a piece of scrap cloth to make sure they can get through the material as many of these types of scissors are designed to cut paper. They may not make it through the thickness of cloth.
Cover your ironing surface
Iron on a wood or tile surface with a towel underneath the coaster to prevent any burning of surfaces or melted remnants from sticking to surfaces.
Step Four: Arrange Your Designs
Be as creative as you like!
Now comes the creative part! Select a piece of cloth to use as your background. If you have not cut out an iron transfer to match it, do that now.
Next, select the different flowers, leaves, petals, and grass that you'd like to use in your design. You can use a variety of items on each cloth, but try not make it too thick. The thicker the greenery, the higher the risk of ripping the iron on transfer when it is melted.
Be aware of where the edge of the transfer paper will be. You want to have your design in the middle with some edge or transfer paper so that no part of the plants are sticking out when finished.
There are so many different ways to arrange your items. You can use them in one piece or tear them apart and create a whole new design. Anything goes. Let your imagination fly!
Do you enjoy nature crafts?
Crafting from Nature - Making things from Mother Earth
There are so many plants around us and so many things that you can create from nature! If you have plants and trees nearby, you can create a ton of things.
I think it's kind of neat to be able to use the natural materials around us to create something. Those weeds you hate cropping up in your lawn can be use in different craft projects. It's all in how you see it.
Step Five: Time for Ironing
Adults and older children only!
The last step is to iron the iron on transfer to your cloth. Place the pre-cut sheet over your design with the paper backing facing up. This is very important! Take it from someone who has accidentally ironed on the transfer side. It makes a huge mess, let me tell you.
Place a towel or thin cloth over the whole thing to make it easier to iron. Be sure your iron is warm before starting. You want to press and hold the iron on top of the design rather than pushing back and forth. Don't leave the iron in one place too long though as it might make burn spots. You do not need the iron to be on the hottest setting. You may have to play with the temperature until you find what works best.
Gently iron over the towel a few times. Check from time to time to see if the transfer has adhered to the cloth. Once it has adhered you can stop ironing.
Let the whole thing cool. When it is cooled off, peel back the paper. You should end up with a clear transfer and a lovely design.
Iron on the right side
Be sure that you have the iron on transfer facing down and the peelable paper facing towards the iron.
An Alternative Method - For older kids and adults

Originally, this project was designed for a stamped design rather than using whole flowers and leaves. However, this step proved too difficult for me and too dangerous for a five year old. You are welcome to try it out and see if you like the effects.
You will collect the materials the exact same way. However, in this variation, you will "press" the greenery into the cloth with a hammer making more of a stamped impression.
Arrange a couple of items on the cloth. You can put all your stuff on at once or add them as you go. Then put a towel over the whole thing. The cloth will get stained, so don't use your best towel.
Next. hammer over the top of the cloth or towel. Use enough force to smash the greenery underneath the cloth so the color bleeds into your piece of cloth. When done, lift the cloth and remove all the greenery. What you will see is stains in the shape of greenery you used in your design.
We tried it this way (me using the hammer!) but it proved a little to difficult. A stronger person that this 80 pound weakling and a five year old may get better results.

Grow Your Own Plants
Kids love seeing how things grow. Why not try a mini garden that you can grow indoors? There are many kits that provide you with everything you need including the soil.
You and your child can plants the seeds then see your plants flourish. Maybe there will be some leaves to use for your next coasters!
Examples of Coasters and Bookmarks Made by an Adult and Child
Click thumbnail to view full-size


Do you think you'd like to try out this craft project? Do you enjoy working nature into your craft projects? Tell us about what crafts you enjoy in the comments.
© 2011 Melody Lassalle


