Flowerpot Word Garden - Earth Friendly Craft with Duck Tape - Picture Demo - Printable Instructions

Summer is for fun and flowers.
Fields of flowers are one of my favorite things about summer. I don't think I ever met a flower I didn't like. Did you?
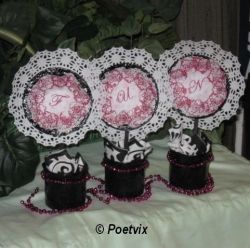
This article will detail in pictures and words how to make the Flowerpot Word Garden in the pictures. The directions can be applied to any color scheme or theme desired. The word art part is of course, optional.
I like the current fashion trend of using word art, for lack of a better term, in home décor. Me being me, I don't like the prices that it typically goes for. Here's a neat, easy and most affordable way to create some of your own, or just a cool flower garden display for a windowsill, book case, shelf, or anywhere really. The best part is that it won't wilt!
Image credits; All photographs are my own original pictures taken by me, Vix.


Check the photo gallery below.
You will learn what makes it smell like flowers, too.
This is a simple craft that does not require much in the way of supplies. It's highly adaptable and very forgiving.
The main materials are tin cans, pie tins, doilies, paper napkins, glue, Popsicle sticks, Epsom Salts and Duck Tape, also commonly referred to as duct tape. Most of this, if not all, you most likely already have.
This project can be done by children or adults. Regular white glue would work for the little ones. They do need to be big enough to be trusted not to try putting anything in their mouths, or be supervised, if that is not the case.
Lastly, while it is really super simple to make, it does take some time. Smaller children will benefit from doing it in stages with breaks between.
I used stamps and ink to make the letters here, but you could just as easily draw them, or print them off the internet and glue them on. At the end of the article, you will find printable directions for how to make your own flowerpot word art garden. You will also find a list of supplies and good substitutions.
How to make a Flowerpot Word Garden
Click thumbnail to view full-size


. I did the stamps first, and then had to be really careful to get the sticks centered right. I think it will be easier to do the sticks first and then just be sure your stamped centers are in pos")


 add five to seven drops of scented oil and mix together with a spoon or your hands. Wash hands immediately after this step if you mix by hand. I used Jamaican Plumb scented oil,")


Take nothing for granted.
There's no better time to start than today.
All children, and some adults, should be reminded to never sniff the Sharpie.
Letter stamps can be used thousands of times over.
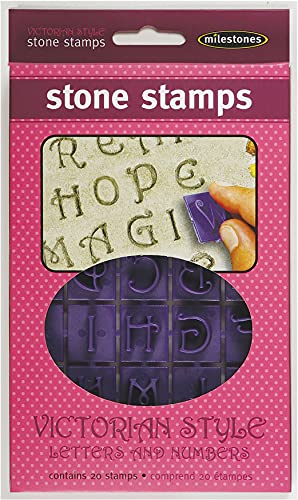

Stellar stamps

How easy is it?
How easy do you think this project is?
This one is so easy.

Print the letters off the computer in pink font. Using pink ink, stamp a flower all around the edge of the inside, smaller doilies.
More beautiful stamps.
I really like the versatility of stamps. They can be mixed and matched with each other or with other kinds of things like stickers, foam cuts, and of course, the ever popular glitter.
Here's a fun way to use a stamp. Paint something with Puffy Paint, just before it's dry, stamp it! You get double the texture.
Lastly, stamps are great for kid crafts as well as adults. Often, children get so quickly discouraged because they do not yet have the fine motor skills required to get great looks. With a stamp, they can get the look while improving the skills. Seeing good results from their efforts lends motivation to keep going. A repetition of that pattern leads to a good work ethic and the self confidence to face new challenges.


Have some fun and give it a go!
Substitutions:
* For salts - Pebbles, stones, marbles, dried beans, cat litter.
* For decoration - Stickers, foam cut outs, beads, pictures.
* For crafting sticks - Pipe cleaners, dowel rods, cardboard strips.
* For doilies - Construction paper, foam sheets, printed pictures.
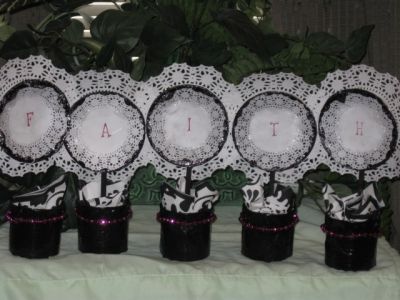
You can do a whole word or sentence in one flower, - if you want to.

With this one, the Sharpie step was not done resulting in a plain silver border. I kind of like it. The can is decorated with glitter foam cut out stars and one star shaped stud that I pressed into the tape with my finger. When doing so, be sure to hold the inside of the can at the same time to keep from denting it.


Flowers bloom in the warm summer sun.
Enjoy while you can and have some fun.
For winter's bite will bid them adieu,
until springtime when they come anew.
Do you like crafting with duct tape? - How to make a duct tape rose
Perfect break times for the younger ones:
After the coloring and after the mixing are the perfect break times for the little ones. They need to wash their hands at these points, anyway.
Frugal tip -
Keep a few large and small bowls on hand just for crafting. Permanently mark them so no one gets them mixed in with the good dishes used for eating.
After holiday or seasonal sales, you can grab the huge plastic ones at Wal-Mart four for a dollar.
Useful resources:
- Easy Metal Look Charms
This is the coolest project and it's where I got the inspiration for the Sharpie part. - Cool Text
This is a super resource for printing letters and word art. It's free to use.
Think parties -
What a really cute addition this would make to place settings at parties.
For each guest, do a single flower with their name in it. Fill the can with individually wrapped candies :). Kids would love it.
Here's a fun activity that kids will love and moms can afford.
Help them explore a garden of words. They will bloom right alongside the flowers they create.
Cook Time
Prep Time: 5 minutes
Total Time: 30 - 45 minutes depending on how fancy you get.
Serves: The whole family
Ingredients
- Tin Cans
- Pie tins
- Crafting sticks of Popsicle sticks
- Duct Tape
- Tin Foil
- Epsom Salts
- Paper napkins
- Scented oil (optional)
- Decorations
- Bling (optional)
- Doilies big and small
Instructions
- Get a bowl that will not be used again for eating, glue, scissors and a Sharpie marker.
- Assemble the materials and cover your work surface. This can get messy, so don't use something nice. Newspaper would work well.
- Cover the cans in Duck Tape. Fold over on the top and bottom. You may need more than one ring of tape.
- Cover the pie tins in tin foil. Press it down really good into all the little cracks.
- Color in the little cracks with the Sharpie marker.
- Color the crafting sticks with the marker or cover in Duck Tape.
- Put the letters on the doilies by stamping, writing, sticking or pasting.
- Glue the sticks to the backs of the pie tins.
- Center the lettered doilies in the pie tins and glue down. Use a good amount of glue.
- Glue the pie tin to the larger doilie.
- Add the scented oil to the Epsom salts and mix together (optional). Decorate your cans now if you decide to.
- Line the cans with the paper napkins.
- Hold the can over the bowl of salt and carefully spoon it into the cans.
- Put your flowers in the cans.
- Check it out! It looks good.

While the instructions are free for anyone, please do not copy photographs or text for republication online or off.


