Make Beautiful Windows And Suncatchers, Create Privacy With Gallery Glass!


Tired Of Looking At The Same Old View? Change It With Faux Stained Glass!
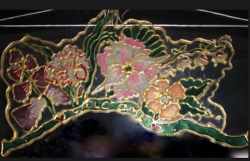
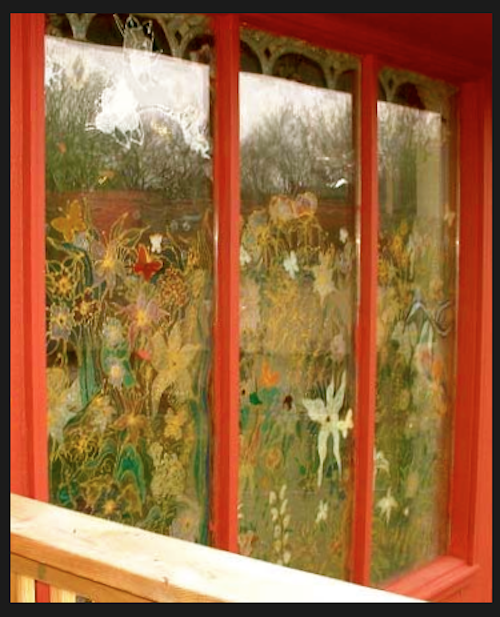
Many years ago I created my first suncatcher with Gallery Glass, and that began a long-lasting love affair with creating faux stained glass! For many years, famed artist Donna Dewberry (think One-Stroke Painting) promoted Gallery Glass products for Plaid. She created dozens of pre-printed designs which could be resized to fit on a copier, then traced and transferred to your working surface. The design shown in this photo, my former bathroom window, was done with one of these designs. I created it working flat on a table, using inexpensive freezer paper as a working surface. Then I moved sections of the work to the window, which was about three feet wide, when it was dry. (The design isn't actually crooked - it's a visual illusion created by the different protrusion of the right side of the sliding window.)
This window shows one wonderful feature of Gallery Glass - it can create privacy where none exists, such as in this bathroom. As you can see, the clear portions of the design (the background) still show the outdoors to a degree - you can tell what the weather is, for example -Â but no one can see in. The back side of our house then was nothing but floor to ceiling windows in almost every room, and was a southern exposure. Adding the glass covering eliminated a problem we had with the dining room vinyl floor fading from sun exposure! We replaced the floor, I put in the new window, and no more problems.
This lens represents the first time I've looked at the photos of my windows in a very long time. You see, I created a houseful of what was, to me, very beautiful art, in the house I thought at the time was my "forever home." The railroad where my husband works had different ideas when he was promoted and relocated 500 miles away! The realtor demanded that all my painstaking glass work be removed from the windows. My heart was broken, and I couldn't bear to destroy it myself. My teenage kids were enlisted for that job (one they relished, I think!)
That brings up a very reassuring point about investing your time and expense placing Gallery Glass designs on your windows. If you ever change your mind, or have to move as I did, the designs ARE removable! I would recommend for ease of removal that you leave a small (1/4") margin of clear glass around the outside border of your design. That way you won't accidentally damage your window itself when you remove the glass with a sharp object. If you mist the glass art for a few times over a day or so, it will soften the glass a bit. You can then carefully remove the window art in segments and transfer it to freezer paper, thus preserving your hard work. You can always repair any problems with more glass paint. I wasn't so lucky... my designs all went in the trash.
You might want to get a taste of Gallery Glass by doing a small kit, such as a suncatcher. You'll get a feel for how the product works on a small scale at very low cost. Once you get "hooked," and want to do larger designs, you'll be buying your colors by the bottle! Most of those, as shown here at Amazon and on eBay, are available for $3 or less per bottle. The bottles last a very long time if kept in a cool dark place.
So...what will you create?
Try Gallery Glass With This Easy Suncatcher Kit! - You Will LOVE This!

The Easiest Method For Window Designs -Work Modular!
Create Designs Flat, Let Dry & Apply To Glass
By far, the simplest way to do Gallery Glass is by working on a flat surface. Nothing runs or drips, mistakes are easy to correct. Just finish your design, walk away and let it dry! Come back the next day, or the next year, peel up your design carefully and apply it to your glass surface.
For a period of time, designs are easy to reposition on the glass so you can get it just like you want. After a few days or weeks exposed to daily sunshine, the glass will become a little more brittle and you can get boo-boo's. But even those are easy to fix! Just reposition the art where you want it, then touch up the broken or torn area with a bit of the same color of glass, and it's like it never happened.
Plaid, the maker of Gallery Glass, sells wonderful sheets to create your stained glass on. But when you're working on a very large project, like the picture windows shown in this lens, that can get expensive. I discovered early on that the big rolls of freezer paper are wonderful for this purpose. Roll out the length you need, and work on the shiny slick side of the paper. You can also store your completed designs on this paper sandwiched between two sheets, only shiny sides touching the glass. I have kept designs for years in this manner.
The photo here is one example of this. I created it freehand with the modular method, then stuck it onto an antique mirror later. The Welcome plaque lived on various glass surfaces - I'd change it around now and then.
Gallery Glass Leading also comes in convenient strips that you just peel off the sheet and apply! Now how easy is that!

Make a Gallery Glass "Collage!"
My Kitchen Window Was Done Like This.
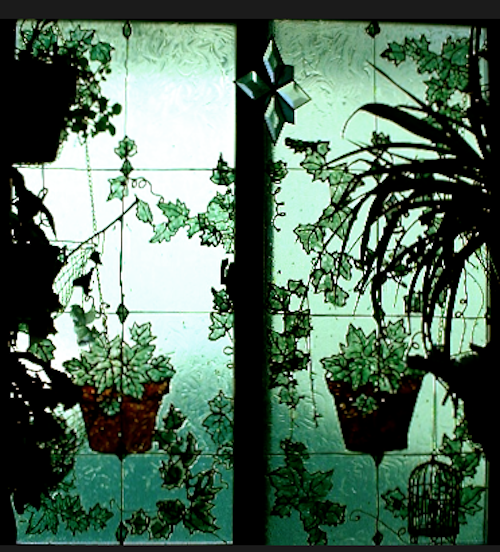
With my first glass kit came a whole lot of pretty bird and plant designs. I'm never satisfied with a project until I rearrange it many times, getting it "just right." Gallery Glass is perfect for that, because it's easily repositionable for the first couple of weeks.
I traced the design sheets onto freezer paper, then completed many small modular pieces that I could rearrange to my heart's content. Every potted plant, every other design you see on this window was done in this manner. Once I was sure I was satisfied on their positioning, I painted the clear background directly onto the glass.
The beautiful thing about that part is that you don't even have to be careful - you can paint the clear glass right over all of your designs with a large (say, 1") brush, giving them a bit more protection and blending them seamlessly into the background. Of course you could do a colored background as well... just don't paint over your modular designs with color unless you do so on purpose for the design!
Just Need Privacy?
Simply brush on Gallery Glass in Clear (or your choice of colors) in swirly strokes that suit you with a paint brush. Let dry, and apply additional coats, drying in between each one, until you achieve the desired level of privacy!
Using Trompe L'oeil (Trick The Eye)
Create a window where none exists! Just buy any mirror, complete your glass design on it, and hang it!
Remember This...
NOTHING is permanent with Gallery Glass! You can always add, subtract, or change your designs! Say you have a red birdhouse and you decide you want black. Just paint over it!
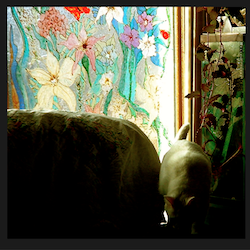
My Living Room Front Window Doggie Mural... - Floor To Ceiling!
This was a labor of love! It's a freehand mural of my own Miniature Schnauzers Scrappy Jack, Sparky and Sheina Marie, plus rescue girl Caesy Anne. The only one of them living now is my Scrappy Jack, who is 10!
As with the dining room window, I added the lattice work at a later time. If you notice the clear background, you will see the texture I was able to achieve with a big paintbrush.
This mural was created entirely freehand by painting directly onto the glass! Later on, I added the modular lattice trim design from a kit. The only thing tough about it was maneuvering myself into difficult positions and staying there long enough to paint! (I've had four back surgeries!)
Another nice thing about Gallery Glass - you can mix the colors! I'd set up a painter's palette or a plastic plate with the colors mixed as I wanted in small amounts, then go to work!
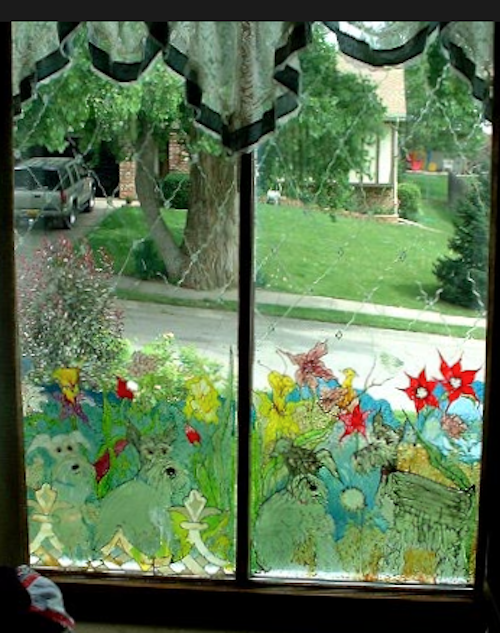
My Kitchen Window - Here's An Example Of Creating Privacy
We were very close to our neighbor on this side of the house, and I wanted a new view to look at - something better than just their green house!
This design's how-to's are explained in the next section.
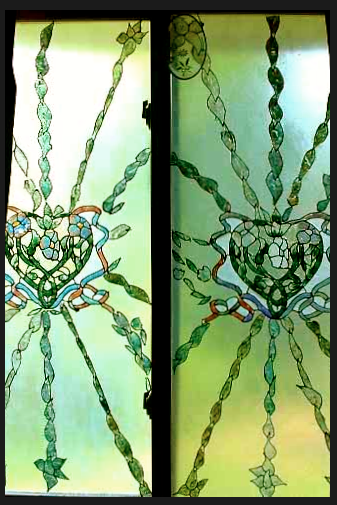
A Close-Up Of The Kitchen Window... - And How It Was Done
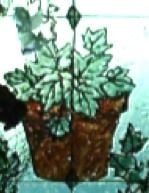
Just wanted to show you close-up detail on part of the window, so that what I explain might make more sense! The flowerpot and vines were applied first to the bare glass window (which you clean first, of course!)
Next, I applied the clear glass background with a brush using a swirling pattern. Any brush pattern designs you paint directly on the glass will stay that way when they dry! Now, how cool is that...
After that, I created "Leading" strips to create the illusion of window panes. Leading comes in white, black, and metallics, and serves as a raised line or outline to contain the liquid glass. Typically you apply leading first, let dry, then fill in the outlines with glass color. I would peel up the dried leading strips from the freezer paper, and stick them onto the glass where I wanted.
Finally, I added the little diamond shapes. Those were created by drawing them on the freezer paper, outlining the design with leading, then filling in with colored glass when dry.Then I stuck them in place, and the window was done.
My Whole Kitchen Sliding Door
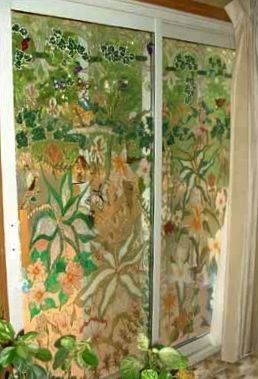
This door was one of my favorite projects. It combines the use of freehand art (the hostas and other plants) and modular designs (the birdhouses and birds). I wish now that I had done the freehand parts in modular method rather than painting directly on the window, because I could have saved and replicated my designs!
Want To Do Freehand Gallery Glass? - Here's All You'll Need!

Bedroom Window - Again... Privacy!
Can you tell I love flowers? They're in all my designs. This one is a combination of using designs from a kit and my own freehand touches here and there.
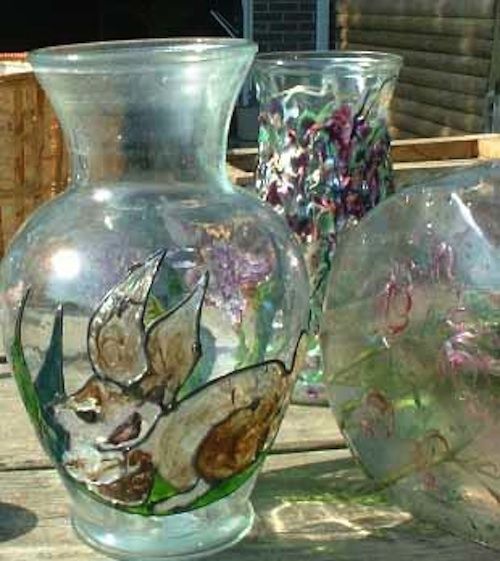
Gallery Glass On Glass Objects! - Oh, now this is where it gets really fun!
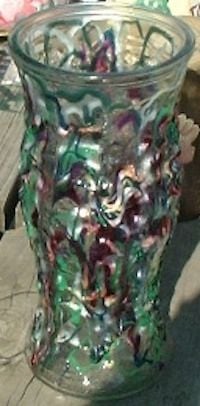
You can paint Gallery Glass, or apply modular pieces of it, on any glass surface! Vases, cake plates, bowls, you name it! You can hand wash the items in coolish water with dish detergent, and dry quickly. You don't want the glass to soak in water for any length of time or it will soften.

Oh, Think Of The Holiday Ornaments You Could Decorate! - I Have Made Dozens Of Them As Personalized Gifts!
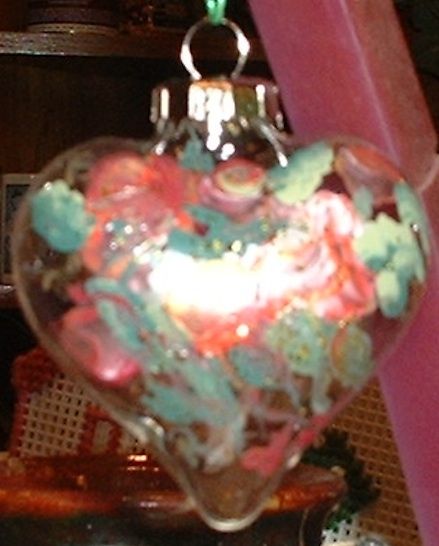
Here is where you can let your creativity run wild! Pick up a box of plain glass ornaments and paint them with Gallery Glass! Even if you just put the person's name and the year on it, it's gorgeous!
My Living Room Window From The Outside
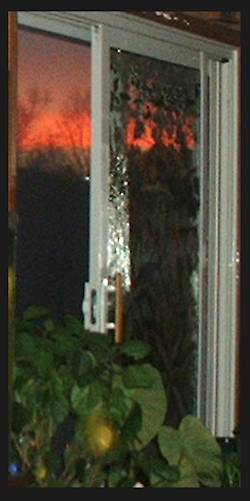
My Kitchen Door, Picturing A Beautiful Sunset (That Part's Real!)
The Whole Living Room Back Window - Wish I'd Moved Everything Out Of The Way!
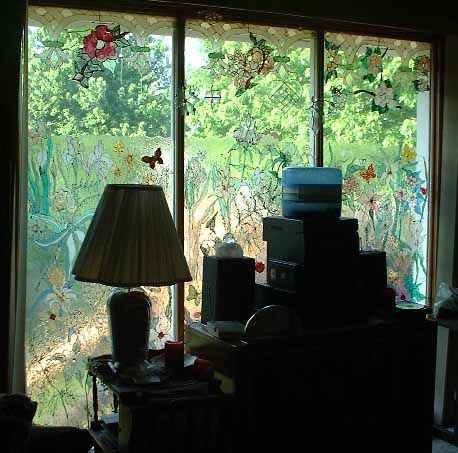
Don't learn the hard way like I did – always take photos of your completed designs in great light with no obstructions!
Removing Gallery Glass
Leave a 1/4" margin of empty glass around the outside border of your design. That way you won't accidentally damage your window itself when you remove the glass with a sharp object. Mist the glass art for a few times over a day or so, it will soften the glass for easier removal with razor blades.
Tina Cat Had Been Enjoying The Living Room View To Outside! - The animals could always see through the windows.
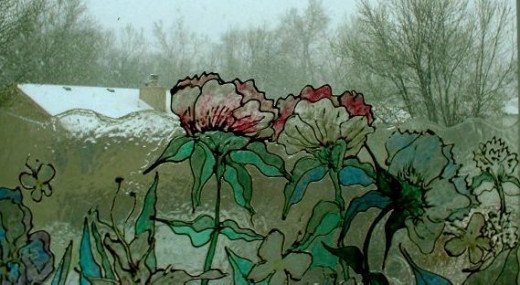
Snow Looked Pretty Thru The Freehand Flowers!
What Do You Think Of Doing Gallery Glass? - Come On, You Can Tell Me!
What Are Your Thoughts On Gallery Glass After Reading This?
Closeup Of Clear Leading - So You Can See How It Looks!
The little diamonds were just little blobs of white Gallery Glass I shaped into diamonds as they dried with a knife.
I freely confess to having taken all of the admittedly amateur photos in this lens!


