Thinking out of the Box: When Planning DIY Projects


Exploiting Wasted Space in Your Home
This article shows what you can achieve with your DIY Remodelling projects by thinking out of the box to exploit hidden and wasted space around your home? Here I give a few simple ideas and projects with examples, including before and after photos of a built in Larder in a doorway, making a kitchen smaller to make it bigger and in the process creating a cloakroom, utilising and building on from existing furniture to create a built in Welsh Dresser; turning the old fireplace into a display unit, revamping an old bathroom, and re-using old furniture to create more space in your home DIY workshop or garden shed.
DIY Projects
Do you plan your DIY projects and if so how much thought do you put into it?
How do you plan for your DIY?

1. Creating Storage Space in a Doorway
And Making a Built-In Larder With Pull Down Worktop
Based on a 1950s style larder, built in to a space replacing what was previously a brick arch. Although the brick arch was architecturally attractive, at 4ft (1.22m) wide it was a space waster when storage space is premium. In taking down the brick arch there's ample space to retain a standard width doorway and beside it squeeze in a custom-built fitted cupboard; as shown in the before and after photos below.
This design is based on an old 1950s freestanding larder that belonged to my grandparents and the enamel bread board from the original larder was fitted into the pull-down worktop. The Carcass is built from 18mm exterior plywood and the shelves, doors and drawers are constructed from pine.
Below the pull-down worktop are spice drawers and vegetable drawers. The spice drawers are used for anything other than spice, ideal for storing all those little things that tend to get lost in the back of other drawers. The vegetable drawers are made from pine, including their bases all of which have five large 1 inch (25mm) vent holes. The drawers were given several coats of varnish for easy washing. Each of these three drawers is designed to take the weight of 10kg of potatoes. I did evaluate commercial vegetable racks to fit the space as an alternative but they're all poorly designed and none of them could take the weight of the potatoes and if we tried they would have been top heavy, not lest to say they would have ill fitted the space available.

Building of the Larder (Using Space in a Wide Door Opening)
Click thumbnail to view full-size


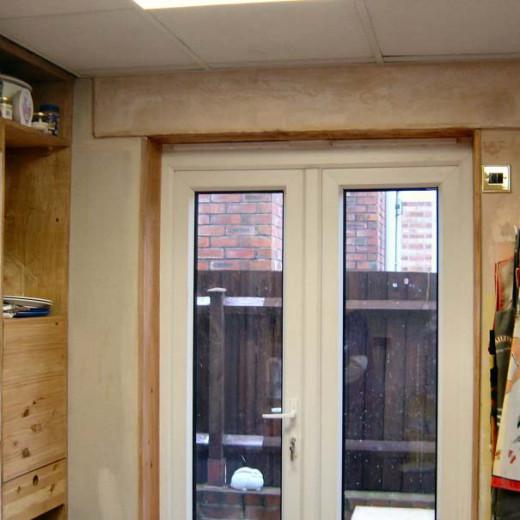
2. Making a Fitted Kitchen Smaller to Make it Bigger
Making Maximum Use of Wall Space
The Larder mentioned above was just part of a larger project to modernise the kitchen and install fitted kitchen units, which are covered in full in a separate Squidoo. Here is just a before and after photo showing where a section of the old kitchen was boarded off to create more storage space. Previously, the back door was in the corner of the kitchen (behind the plasterboard in the photo) creating dead-space in a huge area of the kitchen because access to the door was needed. Blocking off that end of the kitchen reclaimed a lot of usable space that could be reutilised for cupboards and worktops. The old back door in the space behind the plasterboard was bricked up and a doorway to the space was knocked through from the living room to create a cloakroom (see the before and after photos here). The new back door was made in the opposite side wall away from the corners to maximise on space and usage, as seen in the photos below.
Remodelling Fitted Kitchen (Step by Step Progress)
Click thumbnail to view full-size


3. Built-In Welsh Dresser Above an Existing Alcove Cupboard
Adding Storage Space to Existing Furniture
Rather than just shelves for book cases here is an example of a 'welsh dresser' built in an alcove above an existing cupboard, using pine and recycled glass; the glass having been salvaged when the old front porch was remodelled.
New Built-in Welsh Dresser (Remodelling Alcove Cupboard)
Click thumbnail to view full-size


4. Display Shelves in Old Fireplace and Utilising Hidden Space
Maximising on Hidden and Wasted Space
When we moved into our existing home the original open coal fireplace had already been converted into a traditional gas central heating system with gas fire and back boiler; the previous owners had also faced the fireplace surround with modern stonework.
However, with the ever increasing cost of gas, we decided to modernise the central heating system by replacing the old gas fire and back boiler with a combi boiler replacing the old immersion tank in the airing cupboard (in the bedroom). We did have the option of having a new gas fire fitted but as a gas fire uses as much gas as an entire central heating system we decided it was an unnecessary luxury and opted instead for two radiators in the living room (one at each end of the room); the other bonus with a new combi system is it also makes the water tank in the loft redundant so I spent a couple of hours in the loft removing that which once removed created additional storage space in the loft.
Once our new combi boiler central heating had been installed and the old gas fire and back boiler removed the old fireplace became nothing more than just a feature; we couldn’t have used it as a coal or log fire (without a lot of additional expense) because of the damage that had been done to the old fireplace when it was knocked back to house the back boiler and gas pipes. Therefore, instead, I decided to rip out the more modern surround and brick facing revealing the original opening; which as it turned out was quite large and square, and ideally suited for repurposing as a built-in display cupboard. Having got this far and seeing the potential I plastered and decorated the old fireplace opening and then added fitted plate glass shelves.
Having got thus far, on sitting down with my cup of coffee watching television and occasionally glancing at our new display shelves where the old fireplace use to be I was conscious of the blank wall above (the old fire breast) knowing that it was concealing wasted space behind. Therefore, one weekend, with help from a friend (a retired builder) we knocked through the old chimney breast to reveal the wasted space into which we built a recessed brick arch. In this newly created space I fitted a wooden back and base and then more plate glass shelves.
To fit the plate glass shelves in the old fireplace and fire breast above I fitted small inch aluminium angle on each side with a couple of small screws to support the glass and then allowing a few millimetres for a snug fit carefully measured the gap and had the plate glass cut to size by a local Glazier.


Creating Additional Storage Space in Redundant Fireplaces
Reclaiming Dead Space
In the bedroom above the living room, where the chimney continues, the previous occupant had (as so many do) blocked up the old bedroom fireplace with plasterboard; and then built a utility cupboard in front of it. In my desire to utilise any dead-space (where possible) I quite naturally removed the plasterboard and cleaned up the old fireplace. As with the fireplace in the living room below it was a square opening, albeit much smaller, which ideally lent itself to shelving. Therefore, using some scrap wood in my workshop I quickly knocked up a shelving unit which snuggly fitted into the old fireplace; thus, as this is now at the back of a utility cupboard, creating a cupboard within a cupboard.


5. Utilising Spare Bedroom Space For a 2nd Bathroom
Repurposing Living Space
A previous occupant had portioned off the end of the main bedroom to create an en-suite bathroom, but did little more than install a cheap plastic bath with a few tiles around the top of it. Therefore when a friend was getting rid of his old enamelled iron-cast bath I took it off his hands, gutted the en-suite bathroom and with the help of two friends (it was heavy) dragged the iron cast bathroom upstairs to install into the 2nd bathroom which was then fully tiled and decorated; a solid oak floor was laid and to finish oak panelling installed up the side of the bath. The remaining oak boards were used to create a built in vanity unit with glass shelves above.

6. Reusing Old Furniture for Workshop Storage
Readymade Shelving and Cupboards for Your Workshop
One of the biggest problems in a small home DIY workshop shed is keeping it tidy. Unless you're well organised and put everything back on its rack or in its shelve once used as your working on a DIY project you quickly end up with tools and materials spread all over the workbench and workshop area.
If you're like me once you taken a few tools out to do a DIY the workshop quickly become cluttered and it can take ages putting everything back after you've finished. Over the years I've found what works best for me is to have 'a place for everything and everything in its place'; a catch phrase my great grandmother, a typical house proud Edwardian mother, would frequently say to her children in an attempt to install tidiness into them.
You could go to the time and expense in buying load of wood and building your own shelves and cupboards for your workshop, or just go out and buy the shelving; if you have the time and money that's great. However, if you're working on a tight budget and you'd rather spend your time on other activities then you'll most just knock-up a few shelves and storage spaces using scrap wood. Given time you could then, as I did, gradually replace your temporary shelving with old unwanted furniture as it becomes available; provided it fits and has the potential for being functional in your shed or DIY workshop.
It helps to 'think out of the box' to see the potential of old furniture when deciding it could be adapted for use in your DIY workshop. To be functional old furniture should offer easy access storage to your tools and accessories; if tools are stuck at the back of a cupboard and are difficult to get out when needed then it's not going to work. Below are examples of different furniture reutilised in my home DIY workshop for shelving and cupboard storage.
Office Desk - When I built the shed the first and most important item for the home DIY workshop was a workbench, for this I utilised a table top from an old and redundant office desk, 3 foot (90 cm) by 8 feet (2.4 metres), the desk top was made from the same material used for kitchen work surfaces and therefore ideal as a DIY worktop bench.
Electric Fire Surround - When we moved into our present home it had full central heating installed so our old electric fire became redundant and got put into the loft. After building the shed I stripped out the electric fire and kept the wood surround, which includes shelving for ornaments and used that in the shed workshop for keeping all the main screws and nails to hand in small pots and containers.
Glass Unit - We call it a glass unit but only part of it is glass; most of it is wooden cupboard and shelves. When we replaced our old Glass Cabinet with an oak one I took the old unit down to the shed and utilised it for storage. Originally at the back of the workshop I just knocked together some shelving with scrap wood but with all its cupboards and shelves the glass Unit utilised the storage area far better than previously. I took the two doors off the bottom cupboards for easier access and took the plinth off to use the generous space underneath the unit as additional storage.
Medicine Cabinet - In our loft was an old Edwardian Medicine Cabinet that we had no use for so I screwed that to the wall in the DIY workshop for storing small bits and pieces.
Kitchen worktop - Having removed the original shelving to make space for the glass unit I had a void to the left of it which was utilised with a spare bit of kitchen worktop supported underneath by an old hi-fi cabinet on one side and two bits of sturdy scrap wood on the other as legs, leaving plenty of space underneath so when a neighbour threw away an old metal bathroom tidy I also slipped that underneath the kitchen worktop next to the hi-fi cabinet. On the worktop itself I bolted a handy vice and placed a grinder next to it.
Boxed storage units - The most recent addition are some boxed storage units a friend was throwing away as part of remodelling his living room. The boxed units consisting of a unit of four squares and two separate squares, the four square unit I put underneath the kitchen worktop as support, replacing the old hi-fi cabinet and bathroom tidy, and in the space remaining knocked together some shelving for small metal drawers; with the remaining two square boxed units sitting on top of the kitchen worktop.
Old Shelf Unit - Having completed the above mentioned modifications I had an old shelf unit that no longer had any use but the shelves were quite wide apart so I added a couple of extra shelves from scrap wood and stuck that to the back of the kitchen worktop, behind the vice.
So as previously stated, when boxing around for ideas, think out of the box and see for yourself how old redundant furniture can enhance the storage space in your home DIY workshop, shed or garage without coasting you anything other than a bit of time reorganising your shed.
Utilising Old Furniture for Tools and Accessories Storage
Click thumbnail to view full-size


This content is accurate and true to the best of the author’s knowledge and is not meant to substitute for formal and individualized advice from a qualified professional.
© 2011 Arthur Russ


