How to Bottle Essence of Troll - DIY Upcycle Glass Bottle Craft Demo

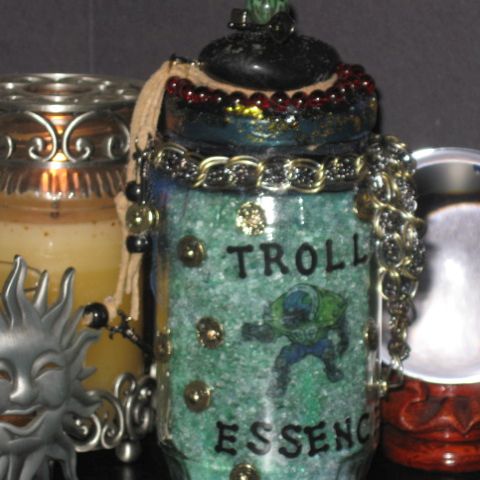
Essence of troll apothecary jar

Apothecary bottle for decor
Do you like the idea of apothecary bottles used as decor and more?
Here's a really easy to make apothecary display bottle.
Do you like mythical creatures? I do.
This article will show you how to easily and for dirt cheap make some cool fantasy inspired Halloween décor and gifts. I'm going to stick to a troll theme for this project, but you could use these directions for any theme you want.
What brought on the trolls? Apothecary bottle crafts. For real. I've been having a stone cold blast of late making apothecary bottle type craft projects filled will all kinds of fun stuffs.
I was watching Harry Potter and saw the scene where a troll invades the dungeon at Hogwarts. It made me think essence of troll would be a great addition to the apothecary bottle thing I've got going on.
Follow along to see how totally easy this was. It was fun too.
The artwork is fast, fast, fast
This troll essence apothecary jar is filled with bath salts but it's not just for soaking away the troubles of the day.
It's a great air freshener too. Huh?
For real. Check it out.
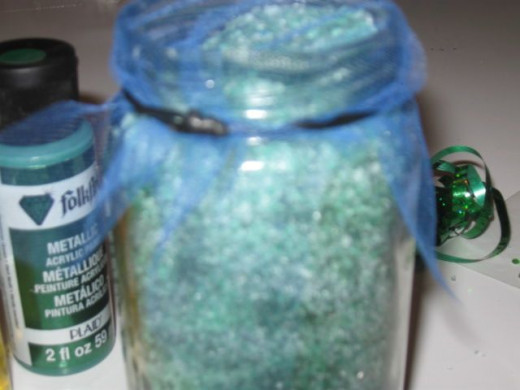
Covering the inside opening of the jar with a super fine grade netting lets the fragrance escape, but not the salt. Salt holds fragrance for a very long time, if resealed between uses.
This puppy is loaded it up with the scented oil. I wanted to use dragon's blood scent but ended up with ginger root because that's the only thing I had that I thought would work.
I don't think something foo foo girly is going to do well for trolls.
Stickers make for instant letters on glass and may other objects
Uber easy is the word.
Let's see how this little guy came to be.
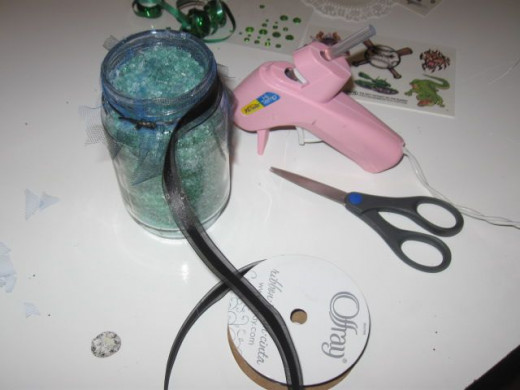
We are going to be using some messy stuffs here, paint, a glue gun, glitter, so be sure to cover up where ever you are working so the drudgery of cleanup later is way less.
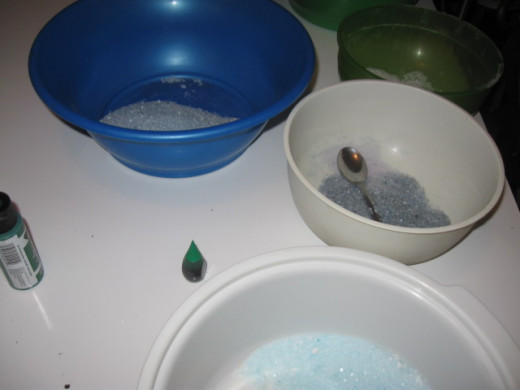
Grab a jar with a lid, some Epsom salts, blue and green food coloring, bowls and a spoon.
This jar was a lowly relish jar before it became a much more attractive container for our essence of troll.
Why throw out what you already bought when you can use it for fodder for your crafty craving?
The mother lode of cool looking temporary tats.

Salt, color, smell and toss together for instant bath salts
First up, mix the troll essence.
So, so easy and it smells great.
Let the kids dive in with their hands if they want. It washes right off.
Divide some Epsom salts into bowls. Use food coloring to dye the salts. A little goes a long way here.
It's best to start with just one drop and mix it up. To make darker shades, after taking out what you want of the shade you have, add another drop of color and repeat.
I had seven shades total of green and silver mixed with a little plain white. I had some left over silver, blue and pink from anther project I just did. I added a few drop of color here and there and remixed.
I did this swirled look first. - Deciding it wasn't the right look, I dumped it.
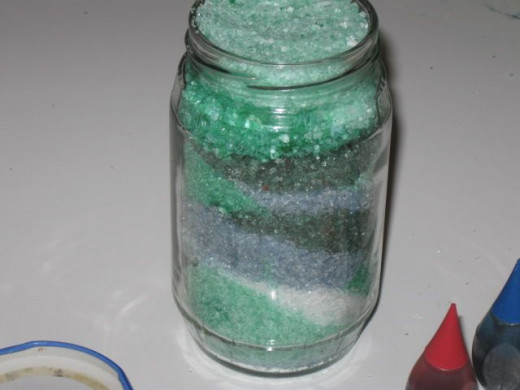
It all went into a bowl, got a good toss and re-scooped into the jar. I like it better all mixed. What do you think?
The girls will so love these.

Netting allows the smell out while allowing the salt not
Smell is the most powerful sense we have.
Are you into things that smell good like scented candles, beads, potpourri and such?
When you get the salts packed the way you want, let's grab the gear and go for it.
We're going to use a good bit of stuff here.
I didn't really plan this in advance, but rather just knew what temporary tattoo I was going to use and what colors.
Over that, I used what I had hanging out in the craft bin.
What was used?
One relish jar with a garlic jar lid since I couldn't find the original lid.
Also there was paint, a paint brush, water, temporary tattoos and stickers.
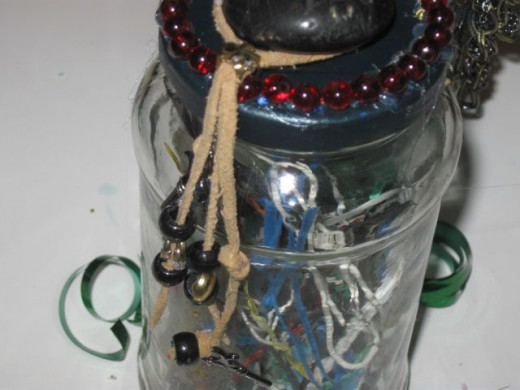
Ribbon, chain, charms, cord, a boatload of hot glue, glitter, a rock, a fat bead, some smaller beads, a few pony beads, fine mesh netting, one twisty tie and glitter glue were also involved in this troll creation.
Who knew trolls were so involved?
After adding a good amount of the scented oil of your choice, make a permeable lid.
Cut off a rectangular shape of fine mesh netting.
A rubber band would be better but I use a twisty tie because I couldn't find a rubber band. Go figure. To cover it up, use a hot glue gun to attach some black ribbon.
Now, we have an air freshener with salts that won't spill. Use scissors to create a somewhat frayed look on the netting.
Mine was blue which I did not like. To fix this crafty hurdle, I finger rubbed a dab of the same paint I used to paint the lid on it to tone down the brightness. It worked fine.
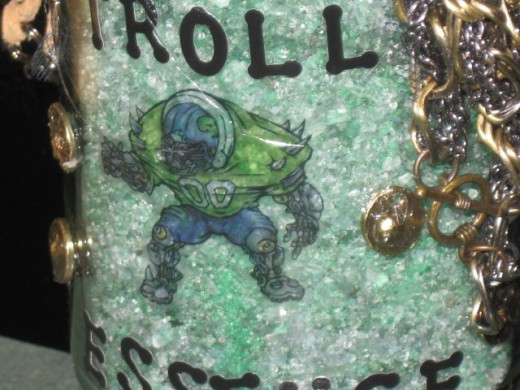
Grab your main image. - I used a temporary tattoo troll image from a package made by Ed Hardy.
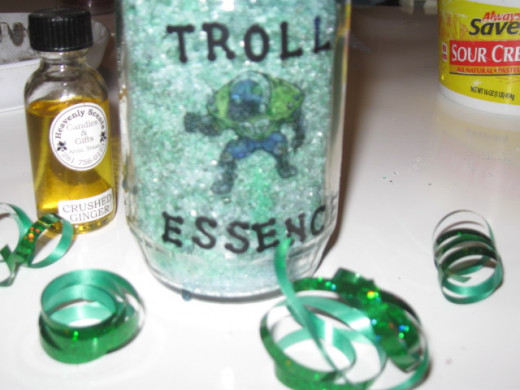
You could use a temporary tat like I did or you could decoupage any image you want. A sticker would work well. Whatever you like.The letters are Sticko brand stickers.
They are not easily lined up. As you can see, mine are kind of wonky but I think it works with the troll thing. To get a straight line, you could use a piece of masking tape.
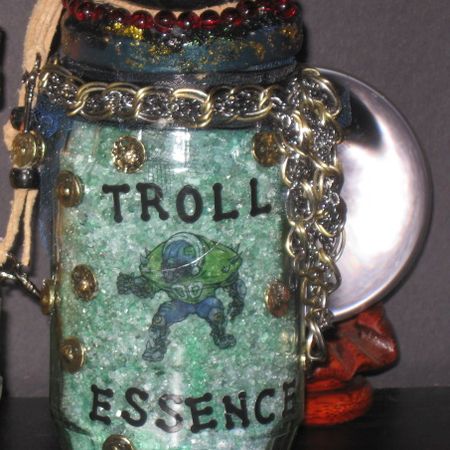
Chain adds weight, interest and movement to the apothecary bottle
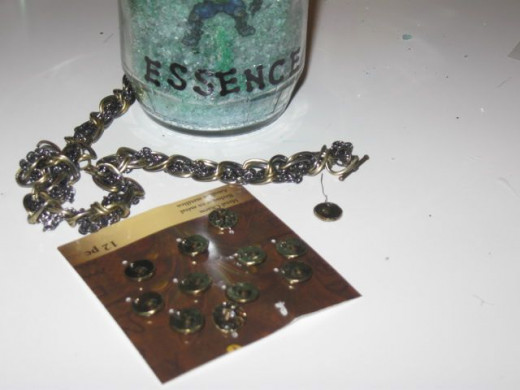
Next up came the chain.
Any old chain would work.
From an old cosmetic necklace to crafting chain, what have you, it should work fine. This was a dollar bin craft find on the sale aisle a while back. It's actually for jewelry making but got drafted.
The chain is glued around the rim just under the lid. There was a good bit hanging down when the circle was complete. It was looped and glued over itself.
The round golden charms were from the same bin on the same trip. All of it was attached with a glue gun.
Between figuring out where you want to attach your embellishments, go on and paint out the lid because it takes a while to dry. Be sure to do the underside. I found it much easier to work with by sitting it atop another jar while I painted it.
After painting your lid, glue down a rock. - Yep, a rock. I needed some height and this guy was just loafing about so he got drafted too.
How the lid was done.
On top of the rock, glue down a fat bead. Around the top rim of the lid, glue down some beads.
A key charm got glued up by the fat bead. All around the base of the beads both fat and small got run a good bead of black glitter glue. Then, I wrapped a few pieces of thin cording around the rock.
To the staggered length ends, I added some pony beads, some more of the charms I glued to the jar and some key charms.
Fine gold glitter and just a tad of silver glitter were sprinkled over the top while the paint was still tacky wet. The same glitter combo was finger rubbed around the side of the rim.
In a few more minutes, the whole thing will be dry. When it is, give it a quick sealing.
You can use Mod Podge, hair spray, spray on acrylic, lots of stuff but to keep the tat and stickers from peeling up or off, seal it up with something.There you have it, guys and gals, one essence of troll in an apothecary bottle air freshener.


