How to Make a Customized Hello Kitty Keepsake Box with Quilted Lining - Easy Craft Demo

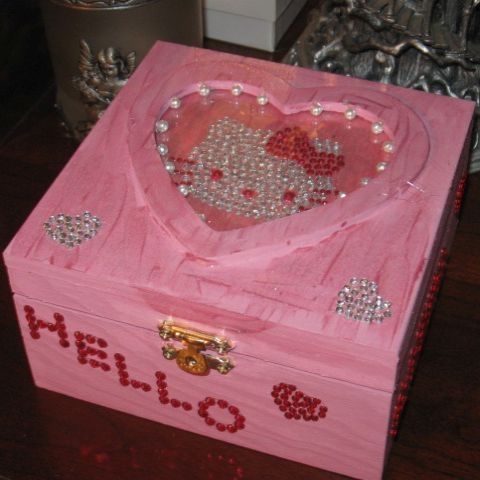
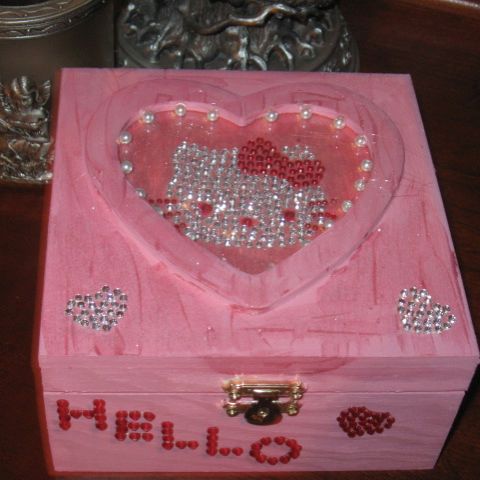
Hello Kitty keepsake box
Hello Kitty is huge!
Oh, my gosh, are gals in love with Hello Kitty. I'm right there with them. I was shopping for some Hello Kitty stuff for a special little someone lately. It was all so cute. From jewelry to clocks, mugs and socks, there was Hello Kitty galore.
But, it was kind of pricey. In fact, it was way pricey. I'm thinking the big not. What to do? Make it myself!
I have a small wooden keepsake box I got in the crafting section of the local Wal-Mart a few weeks ago. I grabbed it for like two bucks on clearance. At the same time, I found these cool Hello Kitty sparkly stickers on sale for like a buck each, so I grabbed them too.
I wanted to make a pair of sneakers but the size doesn't seem to work with the shoes I had. Let's adjust on the fly and get a custom Hello Kitty keepsake box using this stuff and some bits hanging out in the crafting bin.
Follow along for a fun, frugal project that Hello Kitty lovers of all ages can do.
These raised texture decals take the sticker concept to a whole new level.

It didn't take much at all. - A little paint, some stickers and so forth. Viola. One Hello Kitty keepsake box.
I saw a box similar to this at the store when I was shopping. If I remember correctly, it was around $12.95. I have about $5.75 in this.
It was really easy. It did take considerable time due to waiting for things to dry, but other than that, it was a breeze.
Of course the directions will work for any theme you want. The stickers are what makes it so easy. That and cheating on the quilted lining part. Check it out.
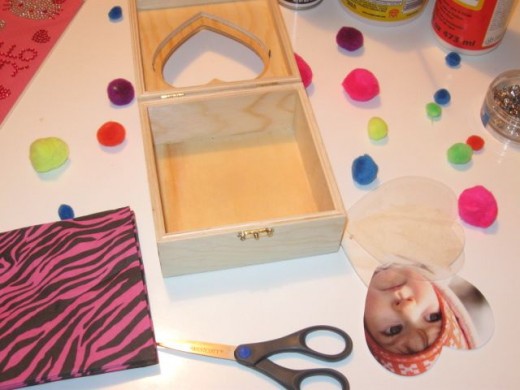
The materials used

What's it going to take to make this?
You don't need much. Any kind of box will work. If you don't have a wood one, you could recover a cardboard box with paper, material, felt, whatever you want. This box is wood.You will need stickers to make the pretty parts. For the inside lining, it's just paper napkins, a few push in pronged studs and a whole lot of Mod Podge.The outside of the box is just simple craft paint and more stickers with a few beads glued on. As for tools, your going to need a paint brush, a toothpick and a glue gun. Let's whip one of these puppies out.
Do the lining first.
Make sure to do the prep work.
It won't really effect the project, but it will protect the table.
I'm working on a piece of tile board laid over the table here in the kitchen. You could protect your surface with newspaper, a drop cloth, a plastic garbage bag, whatever.
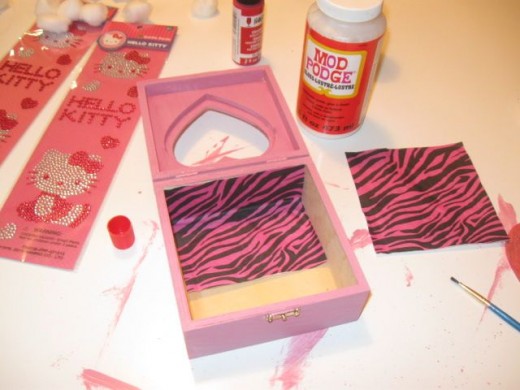
Get all of your supplies assembled and let's get to it. As you can see, I had more stuff here than I needed. I usually do.
I thought to use silver doilies to make a lace looking trim but changed my mind. Start by taking the photo holder insert out of the box so you can paint.
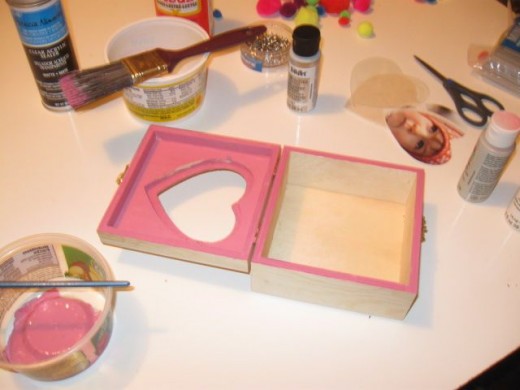
Step one is to paint the box. Since we will be lining this, you don't have to do the inside.
You know you love the kitty.
How much do you love one of the world's most famous cats?
Don't forget the inside rim of the box.
Do be sure to paint the rim on the inside, though. You will need to do the inside cover too unless you choose to cover it with lining.
For this, I mixed red, white, silver and silver glitter. I think getting the exact color you want in a bottle would be easier but I'm currently out of pink, so there it is.
If you decide to mix your own as I did, be sure to mix enough the first time around. It's really hard to match the color a second time around.
Paint is so simple yet does so much.

Be sure not to shut the lid while the paint is wet.
It will stick to itself.
Just keep painting until you have covered the box.It took me two coats because the wood soaked up the paint like a sponge. A small brush was used for the corners and a larger regular paint brush for the larger surfaces.Be sure to paint the wooden insert for the picture frame part too.
Step two is to do the lining. In this case, our quilted lining is really paper.
Another fun Hello Kitty DIY project for you created by mahumtariq.
How to make the lining for the keepsake box.
After everything is good and dry, it's time for the lining.The lining could be done with real fabric, felt, even a bandanna.
I had these napkins that I thought would look cool but I wanted it to look like cloth and kind of poofy like quilting does. Problem? Nope. It's really easy.
Cut the napkins to line the sides. Glue them down. Now, lets make the poofy part. Grab four cotton balls. Over them, lay a whole napkin flat.
In the middle, push a pronged gem stud through the napkin and into the wood. Do a few more in the corners.
Save your fingers. Use a hammer to get the studs to go through.
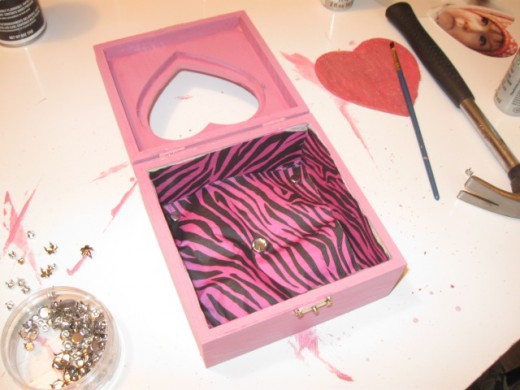
By the time I hit the second stud, my thumbs were really sore from trying to push the prongs into the wood.No worries. Grab a hammer. A whack or two later and it's all good.
The lining while still wet.

Step three is to drown the lining in Mod Podge.
This is going to look nasty.
Don't worry. Everything will dry clear but it will take hours.
Be sure to go heavy here. The thicker the Mod Podge, the more it will look like cloth when finished.
When painting the product on the sides, go gentle to start. Work from the bottom up the sides.
When doing the bottom, do a really heavy coat on the corners and edges, then, do a really heavy coat over the entire bottom. This will ensure nothing peels up over time.
Step four is to add the bling. The stickers make this so easy.
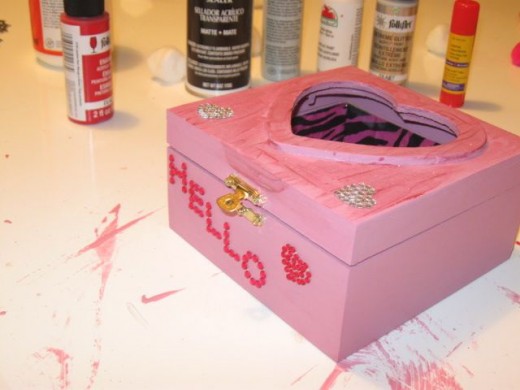
Just peel and stick where ever you want. Be aware, these are not very forgiving. Be sure you get it where you want it the first time.
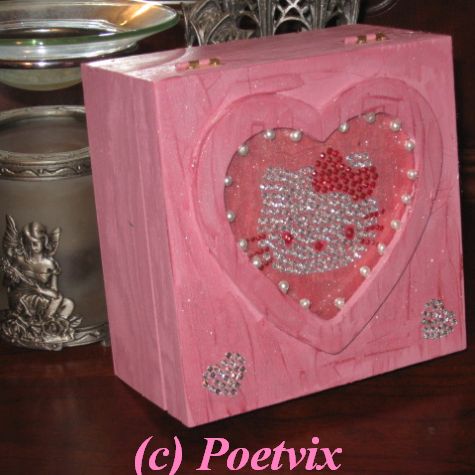
Step five is to reassemble the photo insert. You could decorate this part with stickers or not.
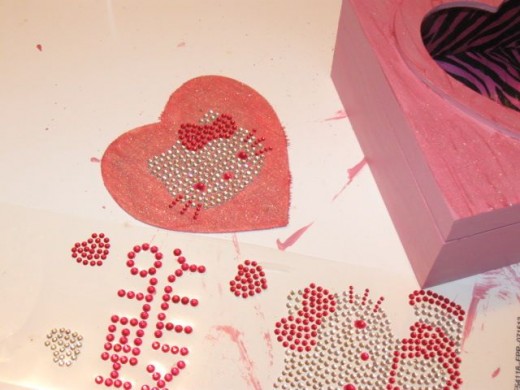
This could be kept to display a photo or you can Hello Kitty it up as I did.
The pearl accents add sparkle and movement while matching really well.

Step six is to add some beads.
These were hard to work with.
The beads are pretty small. To make them easier to work with, stick it on the end of a toothpick.
Dab the bead into a drop of hot glue and then affix to the inside lining of the photograph cover. Wait a second and pull out the toothpick.
It makes it much easier not only to hold onto the beads, but further to get them right where you want them without burning yourself or getting gobs of glue everywhere.
The last step is to spray it all with a shot of acrylic sealant. Be sure to do this outside.
The spray acrylic is stinky and horrible for you to breath, so really, outside is the way to go.If you don't have acrylic, do a fast coat of Mod Podge. Give it some time to dry while you grab some munchies and chill. Before you know it, one custom Hello Kitty keepsake box will be good to go.
The lining is my favorite part.

It never ceases to astound me the way Mod Podge changes the appearance of the most ordinary things. As you can see in the corner, it's still drying. I really should invest in a heat gun but it will dry eventually.
Be it for gifting, personal decor and storage or just crafty type fun, the theme possibilities are endless.

What kind of theme do you want?
© 2014 Rhonda Lytle


