How to Make a Kindle Cover

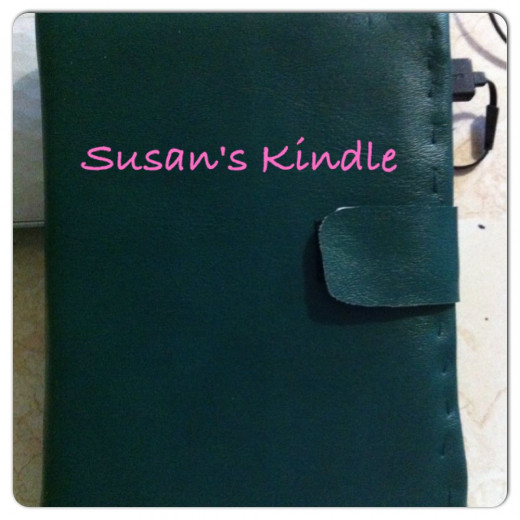
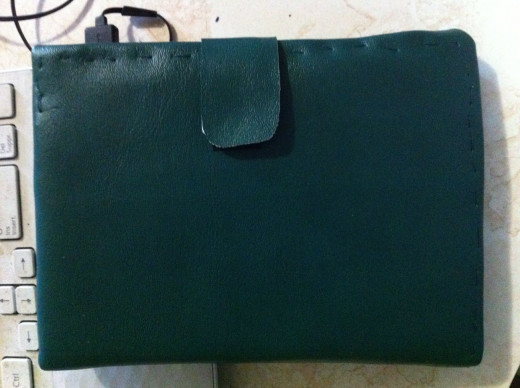
My Kindle Cover
Kindle, iPad, E Reader or Tablet Covers
Making a Kindle Cover from Faux Leather is really quite easy. If I can make one anyone can.
After looking for a year for a cover for my Kindle and never being able to find one that I truly liked, I decided to try and make one myself. How hard could it possibly be right. I have to say this was very easy to make and inexpensive. The covers I was looking at in various stores were $35 - $50. To make this one it was $12.
I followed the video below for making an iPad or tablet case but I did skip and change a few of the ways in which she made hers. .
These would be a great homemade gift for anyone who has an iPad, tablet, Kindle, or E Reader.
All photos used in this article are the property of the author Susan Zutautas.
Time required: 4 hours
Difficulty: easy
Cost: 12.00
Materials:
- Faux-leather remnant
- Cardboard
- Glue (I used spray glue)
- Double sided tape
- Velcro
- Elastic
- A piece of fabric or faux-leather for the inside of the E Book or Kindle
- Thread
Tools:
- Marker or chalk
- Ruler
- Sharp Scissors
- A large darning needle
Instructions:
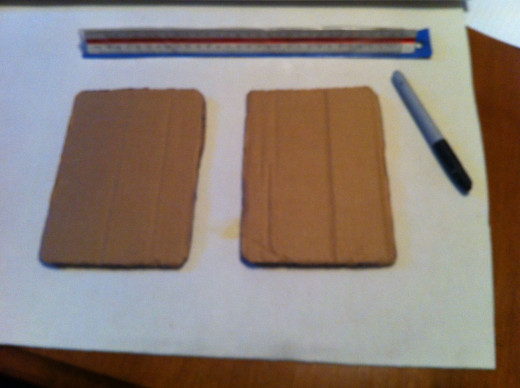
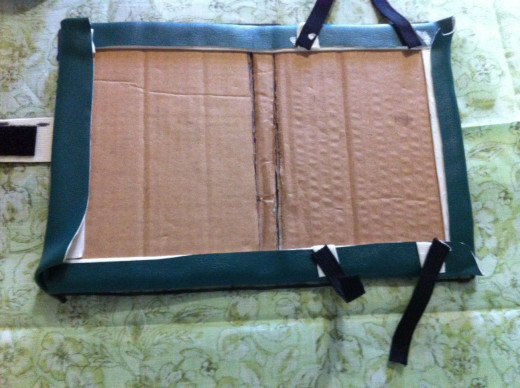
1. Starting with a piece of cardboard, a pair of scissors and a marker or pen trace out your kindle onto the cardboard. I used a heavy piece of cardboard from a box top. Once you've traced it out, with a very sharp pair of scissors cut out the traced pieces. Also cut out a strip of cardboard the length of the kindle and just under an inch wide.
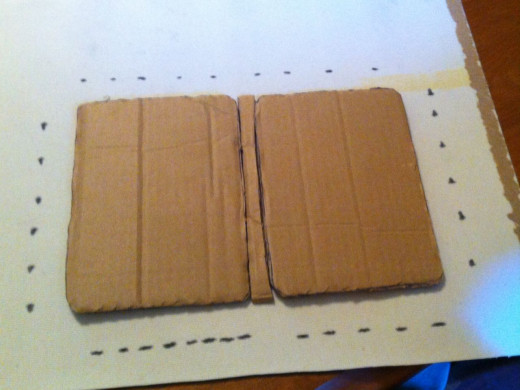
2. Lay your cardboard pieces onto the inside of your faux-leather and with a ruler and marker mark out around the adding and inch and a half - two inches. Cut around the mark-outs on the material. Please note that I have included the thin piece of cardboard. This is for the spine of the cover.

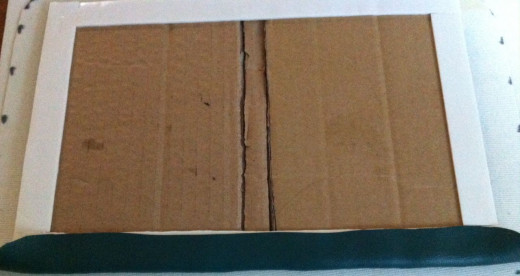
3. Set your pieces back down onto the material. Carefully flip them as you see in the picture. Next you want to get your spray glue and spray the material where your pieces of cardboard are not sitting. Once you've applied the spray gently flip the pieces back over and into place. Press them to make sure they stick well.
4. Cut the material on each corner to make it rounded.
Apply a piece of double sided tape to the bottom of the cardboard. Bring your material up onto the double sided tape like you can see me doing in the picture. Do this to each side. Don't worry about the corners as they will be stitched when we go to sew our piece.
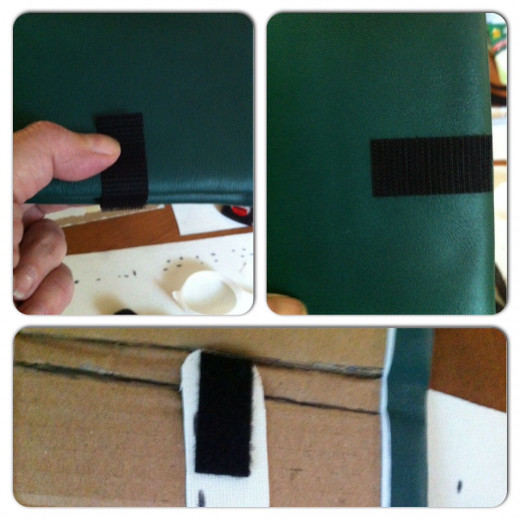
5. Next step is applying the Velcro for a closure on your Kindle cover. From a piece of leftover faux-leather cut a closure tab. I used Velcro that has a sticky side to it rather than the iron on type.

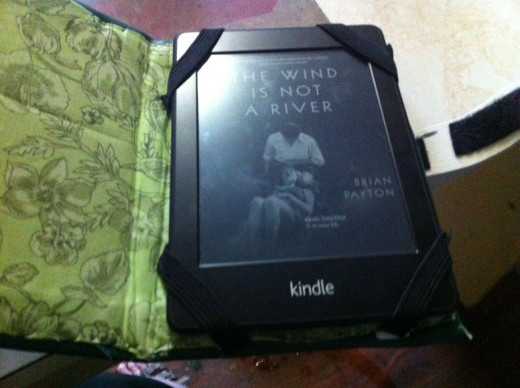
6. Cut 4 pieces of elastic 3 inches in length. With double sided tape apply them as you see in the picture.
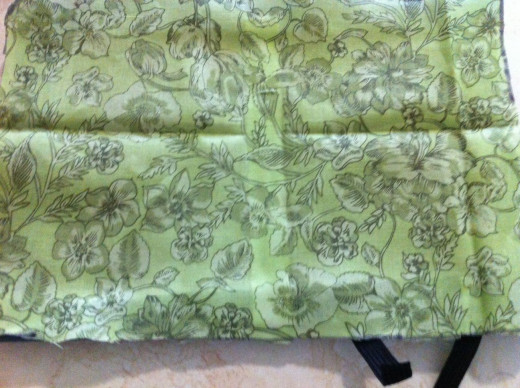
7. I used fabric for the inside of my kindle. You may want to use the same faux-leather that you used for the outside. Lay your project on top of the fabric tracing around it with a marker. Cut the piece out with very sharp scissors.
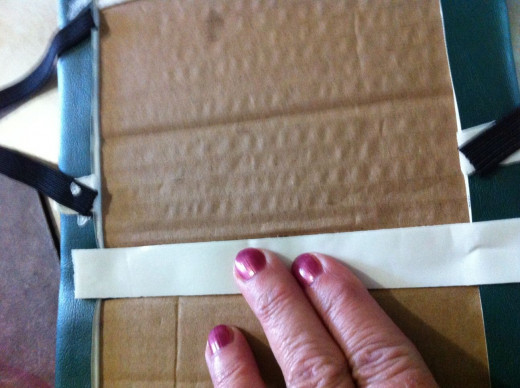
8. Cut a piece of double sided tape long enough for the spine of the book and press it well.
9. Take your cut piece of fabric and lay it onto the kindle cover making sure it is centered properly. Press along the middle where you put the double tape.
10. With your darning needle and thread stitch the fabric to the kindle cover. I'm not the best seamstress and I did this by hand. If you have a sewing machine by all means use it.
11. When taking down the elastic you want to tack it so that it will corner cover your kindle to hold it into place.
12. This is the video that I used for this project.
© 2014 Susan Zutautas


")