DIY Lightbox - How to make a lightbox for photography
A picture's worth a thousand words, a great one's worth a million!
So you love to craft (or take pictures of smaller objects :) and your little craft looks amazing... Until you take a picture of it where all of it's beautiful colors and details turn to something less than mediocre... Sounds familiar? I've been there and done that and decided to put it to an end cost effectively as this small but an important project costs less than $5!
Let's make a lightbox and start taking pictures your crafts deserve (without a fancy photo camera)!
Be sure to connect with me on Pinterest!
Photos on this page are taken by me unless stated otherwise.
Difference is quite obvious! - Before and after!
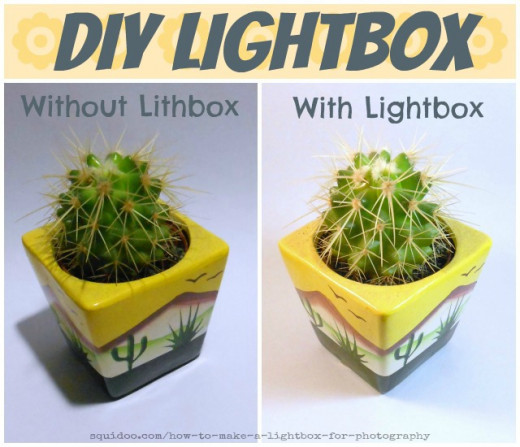
I decided to let the photos speak for themselves. I'm no expert when it comes to taking them but I know a bad photo when I see one (I saw them all the time when it came to mine). I don't have a fancy camera (Nikon Coolpix) as most of the smart phones and iPhones take way better pictures than it does. But here you have it, a photo taken outside of light box with my best effort to make it look cool and a photo taken inside of the lightbox.
It's amazing how a simple thing such as this can make all the difference! You have to have a lightbox and if you have all that's necessary to make one at home you'll have yours finished in less than 20 minutes!
Let's make it!
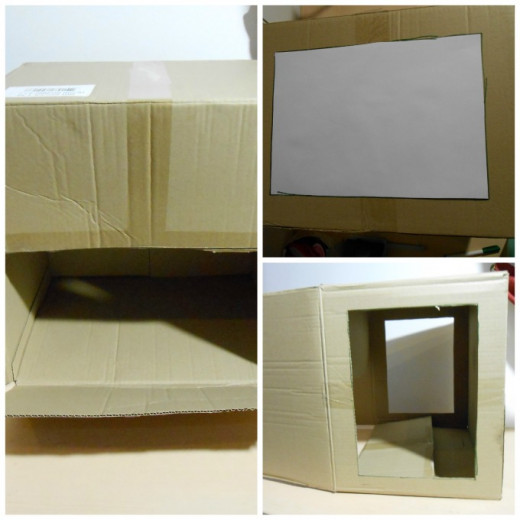
What you'll need
cardboard boxwhite baking/parchment paper (you can use tracing paper but it's way more expensive)crafting knifegluelightsYou can get a big box for free at most stores if you don't have one at home - all you need to do is ask as they are throwing them away on daily basis.When you have your box take a sheet of regular paper and use it as a stencil and draw squares on both sides and on top of the box (opening of the box facing towards you). Cut the holes with a crafting knife (you can also try with a kitchen knife).Measure the white baking paper so it goes over the holes and glue it on the box so it covers the openings. All done!Place a sheet of white (or any other color) paper in the box to use as your background and place the lights next to the holes (covered with baking sheets). Take a gorgeous picture :).Quality does matter when it comes to baking paper

Backdrop
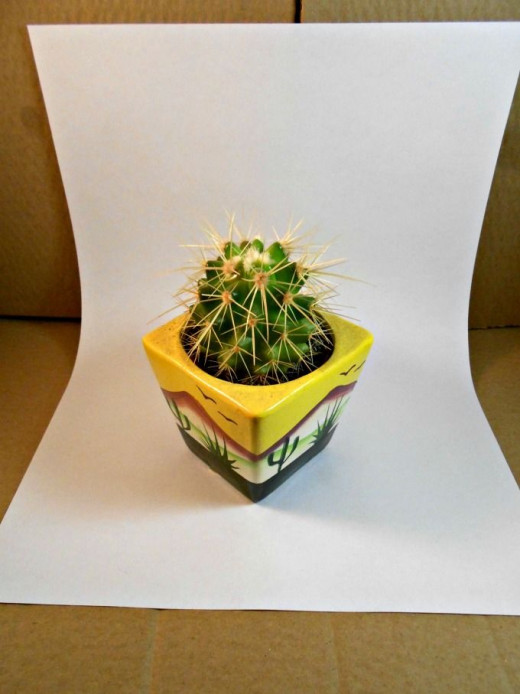
I think white backdrops are the best if you really want the object to pop out but be sure to experiment with other colors and textures. I've had some great results with black!
How much you'll be saving?
Well it depends, from a couple of tens of dollars to a couple of hundreds. For an beginner crafter a DIY lighbox will be enough but if you are going more pro I would still go with a professional one.
