How to Make a Mod Podge Picture Frame

It's Time to Mod Podge!
I go into crafting sprees which sometimes end up great and others end with a...'what were you trying to make?' When I went crazy painting picture frames (with sad results), I accidentally ended up making a wonderful discovery involving mod podge. Thanks to their amazing product, I turned my mistakes into completely unique picture frames. I found myself enjoying it so much, I had to create a squidoo to show you how to make your own mod podge frame!
By the way, these frames make great home gifts. Not to mention, people will start referring to you as being 'creative.' So add creative to your descriptions of yourself and be proud of your mod podge skills. No one need know how incredibly easy it actually is.
Step 1: Gathering Your Supplies

For your Mod Podge Picture Frame You Will Need:
*Mod Podge
*A Magazine
*Scissors
*Cheap Paintbrush
*Picture Frame
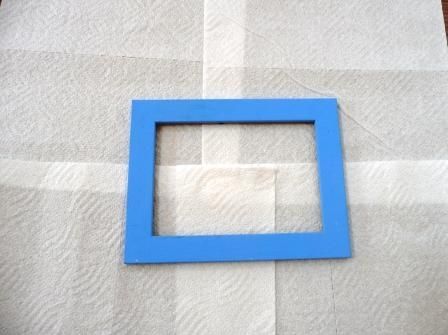
Before beginning, ensure nobody will miss the magazine you are destroying. My friends give me ones which have been read by all of us and are no longer needed. Make sure your paintbrush is cheap or old. You will get Mod Podge on it (obviously) so do not use one which you intend to use for other purposes later on. I choose picture frames which I either have bought for the purpose or no longer like. I had a creative urge and painted that frame a weird blue shade and then realized, I didn't like it. So I will transform the ugly unwanted frame into a beautiful work of pod modge art.!
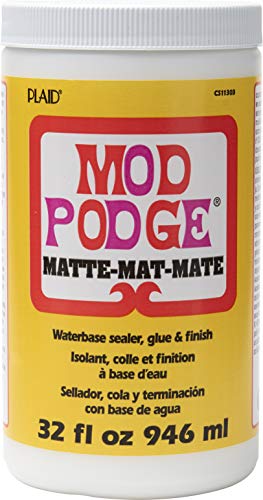
Get Your Mod Podge
Step 2: Choose Your Words Carefully

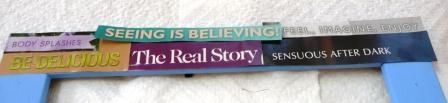
To make a pod podge frame, you will need to gather lots of sayings or phrases in all sizes, shapes, and colors. I liked this phrase so I chose to remove it. Carefully cut it out from the magazine.
*IMPORTANT*

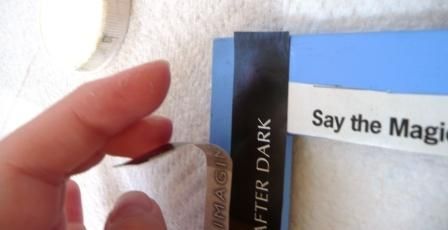
Make sure to leave space around what you have cut out. The sides do not have to be perfect. After all, you can always trim the picture to size later. In this case, the bottom had to be cut shorter because of the unwanted words below. However, I left room on the top and sides. You will need this room if you hope to create a 'layered' look for your frame!
Do you have a magazine subscription? - Recycle the Extras and Make Mod Podge Frames
My friends always give me their old magazines instead of throwing them out. I use them for a variety of projects which keeps me busy and the earth a better place. After all, the less magazines we have filling up our world's landfills the better off we shall be.
Step 3: Get Prepared to Mod Podge
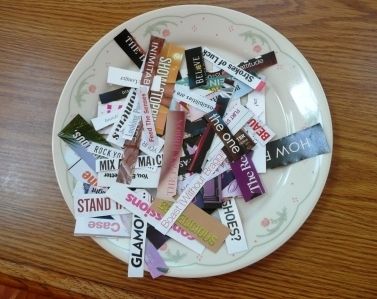
BEFORE you begin mod podging, make sure to have a lot of choices for your frame. The worst is to have to go through and find phrases while you are halfway into the frame. Get all sizes, shapes, and colors. Do not worry about your cutting job for the moment. You can trim them to your heart's content. Just make sure to have lots to choose from before beginning. Sometimes the phrases you want may not fit exactly so be prepared with others if that becomes the case.
Step 4: Prepare Your Frame
Make sure to remove all backing and glass from within your picture frame. You don't want to risk dropping mod podge on the glass or contents inside the frame. Cover the area with paper towels or work in a space where no one will mind a few drops of mod podge here and there. Get a wide workspace so you have room to maneuver.
Pick a frame
My picture frames were from Ikea but there are plenty on the web to choose from!
Step 5: Plan! Plan! Plan!

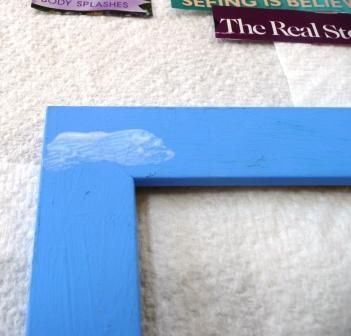
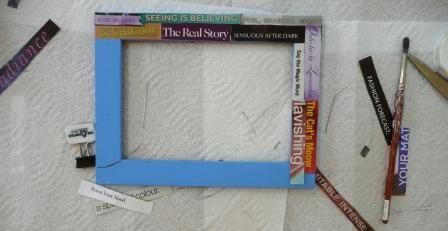
Your first side of the frame is very important. Plan how the pieces will fit against each other. For example, I overlay the 'be delicious' with the 'body splashes' and 'seeing is believing.' This is important to know before you start gluing as once mod podge is laid on the frame, it is difficult to remove the pieces. As you can see, my hands shake so the pieces are a little shaky. Do not worry about that. What is important is deciding the layering.
Step 6: Ready! Set! Begin!
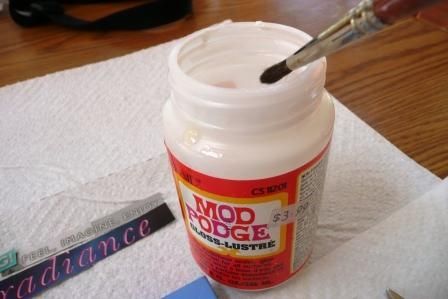
Carefully remove your phrases from the frame and lay them out in the same pattern (as you see in the left side of the photo). Open the mod podge and fill your brush. I used to transfer my mod podge to a separate smaller container but have gotten lazier in my old age. Some people choose to do this and add a little water to the separated mod podge. I prefer not to as it makes it runnier and harder to work with.
What Makes a Mod Podge paintbrush?
The answer? One which is cheap! Mod Podge and expensive paintbrushes do not mix. If you have nice paintbrushes which cost a significant amount of money (like mine for watercolor), do not ever think mod podge will be good for them. Choose brushes which won't break your heart or wallet if they are damaged.

Step 7: Go Modge Podge Crazy! - Just Kidding!
Paint Mod Podge on the place you plan to put your first piece. Do not put it all over the frame as you want to have pieces overlapping. If you plan to put a piece below your first one, then make sure not to completely cover the area. Confused? I will explain better (promise) on the next step.
Step 8: To Over or Under Lap? - Is Underlap a word?
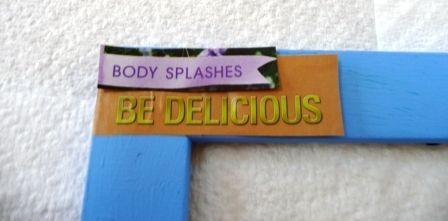
Instead of putting a piece under 'Be Delicious.' I decided to use another phrase and overlap it. To do this, merely apply mod podge to frame and put down your first phrase. Then apply mod podge to the frame where you want your next phrase and some mod podge over the first where the two overlap. Do not worry if you can see the mod podge, it dries clear.
Notice how the end of the 'Be Delicious' phrase is not mod podged. I left it so I can choose to put another phrase underneath. This is what I mean in the prior step. Now I can choose to put another phrase underneath the 'Be Delicious' and then apply mod podge to connect the two.
Step 9: Keep on Layering
The picture shows how I have layered. I put 'The Real Story' under 'Be Delicious.' This gives the frame a look like the phrases are all intertwined instead of one being squished by the others. Keep on doing this with all your phrases and make sure when you get done with your first part of the frame, to leave the ends of phrases unmod podged. You want to keep overlapping as you work your way around the frame.
Tada!

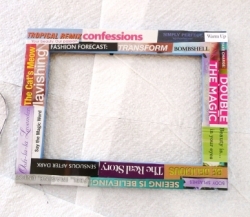
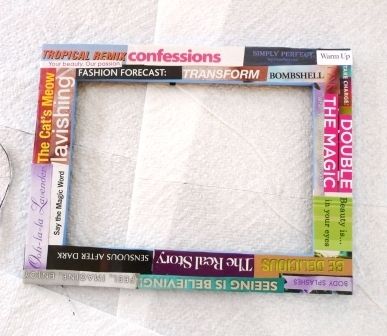
This is the finished first part of the frame. If you compare with how I laid it out initially, you will notice I switched out some phrases. Do not be afraid to alter the frame as you start mod podging. If the color scheme is off or it just does not fit, then switch out the phrase with something else. Just remember to do this prior to laying on the mod podge. Once it's on, it's on for good.
Mod Podge Slogan
45 Years and Still Sticking! (1967-2012)
Step 10: Begin Again
Now, begin the next section of the frame. If you left your ends without mod podge, you can easily add new layers as you can see in the picture. Also, make sure you have completely mod podged everything before completely moving on. Do not leave unattended edges or pieces half-done. Keep it neat and simple.
Edges Complete? - Check

I have sufficiently overlapped and underlapped to my heart's content on the frame's edges. Time to move on!
Step 11: Keep Going! You're Halfway Done!
Halfway done already?! Just keep on going. Once I planned out my first part of the frame, I do more of a 'planning while mod podging' for the rest of it. Make wise choices but most importantly, have fun and avoid traumatizing your mother's kitchen table.
Step 12:Congratulations! You finished!
Once you have finished your mod podge masterpiece, let it dry for a half hour or so. Then, apply another coat of mod podge (or two) for an added shine and to ensure all the pieces are permanently kept in place. After completely drying, reassemble the frame and put in a favorite picture or give as an awesome homemade gift. Still in the mood to mod podge? Grab another frame and get going!
Have you used Mod Podge


