How to make a Sensory Bin


Make a Sensory Box to Stimulate Learning
Young children learn best when all of their senses are involved. The more senses that they involve in exploring something, the more they will learn and remember. Babies explore by putting everything in their mouth. Toddlers and preschooler learn about the world around them by banging, dropping, tasting, and feeling. Young children learn through play. A sensory bin gives young children, babies to preschoolers, a chance to explore and play by touching, listening to, smelling and seeing all kinds of new and familiar objects. A sensory box is simply a container filled with a base (such as dried beans, unpopped popcorn, sand, pepples, water, rice, cotton balls...) and objects to explore. They can be designed with a theme (such as a season, construction, glittery things, a letter of the alphabet, a familiar story, food...) or without a specific theme. After you have filled your box with your base material and objects, you add things such as scoops, small containers, spoons, measuring cups and funnels so that children can pour, mix, touch, measure and actively explore all that is in the sensory bin.They are inexpensive to make and the possibilities are endless! I'm a homeschooling mom of seven children. Of my seven children, two of them are preschoolers, aged 3 and 4. I need something to keep my little kids occupied while I teach the older ones. I've been researching sensory play. So I decided to make some sensory bins (also called sensory boxes) for my preschool kids to play with and keep them occupied and happy. When the littles are happy, we are all much happier. Read on to find out what a sensory bin is, what it is for, and why preschoolers love them. You will learn how to make them for your kids, your grand kids or to give as homemade gifts. They are so easy to make, and so easy to use!
Materials:
- Plastic Bin with a lid
- base material such as dried beans, dried popcorn, etc.
- cups, funnels, spoons
- toys and figures based on your theme

Start with a Container
1. Start with a container. You can get several containers to make assorted sensory bins. Once you get a few containers, you can create a perfectly customized, homemade gift based on your child's individual interests. I use the Sterlite 16 quart containers. They are the perfect size for my preschoolers. They are big enough to hold the sensory materials and small enough to store easily.
Find a Base Material
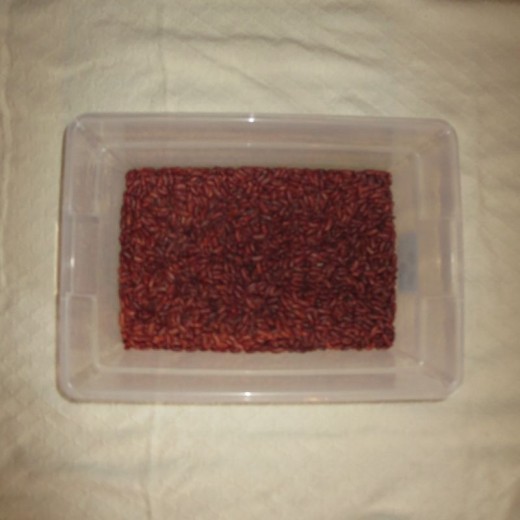
2. Fill your container with a base material. I used 3 bags of dried red kidney beans as the base for my dinosaur sensory box (pictured above). Make sure that you use a material that is age appropriate for your child. Since my kids are 3 and 4 and no longer put small objects in their mouths, these dried beans are a great choice! They are inexpensive and they feel smooth. They scoop and pour easily. They make a pleasant sound when they bump up against each other. If you are making a sensory box for a young toddler who still puts things in his mouth, you could use uncooked rolled oats. They are edible and safe for little ones. Other options for your base material are colored rice, cotton balls, cooked spaghetti (I know--messy but fun), uncooked pasta, shredded paper, crinkled tissue paper, foil, ice cubes, pebbles, sand, dirt. Whatever you can come up with is fine! You can store different base materials in large ziplock bags and change them every now and then to keep your sensory boxes new.
Add some Interest to you bin with toys, scoops, cups....
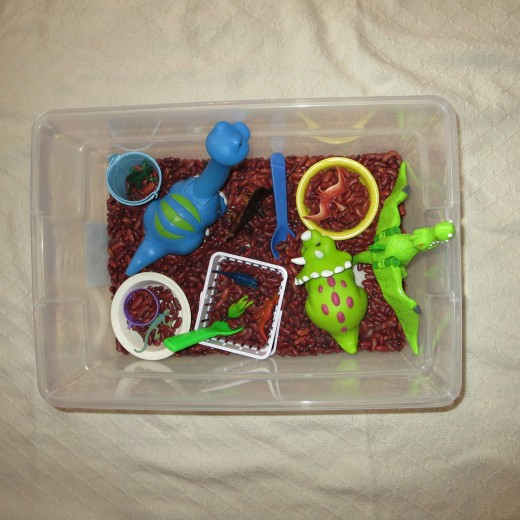
3. Now add some items to your bin. My little guy loves dinosaurs. Of course we had a variety of toy dinosaurs already. Some are Little People, some are Imaginext and some are from a cheap pack of dinos. In the dinosaur bin pictured above, I added some cups and spoons and the toy dinosaurs. The cups and spoons are for dumping and scooping the beans. The dinosaurs are just for fun. My guy liked pouring the beans over the dinos and burying them, then digging for them in the beans. My older kids played "paleontologist." Add these objects to your bin and you're done! Easy peasy fun.

Create a Theme for you bins
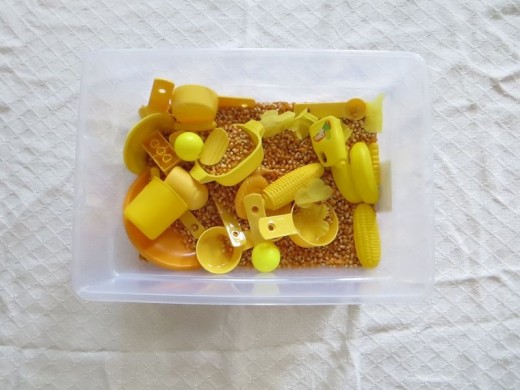
4. Create multiple bins based on what you want to teach. For example, we have a bin for each color. The theme of this sensory bin is "Yellow." The base material is unpopped popcorn kernals. You don't necessarily have to have your base material match the theme color, but I happened to have yellow popcorn so I used that. In the box are a few yellow petals from some silk flowers, yellow measuring cups and spoons, yellow play dishes, a few yellow Lego Duplo blocks, some play food (corn, bananas) and some yellow ping pong balls. You can sort through toys you already have and choose items that are all the same color to make a color-themed box.
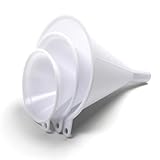
Don't forget the funnels!