How to Make Butterfly Bug Wands - Googly Eyed Glamour - Demo with Printable Instructions

Do you ever need a kid's project you know will come out right?
Are you looking for a good project for the little ones that doesn't cost an arm and a leg, is fun, easy enough to pull off, yet hard enough to keep them interested? What if it resulted in something they will love playing with? It is possible.
Check this out.
Below, you will find detailed instructions with pictures for how to make Butterfly Bug Pixie Wands. It's really super simple and it gets the kids in the crafty zone.
Crafting is great for the really little ones not only for the obvious reasons, but also because it allows for using so many skills worked on at school.
One of the things I really love about this project is that it's pretty close to mistake proof. Lets see how.
Image credits; Poetvix.
Successful kid crafts lead to successful kids.

Sometimes little ones get really upset if things don't come out right and may not want to try again. A perceived negative outcome a few times in a row can lead to a child not wanting to do crafting at all, or not wanting to do projects involving certain skills.
While that might not sound too bad, for young children it can contribute to a reluctance to participate in many assignments and projects at school, or worse.
Sometimes, guaranteed easy is good.
For those children who for whatever reason feel they have repeatedly failed or that their results are never good enough, said feelings can often become the catalyst leading to further and ongoing criticism of the self, doubt, shame and withdrawal.
Thankfully, most kids just sigh and move on, but not all. For some, confidence building crafts that are successfully completed are needed.
To that end, I love this project. Using doilies and gems allows for easy success while still working on some of the basic skills needed at a young age such as cutting, scissor safety skills, gluing, following steps in sequence and many others.
While this is a fun project for all the little ones, I love it most because of how it can quickly and easily get a child in a pattern of perceived success.
Do you think tiny tots can learn valuable skills from craft projects?
Do you think tiny tots can learn valuable skills from craft projects?
Step one -

Gather all the items needed. If using a glue gun, plug it in. This project can easily be done with plain white glue or a glue stick.
I didn't use all of this.
All you need is one clothes pin, doilies, markers, a dowel rod, artificial greenery scraps, gem studs, spray on acrylic or hairspray, glitter, glue and some scissors.
Step two -
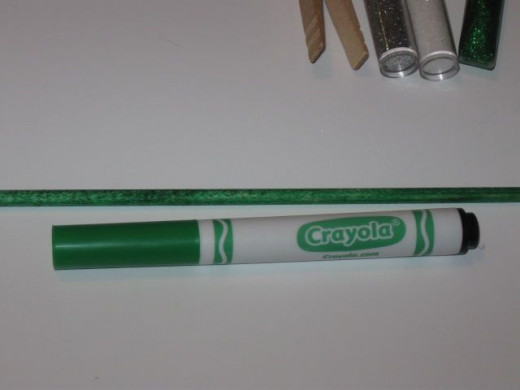
Use a marker to color the dowel rod. This is good for reinforcing confidence in coloring skills because there are no lines to stay in, no colors to keep from overlapping, just a simple covering of the surface with color.
Step three -
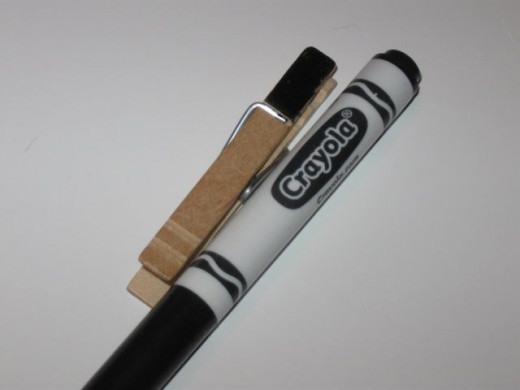
Color the clothes pin. Clothes pins also come in a variety of colors allowing you to get ones that are already done, if you wish. If not, to do inside the pin, you will need a pretty fine tip marker or you can use paint.
Again, because this is simply a covering of the surface, it's very easily completed successfully.
If using paint for this step, use a fast drying craft paint. Do one side and set aside to dry for a minute. Flip it over and repeat. While waiting for dry time, to keep the little ones engaged, have them select the two color gem stones they want to use, if crafting for confidence. If not, let them go hog wild with the colors.
Predetermining a pattern further ensures a successful completion. I would not do it with children who have no issues with building confidence in skills. Let them explore their own artistic desires.
Step four -
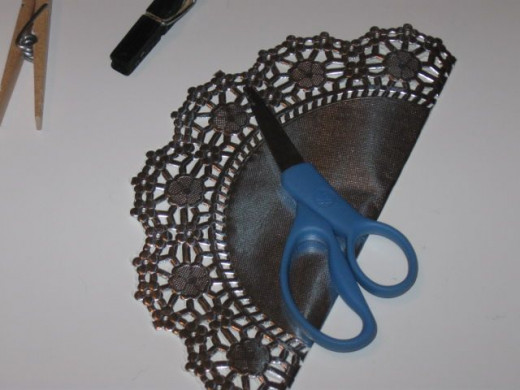
Pick out three doilies of different sizes. Layering the doilies gives the wings some dimension and depth. Doilies allow for perfect lacy looking edges without intricate scissor work.
Fold each in half being careful to line up the pattern exactly. Cut each folded doily down the middle making two perfect halves to be used for wings..
Step five -
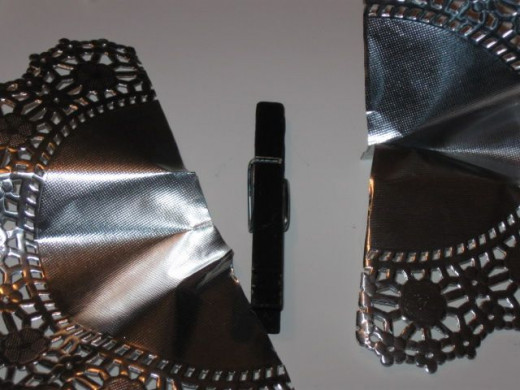
Using the lacy pattern as a guide, make two little crinkle folds in your largest cut doilies. Here, I did the crinkle folds on the third circle in from each edge.
Once you get both halves looking like you want them, use a drop of glue on the inside of the fold to hold it in place while you work with it.
Step six -
It's time to decorate the wings.
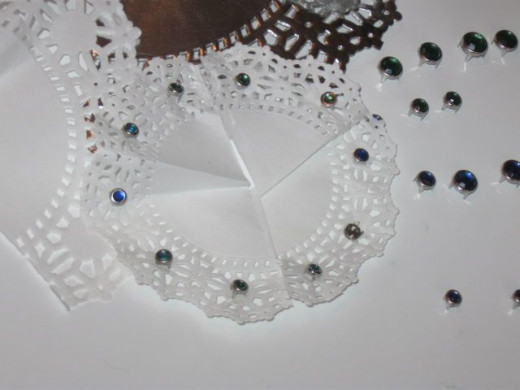
I used pronged gem studs for this demonstration but I can't recommend enough that you select peel and stick gems for the little ones. The pronged studs are sharp. If using the prong studs as I did, be sure to wear a thimble.
Use the pattern on the edges to create a pattern for the gem stones. This is a great way to introduce the tiny tots to patterns in sequence.
I did the middle and top wings with alternating blue and green stones. I did not do any on the largest doily that was used for the bottom layer of wings but you could.
If you want to add glitter, now is the time. To seal glitter, use a quick spray of acrylic or hairspray. Be sure if using acrylic to do that outside. Honestly, hair spray works just as well.
Peel and stick really increase chances of success.
And, oh my gosh they are just so adorable. Be it for this project, scrap books, cards, posters or what have you, these give fantastic looking results.
Step seven -
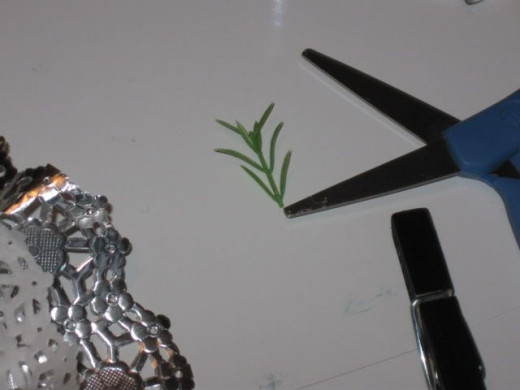
Snip off two, small, green leaves from an old artificial flower. Or, you could easily use a pipe cleaner that you snip off to size.
Glue it onto the inside tip of the clothes pin to make the antenna.
Step eight -
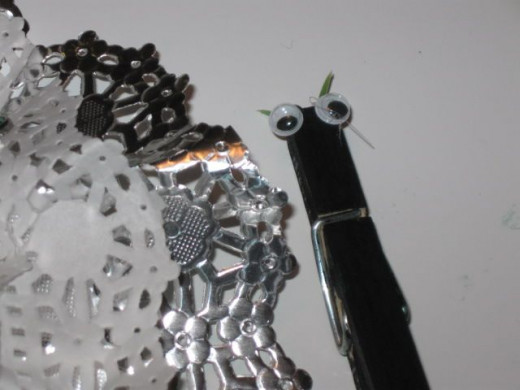
This little butterfly bug needs some eyes. Affix goggle eyes with glue to the top of the clothes pin.
Fancy it up a bit with some glitter or such. I did little dots of green to continue the pattern of dots created on the wings.
Step nine -
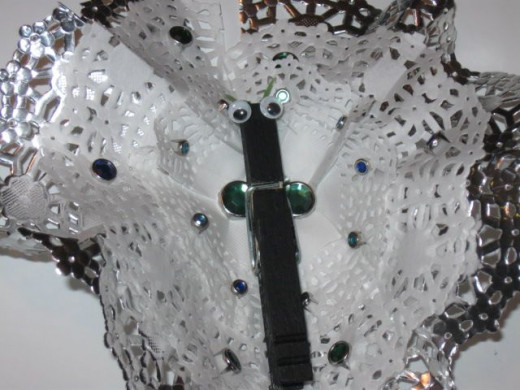
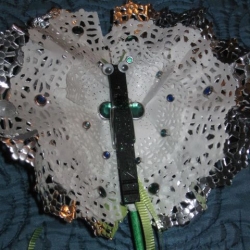
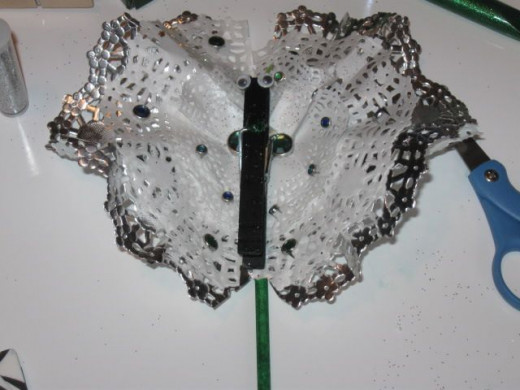
Layer all of the wings from largest on bottom to smallest on top. Glue the three layers together on the inside edge where it will connect to the bug body.
Once you have them right, put them side by side and glue on the bug body to the top. Be generous with the glue here.
Step ten -

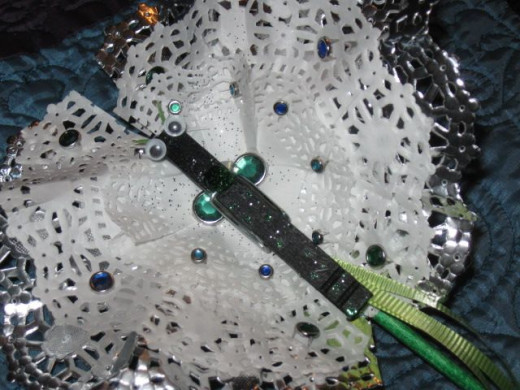
Glue the back of your new butterfly bug to the colored dowel rod. Let dry a minute or two.
Glue some curled ribbons on the back.
You're good to go. One brand new Butterfly Bug Pixie Wand. Yahoo!
Here's a craft that will always come out looking good even for the tiny tots who sometimes struggle with cutting and pasting.
At home or for a classroom project, this craft is great for introducing the concepts of patterns in sequence, basic fractions and symmetry.
Good vocabulary words to introduce would be...
symmetry
mid point
half
sequence
Ingredients
- One dowel rod
- One clothes pin
- Two googly eyes
- Three doilies of different sizes
- Peel and stick gem studs
- Scrap artificial flower leaves
- Glitter - optional
- Spray Acrylic - optional
- Ribbon
Instructions
- Get all of the materials together and have kids wash hands before starting.
- Color the dowel rod.
- Color the clothes pin.
- Fold carefully and cut doilies in half.
- Fold and glue the bottom wings in the middle to add some depth and dimension.
- Decorate doily wings.
- Glue artificial plant antenna to clothes pin.
- Glue googly eyes to clothes pin and decorate, if desired.
- Layer doily wings with the biggest on bottom layering up each smaller size. Glue each wing together on the inside edge. Glue bug body onto top of wings.
- Attach winged butterfly bug and some ribbon to the wand with glue.
Alternatives and substitutions
For clothes pins - craft sticks, real sticks, pipe cleaners, toilet paper rolls.
For doilies - coffee filters, napkins, construction paper, gift wrap paper, felt
For artificial greenery - ribbon scraps, pipe cleaner, colored tooth pick


