How to Make Simple Bracelets

Make a Stretchy Beaded Bracelet Fast
If you like to wear bracelets that match your outfits, here's how to make simple bracelets in less than 15 minutes.
I love bold beautiful jewelry. To look at. But I prefer wearing more subtle jewelry. These simple bracelets are a cinch to make and wear.
Using elastic means there's no clasp to deal with (when making the bracelet or wearing it) and getting the fit right is a breeze. It's also easy to make simple stretchy bracelets as gifts since they stretch to fit most sizes.
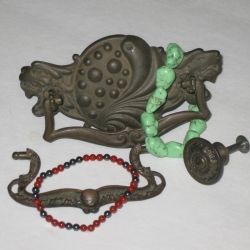
All photos of bracelets and bracelet making: Peggy Hazelwood
Small Beads for a Simple Bracelet


Make a Simple Bracelet
Choose your beading supplies
For a simple bracelet you'll need the following beading supplies:
~ Beads (these are 4-mm coral and hematite beads)
~ Elastic (I use 1/2 mm elastic for small beads like these and 1 mm for larger beads.)
~ Bead tray, optional but helpful for laying out designs and keeping the beads from wandering off
~ Scissors or cutter to cut the elastic
~ Bead stopper (optional, but very helpful to keep beads from rolling off the end of the elastic string!)
Beading Supplies - Elastic Cord, Beads, Bead Trays


![ONE STRAND of 5X5X4MM AAA GRADE NATURAL RED SEA CORAL RONDELLE GIFT BEADS 16 2/3" [these are Loose Beads Strand on a string] - from Hibiscus Express](https://m.media-amazon.com/images/I/61mYtZej1dL._SL160_.jpg)

String the Beads on the Cord
After you've chosen your beads, begin stringing them on the elastic. I like random "patterns." If you are more symmetrical, line them up or choose each bead as you go.
When making this coral and hematite bracelet, I just dumped some beads in the bead tray and picked up whichever one and added it as I went. Sometimes I like order but usually not.
The good thing about beading is you can create your own jewelry just the way you like it.
Beading Tip:
If you're just making one bracelet, leave the elastic on the spool while stringing the beads.
If you cut the elastic, use a bead stopper (a clip placed at one end of the elastic to stop the beads from falling off the other end of the cord).
Keep reading to see bead stoppers
available on Amazon to buy for your beading.
String the Beads

Gemstone Beads -- Gorgeous Beads

 in the elastic.")
Tie Knots in the Elastic
To finish the bracelet, first stretch the elastic by gently pulling on it from both ends. This will stretch the elastic a bit to make it less likely to break when taking it on and off.
Then tie several square knots. (These are the knots you use to tie your shoes.) I usually tie at least four or five.
Trim the ends of the elastic, but not too short or the knot will come undone.
If you want to, add a drop of glue like E6000 or 527 to the knot to help keep it from coming undone.
Beading Tip:
When using elastic, if possible,
use a bead with a larger hole at the end.
You can hide the knots inside the hole.

More Beading Supplies - Bead Stoppers, Bead Trays, Bead Boxes
The bead stoppers shown here are wonderful! You pinch the ends and the coil portion opens up. Place the cord in the coil and release. This holds the cord and stops beads from falling off the end.
Bead trays with a mat are great for laying out our tools, beads, and spacers while beading.
Store beads in plastic boxes with small compartments to keep track of what you have on hand.


Beading Tip:
When you need to cut the elastic when making bracelets, in a group, for instance, measure each person's wrist and give them a length of elastic at least 4 inches longer than that measurement.
Chunky Beads Make a Great Statement


