Let's Make A Keepsake Bracelet Out Of Old Jewelry!

Here's A Way To Enjoy All Those Little Pendants And Charms In Your Jewelry Drawer!
The other day, my fairy god-daughter Laurie brought over a handful of small diamond pendants and charms and said she had a great idea! OK, Laurie always has great ideas so I'm listening... She tells me these are all gifts from her mother over the years. She's tired of having them stuck in her jewelry box never being used or appreciated.
Awhile back I had made one of my "crazy bracelets" as a gift for Laurie. She wanted me to make a new "crazy bracelet" incorporating all of her pendants and charms. Then, the kicker... she wants to give it as a gift to her mother! Now, how cool is that. So I got busy creating something with them, and luckily she was here to give input as I went along.
As it came together, I quickly decided I must make one of these for myself because I have a bunch of little special pendants and charms in my own jewelry box.
I'm betting you might, too, and this might be a fun way for you to enjoy them!
The bracelet is created with colored Copper 20 gauge wire. For a truly special bracelet, you could craft it using Sterling Silver or even Gold plated wire!
The only real skill you will need to learn is optional - that of hand-coiling the wire for accents. You can definitely make the bracelet without those, but I think they add a lot. I've included my YouTube tutorial on coiling wire below.
I hope you'll give it a try! This doesn't damage your pendants at all, so you can feel free to experiment!
What You Will Need
1 roll 20 gauge Copper wire available at craft stores
(Or Sterling Silver or gold plated wire)
Round nose jewelry pliers
Assorted beads
Pendants and Charms
Large magnetic jewelry clasp
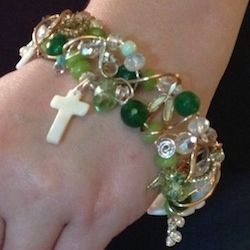
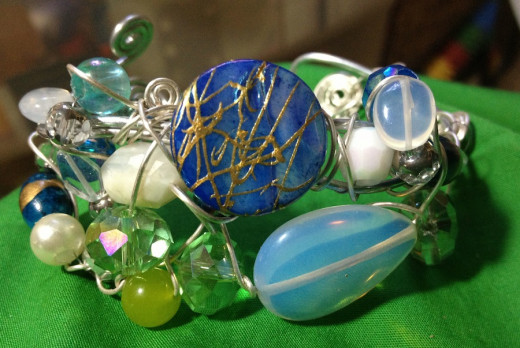
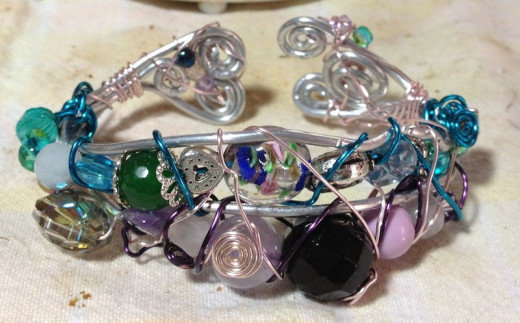
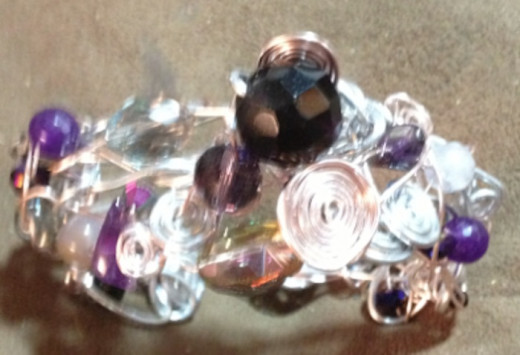
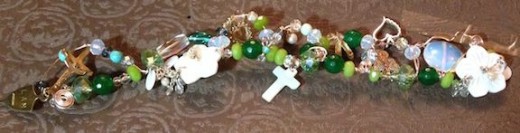
Here Are Some Of My Other Crazy Bracelets
Click thumbnail to view full-size


The Schnauzer Difficulty Rating! - 2 - Pretty Easy!
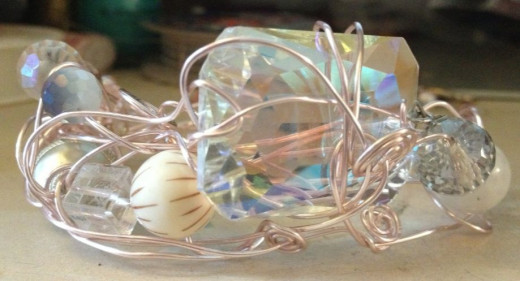
We Start With A Wire Coil - This keeps the beads from slipping off.
Cut a piece of copper wire about 12" long. Coil one end until the coil measures about 1/4" or your desired size.
String your favorite beads and pendants in the order you want them to be.
Make your strand the length of your wrist measurement minus one inch.
Cut off your wire about 2" past the beads. Coil the end of the wire until it reaches a bead.
If you want a single strand bracelet, you can stop right here and add your magnetic clasp!
(NOTE: The large shell flowers are attached to 2" dangle earrings! If you look closely you'll see the earrings were woven onto the wire in and out of their dangle links!)
Learn To Hand Coil Wire! - Right Or Left Handed!
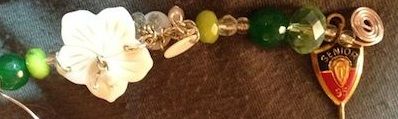
Next, We Build The Second And Third Rows!
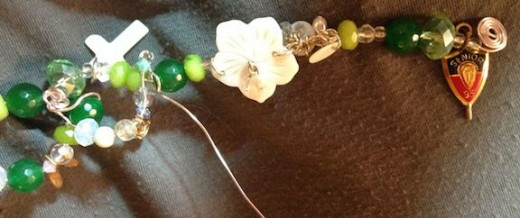
Cut a 28" piece of copper wire. Coil the first end. This time, we will only thread on a few beads at a time - we are creating a raised box over the first row. Add crystals until you can center your pendant over the first row with just enough height clearance for it to dangle. Now add enough crystals or beads to form the other side of the box, reaching down to a bead on the first row. Wrap the wire tightly around the row 1 wire in between two beads. Wrap it once more to secure.
Continue this process across the bracelet. End with a wire coil, wrapping the base of the coil around the first row corner of the bracelet.
Gently bend your squares in place as necessary until it suits you.
Repeat this whole process for the third row, if one is desired.
Finishing The Bracelet With A Clasp!
This bracelet is the first time I used magnetic clasps to finish it, and I will do so from now on! Normally on my "crazy bracelets," I have to add a lot of wire to make the bracelet stiff enough to form a good cuff that will stay in place. But with this method, I can just do the bracelet as we did here, then add the clasp and it's perfect!
I used a 16mm crystal encrusted magnetic clasp. The only place I have found them to date is through eBay. (I'll list some of those here for your convenience). Otherwise, you could use this method to secure a large lobster claw clasp or a toggle clasp.
I will say, the magnetic is the easiest to put on and take off by far!
What Do You Think Of This Idea? - Come On, You Can Tell Me!
What Are Your Thoughts On This Idea?
You Can Follow Me!
"Crochet thread is the ink with which I will sign my life." –SheilaSchnauzies


