Make Simple Graphics & Screenshots Quickly


How to make & share simple graphics and informational screenshots
This is so easy and all you need to do is download a free program. Using it, you'll be able to make wonderful screenshots, to the exact size you need, plus add text, arrows, highlight or frames. This is a great facility.
To demonstrate this, I found this wonderful, copyright-free image on Wikipedia of Marilyn Monroe and I made the screenshots below in seconds.
You'll find that you use it almost every time you're online. I've been using it for years and couldn't work without it. When I recently got a new laptop, the first thing I did was install this free program.
Here are the step-by-step instructions
Instructions:
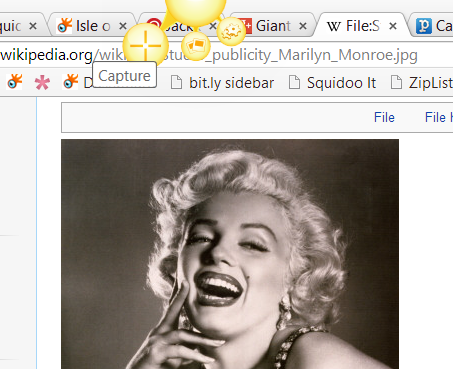
1. When you've installed the program, you'll find that there's a subtle little yellow 'sun' at the top of your browser.
The little sun will stay unobtrusively in the background until you need it.
When you want take a screenshot, just click it.You need to option on the left - the one with the + sign.
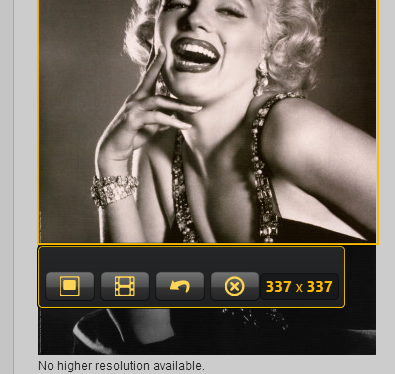
2. This is what you'll see next. The yellow rectangle will appear on your screen and you can easily manipulate them to capture the part of the image you want.
You'll notice that the dimensions are given. This means that you can save your image to the exact size you require.
You'll see here that I am capturing a square - 337 x 337 pixels in size.
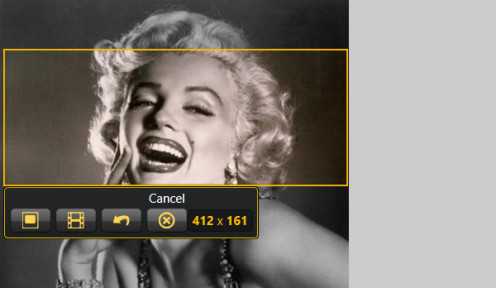
3. Here's another example to show you the flexibility of the program.This time, I wanted a horizontal, wide image.I can adjust the yellow borders until the image is exactly what I need.
When it's to your liking, save by using the icon on the left. Note that you can also make short videos (that's for another day) or cancel the whole operation by clicking the X.
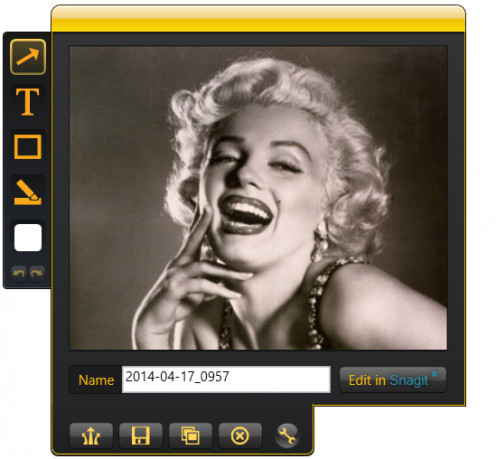
4. Once you've pressed 'save' you get these lovely tools to play with (if you wish - you can just save the image at this point).
You can add text, arrows, frames and highlights and change the colors accordingly using the box at the bottom.
Arrows, frames, highlights and so on can be easily resized by grabbing a corner with your cursor.
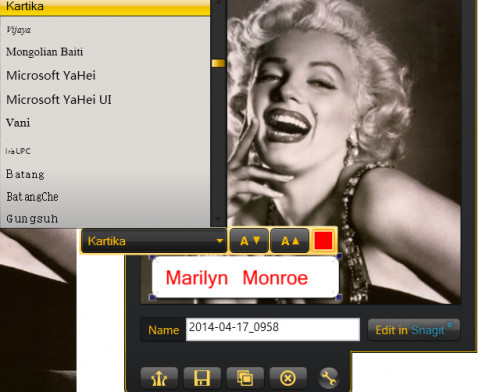
5. Here you see the text function in action. I have chosen white and red but you can choose from the colours in the palette.
See too how you can select your own font. That's a great facility.
You can select the font that goes perfectly with your image. When you're done, simply add a filename for your image and press the save icon.
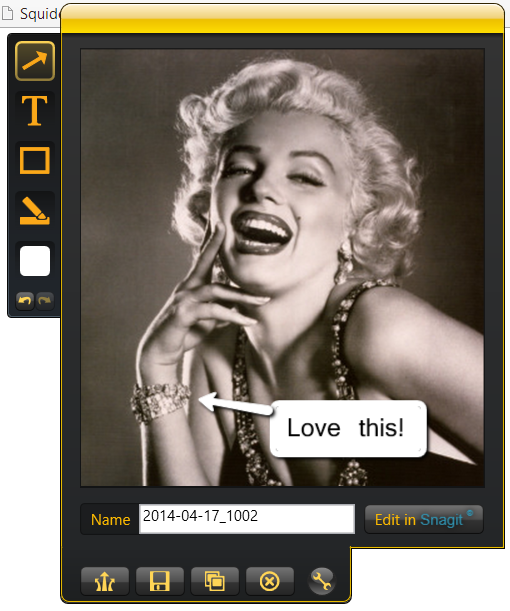
6. Here's another example using text plus an arrow. This can be great for curation sites, such as Pinterest.
It also provides a very good way of demonstrating to others how to manage various online functions.Imagine you were showing someone how to switch from the text editor of Wordpress to the HTML editor.
A simple image with arrows and instructions would be much better than long-winded explanations.
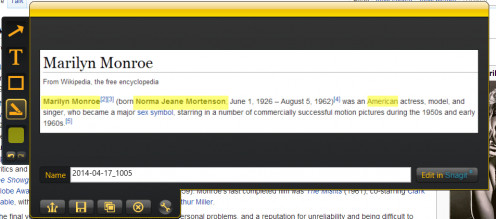
7. I don't use the highlight function very often but here you can see it in action on the Wikipedia page about Marilyn Monroe.You can highlight individual words, phrases or entire chunks of text.
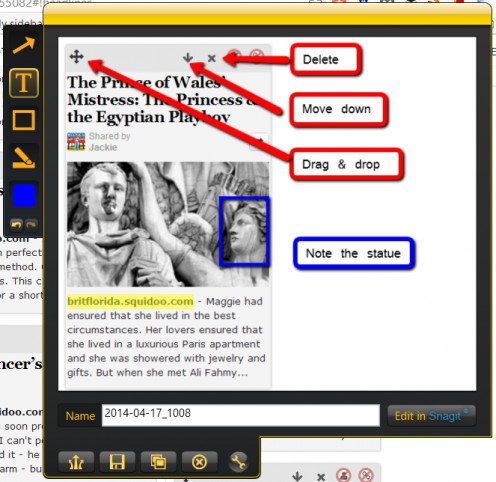
8. This isn't a very pretty image (which is a shame following on from Marilyn) but shows the various tools in use.
You can see that I've used red for the arrows and corresponding text boxes and blue for the frame and its comment.
Finally, I've used the highlighter tool to emphasise the URL.
Over the years I've developed hundreds of ways of saving time whether it's looking after the house or in my role as professional graphic designer.Much of what I've discovered has been grabbed from various books, including the one below.
I hope that the tutorial above has given you enough information about how to use this program which, you'll remember, is absolutely free of charge.
The video below will give you a good overview too - and explain how your screen capture will be placed into your computer's clipboard.
This overview and quick tutorial will help you to make the most of this brilliant little program.
© 2014 Jackie Jackson


