- HubPages»
- Arts and Design»
- Crafts & Handiwork»
- Jewelry Making
Wire Wrapped Jewelry Patterns: How To Make A Wire Wrapped Bracelet

Make Your Own Jewelry
I began making my own jewelry about two years ago, after I broke my leg. I needed something to do that didn't require standing and making jewelry seemed like the perfect hobby. I quickly fell in love with it and now have a handmade jewelry business.
You, too, can make your own jewelry. Handmade jewelry makes a great, inexpensive and heartfelt gift. It gives you a chance to make original jewelry and unique jewelry that's not sold in stores. Plus, it's fun! There's nothing quite like that feeling you get when you create something from scratch and produce a beautiful product. And with jewelry making, it's easy to get that instant gratification, once you get the hang of it.
I'm going to be writing a series of Hubs with different wire wrapped jewelry ideas, but for my first, I'm starting very simple. Here are the steps for a basic wire wrapped bracelet. You can use any type of wire or beads -- it's up to you! -- but I recommend having enough materials on hand so that you can afford to make mistakes (trust me, you will). I also urge you to stay safe when using the jewelry tools; don't let young children use them and be careful because the ends of the wire can be sharp. Also, keep the materials away from pets.
With a little practice, you should be able to make a simple bracelet. Imagine how impressed everyone will be when you wear your handcrafted masterpiece!
Materials


Wire Wrapped Bracelet Materials
Here are the materials that you'll need to make this wire wrapped bracelet. You can find most things on Amazon or at craft stores like Michael's. For beginner jewelry makers, don't bother getting top of the line tools. Just get something inexpensive and functional. Once you get the hang of the craft, you can move on to higher-end items. When I was first starting out, I ordered a basic jeweler's tool kit. This had almost everything I needed and I still use it today.
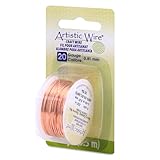
1. Wire. For this particular bracelet, I recommend using 18 or 20 gauge copper or silver colored copper artisan wire, which you can get for just a few bucks on Amazon. When it comes to art wire, higher gauges are softer. So 18 gauge is slightly harder than 20 gauge. Copper is great for begginers because it's soft and inexpensive, and very easy to work with. It also looks nice. Copper goes well with so many colors, but I especially like it with blue, as you'll see with my finished bracelet. I like the contrast, which is very striking.
2. Small beads. You'll need about 7, any color and shape that you like. You can mix up colors and shapes or use all of the same kind. It's up to you. I like using smaller beads for bracelets because they're less likely to rub against your arm. Definitely make sure that the type of bead you're using is lightweight and comfortable, in addition to being pretty. You don't want your jewelry to be annoying to wear.
3. Wire cutters. I recommend getting flush cutters, which cut on the flush. This way, the wire edge won't be as sharp. You don't want to cut yourself on the wire.
4. Jeweler's file. This is to further file down the edges of the wire, to smooth it out.
5. Round-nose pliers. These have a rounded tip, which is great for making looping designs and spirals.
6. Flat-nose pliers. These have a flattened tip, which is great for squeezing the wire together and securing it.
7. Goggles. I don't personally use these, but the bits of wire can sometimes go flying when you cut them. You don't want to get them in your eye!
8. Ruler. This is so you can measure your bracelet. This way, if someone wants you to make a bracelet that's 7 inches long, you can make sure it's the correct length.
Instructions


How To Make A Wire Wrapped Bracelet: Steps
Now that you have the materials on hand, you can begin making your wire wrapped copper bracelet. For this, I'm using a basic four-leaf clover pattern, which looks really pretty, but is very simple to make, once you get the hang of it. If you mess up, you can undo the design and straighten out the wire to begin again, but don't reuse a piece of wire too many times or it'll break. This is why it's good to practice a few times until you feel ready to actually make the bracelet.
This can be a fun project to do with kids, but you should monitor them and keep them away from dangerous tools. Never let them work alone and don't let really young kids near the small parts, like the beads. You don't want them to get swallowed.
As I said above, I like copper wire for starter projects, but the fun thing about artistic wire is that it comes in all sorts of pretty colors. You can go crazy and get wire in purple or blue or black; if you're making a bracelet for a little girl, for example, she'd probably love a pink or purple bracelet. When you get better at making jewelry, you can switch over to more expensive types of wire like gold or silver. But why waste money when you're first learning the craft -- especially since the artistic wire looks beautiful.
1. Cut about three inches of wire and gently straighten with your fingers. Be careful not to scratch it. Take the round nose pliers and form a small loop at the very end. Whenever you cut a length of wire, I highly recommend that you file the ends a bit to blunt them. This way, you -- or someone else in your home -- won't accidentally stick yourself with the sharp wire. Trust me, I've done this many times and it hurts! It takes a few seconds to file and it will save you a lot of trouble.
2. Move about a quarter inch to the left of the first loop and make a second small loop. At this point, your clover should look like a bow with a long stem. Try to make all of the loops evenly sized. Always be gentle when forming the loops; you don't want to bend the wire any more than it needs to be bent, otherwise it'll eventually get worn down and break.
3. Move to the top of that "stem" and form a third loop below the second. Try not to place the loops too close together or your clover will look smushed.
4. Now form the fourth loop. Using the wire cutters, cut off the remaining wire; then use the flat nose wires to secure the fourth loop in place. And voila! You have your clover. When snipping off the excess wire, mind your eyes; I suggest holding the wire to prevent the excess portion from flying across the room. I learned the hard way that this is something to watch out for!
5. Follow the first four steps and make 5-6 more clovers, depending on your wrist size. You can always add or remove a link, if necessary.
Next up, you're going to make 5-6 bead links to connect the clovers. If you want to use a different color wire, go for it. A fun thing to do is to make the bead links in one color and the clovers in another. Use your imagination here and have some fun!
1. Cut about 1 1/2 inches of wire. Using the round nose pliers, make a medium-sized loop on one end, but don't close it.
2. String the bead onto the wire until it's centered.
3. Make a medium-sized loop on the other end, but again, don't close it. Your bead should look like it's sitting in an "S."
4. Make 5-6 bead links. Again, you can add or subtract links, if necessary.
Now comes the fun part -- connecting the bead links to the clovers.
1. Hook one end of the bead link to one clover and the other end to a second clover. Using the flat nose pliers, gently and securely close the loops. Repeat the process, alternating bead links and clovers until you make a bracelet that ALMOST fits. Do not yet close the bracelet chain because you still have to make and add the clasp.
2. To make the clasp, cut about 2 inches of wire. Make two loops similar to the ones you made for the bead link, but these should be slightly larger so that they close at the center.
3. Hook one end of the clasp onto one end of your bracelet, and the other loop onto the other end of your bracelet. To open and close the clasp, simply push one of the loops open and unhook; hook it back and push the loop closed.
And here is your finished clover bracelet! You can make these with any type of wire and bead; once you get the hang, these wire bracelets take only about 20-30 minutes to make. They make great gifts for Mother's Day, a birthday, Christmas or any other occasion. People will really appreciate getting a homemade gift from you -- and you'll be saving a lof of money.
Helpful Links
- How To Drive Traffic To Your Etsy Shop With A Blog
One great way to drive traffic to your Etsy site is to keep a blog. Here's how you can use a blog to make more sales on Etsy. - Great Ways To Promote Your Etsy Shop And Make Money Selling On Etsy
Promoting your Etsy shop takes work but is worth the effort. Here are some great ways to promote your Etsy shop and make money selling on Etsy. - Naomi's Designs Handmade Wire Jewelry by Naomirabinowitz on Etsy
Welcome! I sell handmade wire wrapped earrings, bracelets, wire wrapped necklaces, bridal jewelry, rings, ooak, custom. Free gift with purchase - MayaGirl Creations Handmade Jewelry For Kids by MayaGirlCreations
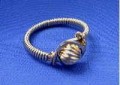
Welcome to MayaGirl Creations! I sell handmade wire wrapped, silver and enamel jewelry for children, tweens and teens. My jewelry is fun, - How To Make Jewelry: Make A Handmade Wire Wrapped Coil Ring
Making jewelry is fun and easy. Here's how to make a wire wrapped coil ring. - How To Make Jewelry: Handmade Wire Jewelry
Making wire wrapped jewelry is a fun and useful skill. Here are tips on how to make jewelry and what tools are needed for wire wrapped earrings, wire wrapped necklaces and wire wrapped bracelets. - How To Make Jewelry: Make A Handmade Wire Wrapped Stone Pendant
Making handmade jewelery is fun and easy! Here's a pattern for a wire wrapped stone pendant. - How To Make Jewelry: Make Handmade Wire Wrapped Spiral Earrings
Making jewelry is fun and easy! Here's an earring pattern for wire wrapped copper spiral earrings. - Jewelry Making Basics: How To Use A Jeweler's Saw
Knowing how to use a jeweler's saw is one of the most important techniqes in making jewelry. Here are tips on using a jeweler's saw. - How To Improve Sales On Etsy: Make More Sales With Your Etsy Shop
Looking for Etsy success? Here are some tips on how to improve sales on Etsy so you can sell more on Etsy. - Jewelry Making Supplies | Wire Jewelry
Jewelry Making Supplies and Wire Wrapped Jewelry Supplies - We carry a complete line of jewelry making tools, wire wrapping supplies, jewelry wire, cabochons and much more! Check out our free online jewelry videos and Wire Wrap Jewelry Patterns! - Arts & Crafts | Michaels Stores
Michaels Stores, the largest specialty retailer of arts, crafts, framing, floral, wall decor, scrapbooking and much more. Michaels� Where Creativity Happens�! - Fire Mountain Gems and Beads
Buy Jewelry Making Materials
Related

★ How to Make Puppets for Stop-Motion Animation | Jointed Limbs and Clay Art Doll Figures ★

Beautiful Wire Wrapped Jewellery - How to Make a Gold or Silver Wire Wrapped Cocktail Ring

How to Make a Beaded Mask or Eyeglass Holder and Necklace

Chainmail 101.5: Beginner’s Chainmail with Advanced Topics

DIY Craft Tutorial: How to Make Jewelry Charms From Recycled Materials