How to Make a Wooden Bathroom Wall Cabinet


Bathroom Medicine Cabinet
As part of recent renovation of our shower room I ripped-out and replaced the old wash basin, under sink cupboard and the cheap plastic bathroom cabinet above the sink. We replaced the wash basin and under-sink cupboard with a new vanity sink and cupboard unit bought for almost half price in the January Sales; just ideal as they are a near perfect fit for the available space and well match our new décor for the room. However, finding a suitable bathroom cabinet was another matter. Unlike the vanity sink and unit, that were a good fit, we found no bathroom cabinets that were near a perfect fit for the space available. Therefore I decided to make my own bespoke bathroom cabinet, made to measure to maximise on usable space.
Bespoke Design
Making your own bespoke bathroom wall cabinet (also known as a medicine cabinet) has the distinct advantage of being able to make it to measure so that it fits exactly the wall space you want to fill; and you can make it with any design features of your choosing.
Bespoke Bathroom Wall Cabinet With Mirrored Doors
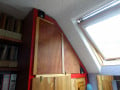
Having modernised our shower room and installed a new vanity sink and cupboard I wanted a bathroom wall cabinet to fill the space above the wash basin. I had exacting requirements in mind, including style, size and functionality; and in particular to maximise on storage space by utilising all the available space. Pinnacle to the design was the requirement for two large mirrors to fit on the on the bathroom cabinet doors.
The area in question was the width between the shower unit and the wall, 30 inches wide; and the height from the top of the vanity sink to the top of the shower unit, 40 inches. I wanted to keep the first foot above the wash basin clear to give adequate clearance for the electric toothbrush and attachment, 10.5 inches high. I also wanted an open tiled shelf, about six inches high, just below the bathroom cabinet as a semi wet area e.g. a shelf convenient for putting soap, flannels, glass (or plastic) tumbler etc. I wanted the doors to be mirrored and for the top of the cabinet to act as an open shelf area for odd items which are not regularly required.
It was obvious from the start that finding such a cabinet of the right dimension and meeting these requirements was highly unlikely; although I did have a quick look at was available. Therefore I decided to make this a DIY project and make my own bespoke bathroom cabinet.
The mirrors was central to the design, so before putting pen to paper and working out the exact design and measurements and writing up a shopping list of required materials I started by sourcing the mirrors. On researching I opted for a couple of Acrylic mirrors, 30 cm by 50 cm (1 foot by just over 19 inches), and they only cost £20 each (about $33); side by side they would give me a width of 24 inches, which is a good size for a pair of doors, and the height was just perfect for my requirements.
Having sourced the mirrors I was able to put together my final detailed design, including dimensions and a detailed materials list. In checking on what scrap wood I had in my workshop (garden shed) I found that apart from the mirrors the only other material I needed to complete this project was some additional pine board for the doors and a couple of pairs of hinges.
Below is a detailed step by step guide to making and fitting the bespoke bathroom cabinet, which although you may not wish to duplicate may provide you with enough useful information and guidance for designing and making your own bathroom cabinet.
Project Objectives
Maximising on Storage Space and Large Mirrors
Making my own bathroom cabinet was a lot cheaper than buying one, more especially as it is made mostly from scrap wood laying around in my workshop; the shed down at the end of the garden. Not only is it made to measure to maximises on storage space but it also meets our other requirements for a new bathroom cabinet including fitting in with our décor for the shower room makeover, large mirrors on the cabinet doors and adjustable shelves inside the cabinet for storage versatility. Adjustable shelves future proofs the bathroom cabinet for any future changes to our storage requirements, which may include manufacturers changing the size their bottles of shampoo, conditioner etc. requiring raising the height of one of the shelves or allowing us to lower its height so we can fit another shelf on top for further storage e.g. to maximise on storage use.
Tools:
- Circular saw
- Bench saw
- Mitre saw
- Jig saw
- Hand saw
- Electric sander
- Belt sander
- Sandpaper
- Tape measure
- Square
- Pencil
- Drill
- Drill driver or screwdriver
- Wood drill bits
- Masonry drill bits
- Clamps and sash clamps
- Wood mallet and chisels
- Router and router bits
- Spirit level
Time required: 3 days
Difficulty: medium
Cost: $100
Materials:
- 3/4 inch (18 mm) pine wood (or old pine floorboards) 6 inches wide.
- 3/4 inch (18 mm) pine board, 12 inches (300 mm) wide
- 1/4 inch or 1/2 inch plywood, 5 inches wide
- 1/8 inch or 1/4 inch plywood strip, 3/4 inch wide, or beading
- Wood glue
- Panel pins
- Wood screws
- Shelf support pegs, metal or plastic
- 4 x wall plugs
- 4 x hinges
- 2 x mirrors, either conventional 3 mm glass or 3 mm acrylic mirrors
- Mirror fixing brackets
- Varnish, wood stain or paint
Step by Step Guide
Sourcing the Wood and Cutting It All to the Correct Width
I decided on a standard depth of six inches for the cabinet, so all the wood I was cutting for the side, top and bottom and shelves would all be the same width of six inches. I my shed I found a number of long pieces of pine wood salvaged from a dismantled bookcase someone had given me just a few months earlier. The shelving was about 8 inches wide so I used my circular saw (attached to a jig) for cutting all the pine boards I needed for this DIY project to six inches wide.

Cutting the Wood to Length
Having cut the main wood I adjusted my circular saw and jig to cut a piece of thin plywood 5 inches wide for the tiled shelf. Then I placed out all the pieces on my workbench so I could start measuring, and using a pencil and square, marking them up ready for cutting to their required lengths.
As part of my design I decided to suspend the tiled shelf underneath the cabinet, and for it to be 5 inches wide; the same depth as the tiled shelf immediately behind the vanity sink where the electric toothbrush and shavers are kept. As this shelf is to be tiled, to keep the same general thickness as the rest of the wood I opted to use 1/4 inch plywood, rather than 3/4 inch pine. Normally I would have used 1/2 inch plywood for the extra strength, but as I would be using 1/2 inch thick tiles rather than the usual thickness tiles I needed to use thinner plywood to keep the overall depth closer to my 3/4 inch target; albeit this shelf would be underpinned with a batten at the back for added support.

The first two pieces to cut were the sides; I opted to cut them by hand, using a hand saw for precision cutting. I could have used my circular saw just beyond the pencilled marked line and sanded back but with such small pieces it is just as quick to clamp them up and hand cut. Having cut the first one rather than re-measuring and marking to cut the second piece separately, it is much safer and quicker to use it as a template e.g. place it onto of the second piece of wood and line them up at one end using your fingertips as a gauge to feel that both pieces are lined up; then with a pencil mark the other end for cutting. This avoids the risk of measuring the second piece of wood separately and making a silly mistake e.g. measuring 23 inches in error for cutting rather than 32 inches.

Adding Shape to the Design for Style
Adding shape to the design; essentially the bathroom cabinet is a square box excepting the lower open tiled shelf which is an inch less in depth. This lends itself to adding a bit of curvature and shape to the design rather than just all straight edges; which I think enhances the overall look of the cabinet. As you are restricted by the limits of what you can do with a jig saw do not get too ambitious with fancy curves; just keep it simple. Mark out and carefully cut the first piece with the jig saw.

You could lay both sides on top and cut the two matching curves (profiles) simultaneously, excepting that when cutting through thick wood a jig saw blade has a tendency to bend so you end up with a slant cut. Therefore, it is probably better to cut one piece first and use it as a template for marking out and cutting the second piece; as shown in this photo. Line the two pieces of wood up, with the template piece on top; fine lining by running your fingertip along the bottom edges so that you can feel that the two pieces are perfectly lined; the fingertips are very sensitive and ideal for this precision check.

Having cut the curves, line the two side panels up, using your fingertips as a guide; clamp them together, double check they are perfectly in line, visually and with your fingertips. Then use sandpaper to make both profiles identical on the two side panels.

Using a Router to Enhance the Style
To add even more shape to these profiled curves choose a suitable router bit and carefully run the router along the inside edge of each curve. This is a point where it pays to think twice and cut once e.g. if you press ahead without thinking it is easy to route the wrong side of either one or both of the side panels. If you are not sure, stand the side panels up and place a pencil mark on the inside of each panel close to where you want to route; just as a visual reminder and check for routing the correct sides.

This photo shows the finished results of routing. However, if you did not want to route, or do not have a router, you could round off the edges with an electric sander using course sandpaper; the end results can be just as effective.

Making the Vertical Pieces
Next is cutting the bottom open (tiled) shelf and the top and bottom pieces for the bathroom cabinet. The bottom open shelf in this design being 1/4 inch plywood, 5 inch depth and the full width of the cabinet (as it will be fixed from underneath); while the top and bottom for the bathroom cabinet are 3/4 inch (18 mm) pine wood, six inches depth, and the width of the cabinet less the thickness of the two side panels.
To achieve this accurately, cut the plywood open shelf piece first and place it over either the top or bottom cabinet piece and lined up in front of the two side panels; as shown in this photo. This will give you a point at the end of the plywood section where you mark with a pencil to give you a cut point.

Clamp the top and bottom cabinet pieces together (one on top of the other), using your fingertips at the end of the wood sections you will be using, to ensure they are in line with each other. Square off the line previously marked, with a pencil and square; and cut the two pieces simultaneously with a hand saw.

Cutting the Doors From a Sheet of Pine
Now all the pieces for the basic box is cut all that remains is the shelf divider, shelves, the doors and the two front side panels, to go either side of the doors. The size of the doors (including their height) is determined by the size of the two mirrors I bought for them, 30 cm x 50 cm (12 inches x 19.69 inches) each; this in turn determines the size of the shelve divider.
Therefore I cut the doors next, and dry assembled the cabinet placing one of the doors over the top to take an exact measurement for the divider, and cut it to size. As the doors would be mirrored I did not want any handles on them, instead the bottom of the doors would overlap the bottom of the cabinet by just under half and inch to create a lip that forms a natural pull handle.

Making the Peg Holes for Adjustable Shelves
As I wanted adjustable shelves, having cut the shelf divider, the next step was to mark out a grid on the shelf divider to pinpoint where to drill the holes for the shelf pegs. Holes about half an inch on either side, at regular intervals e.g. every inch, so that the lowest shelf position could be 4 inches and the highest, which is less accessible (especially for smaller people) could be set at any height from six inches upwards.

I needed to know the size of the shelf support pegs in order to drill the correct size hole; for this I used the hole size gauge plate fitted to the inside of my Drill and Drive Bit Accessory box as one of the rather useful accessories. As shown in the photo, the gauge shows the correct diameter for these pegs as 4.5 mm.

To give a tight fit I drilled the holes slightly smaller, at 4.2 mm; although if I was building the cabinet for someone else I would have drilled them at the correct size of 4.5 mm so that they would not have to struggle forcing the pegs in. I would suggest you experiment on a piece of scrap wood and decide for yourself what you are comfortable with; although do not make the holes too big, otherwise the pegs will just fall out too easily.
As there would be shelf support pegs on both sides of the centre shelf divider I place a piece of sacrificial wood underneath and drilled the holes right through the divider.

Having drilled the peg support holes right through the centre divider I clamped it to each side panel in turn, using it as a template to mark out where to drill the holes in the side panels e.g. by drilling through each hole in turn into the side panel to the correct depth. Normally you would drill to the depth of the peg, allowing an extra millimetre or two clearance. However, as one side of the bathroom cabinet would be against a wall and the other side next to the shower unit, it did not matter whether I drilled all the way through or not as sides of the bathroom cabinet are not going to be visible.

Video Demo of Drilling Holes for Adjustable Shelf Supports
One of the key features of the bathroom cabinet in this article is adjustable shelves. This short video which I made as part of a previous how-to DIY project demonstrates a method I used for making the holes for use with shelf supports for adjustable shelves.
How important are Adjustable Shelves
Not all bathroom wall cabinets have adjustable shelves. I am glad that I designed mine with them because I set all four adjustable shelves to a standard height giving me six 6 inch shelves, and within half an hour of installing it on the wall in our shower room my wife had taken one of the shelves out so that she could have two taller shelves for storing taller items e.g. bottles of shampoo etc.
Fixed vs Adjustable Shelves
Are Adjustable Shelves a Must in Your Medicine Cabinet?
Adding Shape to the Cabinet
While drilling the peg support holes in the cabinet I also took the opportunity to round off the sides at the top of the cabinet to give a rounded profile to the open shelf at the top. I rounded these corners off just by simply using an electric sander, and doing it by eye. Although if you have not done this before you may wish to start by marking out a curve and sanding down to the pencil mark of the curve, using a rocking motion as you move the sander back and forth over the corner. It is a simple job that takes no more than a minute or two.

I next turned my attention to the bottom open shelf, which once the cabinet is fitted to the shower room wall, would be tiled. My aim was for this shelf to be 5 inches in depth with a 3/4 inch (18mm) depth to match the thickness of the rest of the wood. Rather than seeing a tiled edge I also wanted the shelf to be edged in wood. The thickness of the tiles I was using (to match the tiles I used in renovating our shower room) was 10mm, just under half an inch, and taking into account a few millimetres for the tile adhesive 1/4 inch plywood was the optimum choice, albeit (for added strength) it would need be underpinned with a back butt fitted to the back wall.

Fitting the Bottom Open Shelf
And for the facing I opted to use even thinner plywood, just 3mm (1/8 inch). Obviously, plywood this thin is very flimsy and lacks strength. Therefore attention needs to be made to pinning it at the sides and plenty of wood glue applied along its length and left clamped to set; to hold it in place until it is tiled, when the tile adhesive and grout will add additional strength and rigidity required. If you are not confident with this you could quite easily use 1/4 inch plywood for this.

In order to achieve the 5 inch depth of the shelf I had previously cut a notch in the bottom of the side panels to the thickness of the front edging for this shelve; with the tiles later being cut to fit the space, with a few millimetres around the edges for grouting. And once the edging had been firmly glued and pinned in place, and the glue set, it was just a simple case of running sandpaper along the edges to smooth and round them off.

Making the Shelves and Fitting the Shelf Divider
With the cabinet almost complete it was time to make the shelves and fit the centre shelf divider in place. With about 18 inches to play with, two adjustable shelves on either side would give the option of 6 inch high shelves, if they were set at equal distances. To get the correct length of each shelf I simply placed the shelf divider to one side of the box, measured the distance from there to the other side and divided by two; then cut four pieces of pine wood to that distance, less a couple of millimetres e.g. as the shelves are adjustable you do not want them tight fitting.
Then placing each shelf in the box on either side, two at the top and two at the bottom, and placing the shelf divider in the centre (as shown in the photo), it gave me the exact potion for gluing and screwing the centre shelf divider in place.

Fitting the Back Supports for Fixing To the Wall
In order to fix the whole unit securely to the wall in the shower room I fitted back supports at the top and bottom, and predrilled the fixing holes. And at the same time fitted the support trim under the bottom open shelf. For added aesthetics each piece could be finished off with a decorative edge using a router. Although in my case as I had cut down to size scrap wood from an old book to make this cabinet, the original depth of the bookcase shelves being 8 inches, I used the two inch strips that were left over as the back supports and for the underpinning of the bottom open shelf. These strips were already profiled with decorative edging; and just ideal for this purpose.

Fitting the Doors
To complete the woodworking part of this project it was time to cut the front side panels to size for the doors, allowing a couple of millimetres gap on either side of the doors of clearance; dry laying to test for fit; making any minor adjustments as appropriate. The front side panels were made from scrap wood; the only wood I had to buy was a piece of pine board for the two doors.
Fitting the hinges was a bit fiddly, but to be sure of best results I find it prudent to do just one screw on each hinge initially to test for fit. Then, if necessary, unscrewing the hinge to make any final adjustments before using the other screw hole for a second fit; and all being well, fitting the hinges properly.

Varnishing
Having done all the woodworking, it was time to varnish the bathroom cabinet before fitting it to the wall. The cabinet could be painted, wood stained or varnished to fit the décor. I opted to apply two coats of varnish using an oak effect yacht varnish to match the gold trim around the shower unit. The varnish is tough wearing, waterproof and quick drying, allowing you to recoat within one hour. As the varnishing did not take long, I was soon ready to fit the two mirrors to the cabinet doors and fit the bathroom cabinet in place on the shower room wall just above our new vanity sink and unit.

Fitting the Mirrors
The acrylic mirrors we bought came with five sticky strips across the back for an easy and quick fitting of the mirrors to a suitable surface. The adhesive strips are highly adhesive and very effective, however for added resilience I also used mirror fixing brackets (as shown in this photo) which I salvaged from a 1950s dressing table mirror.

Acrylic Mirrors
Alternative to Traditional Glass
In the planning and design phase of my DIY project to make a bespoke made to measure bathroom cabinet one of the critical features determining the final design and exact measurements of the cabinet and its doors was the size of available mirrors for fitting to the bathroom cabinet doors.; and the cost of the mirrors of course.
When researching and resourcing the mirrors I found that most potentially suitable mirrors were either too big or too small and often rather expensive. Then I stumbled across Acrylic mirrors on Amazon which come in a variety of useful sizes and are well priced; and the same thickness of ordinary glass mirrors, 3 mm.
In researching this type of mirror further, noting the pros and cons and taking particular note of customer reviews I concluded that Acrylic mirrors would be just ideal for my project; it was just a case of finding the most suitable size available.
What I discovered about Acrylic mirrors in my research is that they are light weight, generally well-priced and unlike conventional mirrors are flexible so there is no rick of them cracking if for example the wooden door they are fixed to happens to warp; as wood does. The only downside is that as these Acrylic mirrors are so flexible unless they are fitted perfectly flat to a flat surface they will distort the image; for practical use in a bathroom, shower room, or even on a dressing table or wall in the bedroom a minor point which I can live with. Although in a more public area such as the living room or dining room they may not be so suitable unless mounted and framed on something perfectly flat such as MDF or chipboard which are not prone to warping.
These Acrylic mirrors often come with highly adhesive fixing strips on the back, which for smaller mirrors will hold fast on most suitable surfaces; although for larger mirrors additional fixing methods may need to be considered.
My conclusion and recommendation is that Acrylic mirrors are an ideal alternative to conventional mirrored glass, although great care needs to be taken in fitting them to ensure no distortion of the reflected image e.g. frame and mount them on a material which is not prone to warping such as MDF or chipboard. Albeit for somewhere like a bathroom or shower room fitting this type of mirror to pine board, which is prone to a little warping, is less critical provided you are happy if the reflected image is not perfect.
Having used this product once I am more than happy with it and will most certainly being using it again in any future DIY project I may do that includes the use of mirrors.
Fixing to the wall
Once the mirrors were fitted it was just a case of screwing the cabinet to the wall using the four predrilled holes in the two fixing supports fitted to the top and bottom of the bathroom cabinet. When drilling through tiles, use the drill setting first, and once through the tile change the setting to hammer drill. Gently score the tile before drilling for the drill bit to bite, to prevent it slipping on the tile. Drill a pilot hole first followed by a drill bit large enough for the whole wall plug to fit into. Then behind the tile using a smaller drill bit to fit the body of the wall plug only, not the head; in doing this you should be able to push the wall plug in behind the tile to reduce the risk of the wall tile from cracking when you tighten the screws.
The purpose of the 5 inch ledge behind the wash basin was two fold. Firstly, it provides a useful place to put electrical bathroom appliances and other items such as the toothpaste, flannel and soap etc. And secondly, and more importantly, by fitting the vanity sink and unit 5 inches away from the back wall it provided space behind the sink unit for the plumbing e.g. to maximise on the cupboard storage space by having the hot and cold water pipes and the waste pipe behind the vanity sink cupboard rather than inside. Therefore keeping the tiled shelf suspended below the bathroom cabinet in line with and to the same width as the tiled shelf behind the wash basin made for an aesthetically pleasing design feature.

Before and After Photos
Click thumbnail to view full-size


This content is accurate and true to the best of the author’s knowledge and is not meant to substitute for formal and individualized advice from a qualified professional.
© 2014 Arthur Russ