The Backward Rose Free Crochet Pattern!

A New Take On The Crocheted Rose
We've all been crocheting variations of the same rose pattern for decades... and I wanted to do something completely different! I built the structure for this rose in an entirely different way, and I hope you will find it as interesting and pretty as I do!
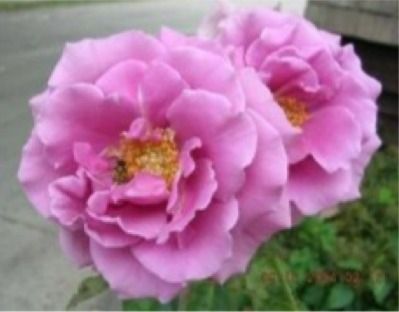
The inspiration for the Backward Rose came from some beautiful roses I grew in my gardens years ago at our former home. I've included a side-by-side comparison photo to illustrate how close I came to actually duplicating the real thing – I was kind of proud of that!
This pattern will work in thread or yarn, just choose the appropriate hook size, of course.
I really hope you enjoy this pattern, which is currently available here free. In the near future, =it will "retire" to my craftsy.com pattern store for sale. So get it now while it's fresh... and free!
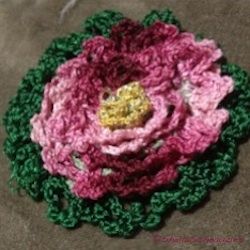
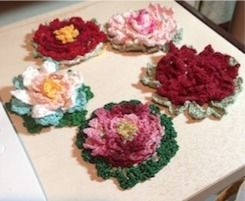
The Backward Rose is my signature crochet design of which I am most proud. I will always love making them and looking at them in different colors! I hope you will, too.
My Real Roses, Where I Got My Inspiration!
You may wish to starch your finished Rose in order to stiffen it into the exact shape you want. I make sugar water for these for tiny motifs on a small scale. In a shot glass, put 1/2" of sugar then an equal amount of water and stir. Microwave for 1 min. on high and stir. Soak motif for a couple minutes, making sure motif is saturated. Remove with fork, lay on towel to drain excess liquid. With toothpick, arrange petals as desired. Air dry on a plate or countertop.
Is It Live... Or Is It Crochet? - (Ha, ha)

OK the difference IS pretty obvious, but I got a kick out of seeing my inspiration and my result side by side. Maybe you will, too!

What You Will Need
For the example shown:
Green Satin Embroidery Floss separated into 3-strand pieces.
1 Ball Perle Cotton Size 8 in pink/white variegated (other colors shown in photo)
Small amount of yellow size 20 or 30 crochet thread
#8 Steel Crochet Hook
How To Make The Magic Happen!
All content SheilaSchnauzies 2012. Please do not distribute this pattern real world, internet or otherwise, thanks! You may of course link to this page.
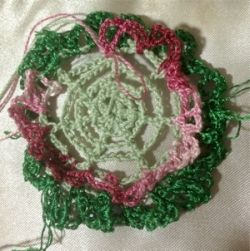
MESH:
With Light Green, Chain 5, join with sl st to form ring
Round 1
Ch 6. *Work DC, ch 2. Repeat 5 times. (6 meshes). End with ch 2, sl st in 2nd chain of starting ch 6.
Round 2
CH 7, *work DC, Ch 4. DC in next DC. Repeat * around, ending with ch 4, sl st in second chain of starting chain. (6 meshes throughout)
Round 3
CH 8, *work DC, CH 6, DC in next DC. Repeat * around ending with ch 6, sl st in 2nd chain of starting chain.
Round 4
CH 9, work DC, CH 9, DC in next DC. Repeat * around ending with ch 9, sl st in 2nd chain of starting chain.
Round 5
CH 11, work DC, CH 11, DC in next DC. Repeat * around ending with ch 11, sl st in 2nd chain of starting chain. Fasten off.
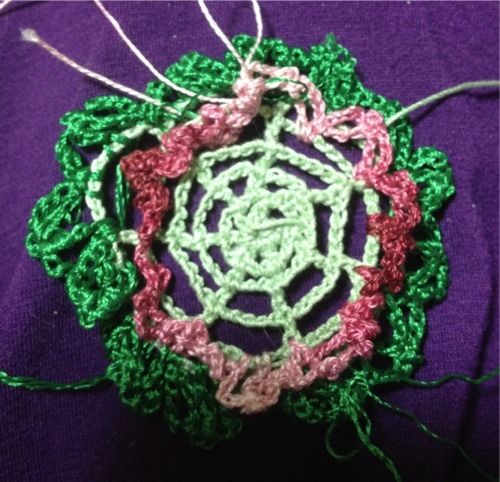
ADDING LEAVES & PETALS
Adding Leaves 1:
Attach deep Green in any DC of outer row of mesh.( *CH 6, TRC in base of ch 6 just made. CH 4, SC in base of ch 4 just made. CH 6, TRC in base of ch 6 just made). SC in ch 11 space. Repeat from (*), SC in next DC. Repeat everything from * around, ending with sl st in base of first ch 6. (We are adding a leaf in each ch 11 space and a leaf attaching to next DC.) See photo below. Fasten off.
Adding Petals 1:
Now here it gets the tiniest bit dicey, because it's a bit unconventional. Hang with me here:) Attach flower petal color (Pink Variegated in example) in the top right corner of the next free mesh.
Petal Rounds A & B
(We are adding two petals in each mesh. See photo above).
A/ (*CH 6, TRC in base of ch 6 just made. CH 4, SC in base of ch 3 just made. CH 6, TRC in base of ch 6 just made). SC in ch 11 space. Repeat from (*), SC in next DC. Repeat everything from * around. End with sl st in base of first ch 6. CH 3, SC in top of DC in the next open row of mesh inward.
B/ Repeat Round A
C/Repeat Round A except we are doing only one petal per mesh now. So this round will go like this: (*CH 6, TRC in base of ch 6 just made. CH 4, SC in base of ch 3 just made. CH 6, TRC in base of ch 6 just made). SC in next DC. Repeat everything from * around. End with sl st in base of first ch 6. CH 3, SC in top of DC in the next open row of mesh inward.
Rounds D & E
Repeat Round C. Fasten off.
Rose Center
Attach desired color (I used Yellow) in any DC on first round of mesh. Work 2 Rag Stitches (CH 7, SC in 5th ch from hook, SC in same DC). in each DC around. (Note, after you complete the 2nd Rag Stitch you will SC in the next DC.) Fasten off.
A Rose In Pink... - Using Alternate Petal Design
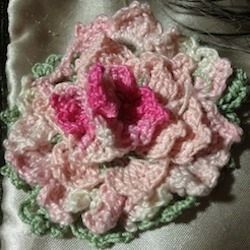
These petals are ch 4, work 3 TRC. CH 4, SC in base of ch 4 just made; work 3 more TRC in space. CH 4, sl st in space, sl st in next space.
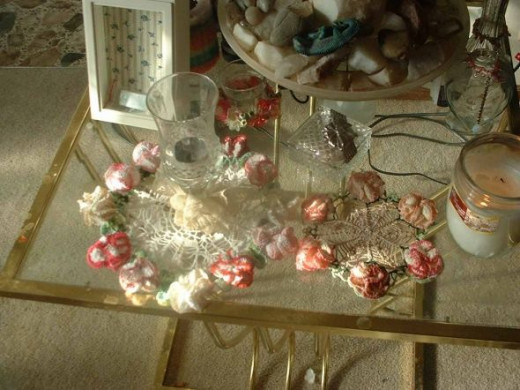
A Bunch Of Flowers In The Works....
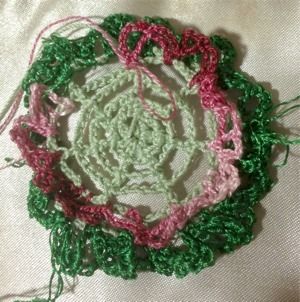
Leaves Added, First Row of Petals
A Word About Thread Or Yarn Selection...
This pattern will work with any crochet thread, yarn, or even embroidery floss if you choose the appropriate size hook. If you're working with color changes, make sure you stay with similar size and thickness so the pattern will work properly.
Adding Petals...
CROCHET IT!!!
Love To Crochet Flowers? Check Out My Realistic Carnations! - The Pattern will be available in my ebook, "Crochet With Sheila, A Lifetime Of Crochet" Coming Jun
You are invited to post a link to this pattern on your website, blog, Pinterest, Facebook, etc. I appreciate it!
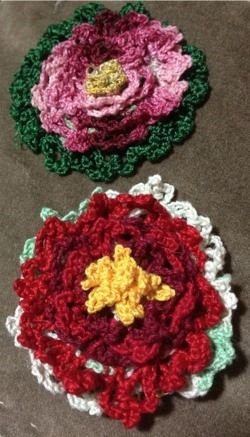
The Difference Starching Makes! - The first rose is starched and blocked... the second one is not.
")


