Patchwork - The Art of Decorative Patches


Inspiration for Using Patches
In this lens I want to look at patches - not necessarily patchwork quilts, but patched up clothes and cloth.
This lens is predominantly going to be about using patches for decoration on textiles pieces but I also want to think about patching up old clothes and recycling things rather than throwing them away. So often we'll throw away clothing or bed linen or whatever when it gets stained or ripped. So what can we do to add some glamour to our old and tired textiles?
I'm particularly interested in Boro textiles of Japan where fabric is patched and mended over and over with square or rectangular patches - everything is cut in rectangles and squares to enable the piece to be deconstructed again and made into another bolt of fabric.
So let's have a root through our scraps of fabric and prepare to make do and mend!
The Advantages of Patches
Patches are useful for lots of reasons.
They can cover holes, wear and tear. They can hide stains. They can "jazz up" a boring area on clothes or textiles. Patches can be used to impart information.
Patches are also great for using up little scraps of fabric. If you've be making clothes or playing with textiles for any length of time then you are sure to end up with bags of little scraps that otherwise wouldn't be useful for anything.
Sometimes I will have lots of little pieces of fabric that I cut for a project but when I layer them up with other colours and textures they just don't look right.
In this lens I'm going to discuss what can be done with all those little scraps.
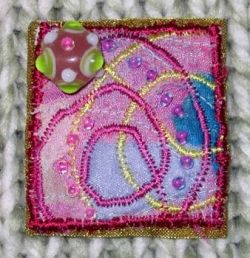
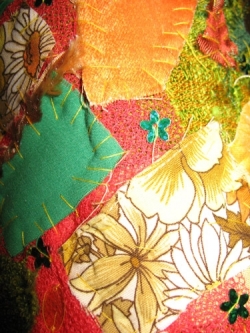
The Image above is a textiles brooch but could just as easily be utilised as a textiles patch.
Above: Scraps of textiles fragments left over from different projects.
Any of this can be used to make fun textiles patches.
Different Types of Patches
What different types of Patches are there, you may ask.
Brownies, Cubs, Scouts and Girl Guides
All sorts of gorgeous embroidered patches are available for clubs, like the ones mentioned above, or to show your alleigance to something like a favourite band.
What about you? What would you make if you made your own patch? Would you embroider your name? Maybe some sort of picture?
Geography Teachers
The classic stereotypical geography teacher (in England, at least!) needs a corduroy jacket with patched elbows.
How could you adapt this idea for a textiles project?
Also think about padding on elbows and knees for skateboarders etc.
Knees
Before rips in the knees were in fashion there was patches!
What about patching under the hole to show off the areas of wear and tear?
Patchwork Quilts
Whole quilts are made out of patches - a fabulous way of using up small pieces of fabric.
How could you take the idea of traditional patchwork quilts and build upon it?
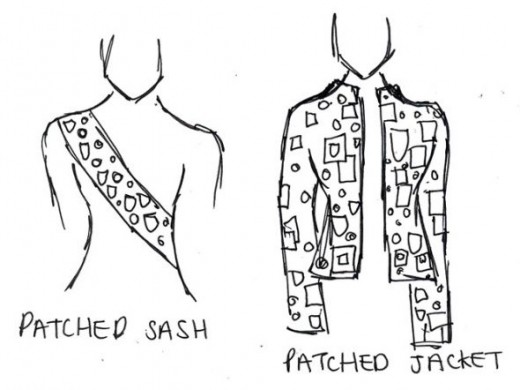
Above: Quick doodles for patched clothing and accessories.
Using up Scraps
I do my best to use up as much textiles and fabric waste as I can because I'm a massive hoarder (I'm trying to work on that!), I love recycling and I hate chucking stuff in the trash.
These textiles pieces shown in this section are completely made from waste textiles - and by that I mean the little pieces that I cut from the edge of textiles pieces.
Why did I end up with excess embroidered bits on the edges of my textiles pieces?
Well, it's because I know that stitching excessively into layered fabrics and then melting them can make them shrink and warp considerably - so I like to play it safe and make my piece a little larger than I want them - especially when I'm making pattern pieces for a bag or some other structured object.
Sometimes I also end up with little bits and bobs that I don't like or don't fit in with the final textiles piece - perhaps they're the wrong colour or I 've stitched something poorly. On occasion I've even cut away the faces from textiles people and given them new faces by inserting fabric into the hole.
I make sure I keep a big bag of all these little bits and then one day when I can't think of anything else to make I have a scrabble through my bag of textiles waste and find some "jigsaw pieces" that look good sewn together.
Above: This textiles piece was made by patching together little slithers that had been cut from the edges of other textiles pieces.
Above: Another textiles piece made from pieceing together pieces of excess textiles.
The circles were spares from the discs I made to decorate the bag shown below.

Above: Blue Iris is a giant circular bag decorated with embroidered textile discs - perhaps this might give you some ideas for how you could make patches that stand out from your textiles piece?
Who says that your patches have to be flat and covering a part of your background fabric piece?
Decorative Patches
As I mentioned above, patches don't need to be covering something - they can be there to add beauty and interest to a fabric, or to give information.
I started experimenting with patches because I was bored with layering lots of little pieces of fabric up behind organza and them sewing all that texture safely under a sheer smooth layer.
I wanted to start sewing fabrics on top of other fabrics - leaving them free to be touched.
I also love the idea that these raggedy patches (like the ones shown opposite) might start to fray in time. Distressing has been a constant theme in my textiles work and I love the idea of fabrics continuing to distress themselves over time.
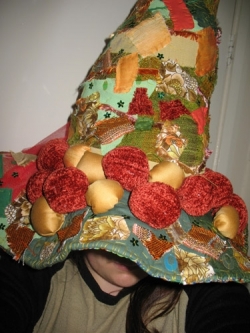
The Pumpkin Patch Hat
I had to handstitch the majority of this hat. Every single piece of surface decoration was stitched by hand simply because of the nature in which I chose to make it.
I started the hat by making a basic hat shape - which was a very solid thing - and then chose to cover it with fabrics.
This was almost like making a sculpture because I had to mould it by hand instead of by machine. I'm sure I could have worked out a way to do all the decoration on a flat piece of fabric first - but this way I got a very solid shape that wasn't going to be too floppy to wear.

Above: A close-up of the surface decoration of the Pumpkin Patch hat.
To Fray or Not to Fray?
If you don't want your textiles pieces falling apart and fraying all over the place then you have a few options.
Choose fabrics for your patches that won't fray - like felt.
Or...
Lightly singe the edges of all your patches - either with a soldering iron, heat gun or naked flame (be very careful and don't inhale any fumes!).
Or...
Use pinking shears to cut the edges of the patches.
Or...
Satin stitch the edges of your patches (or use a decorative stitch of your choice).
Pinking Shears

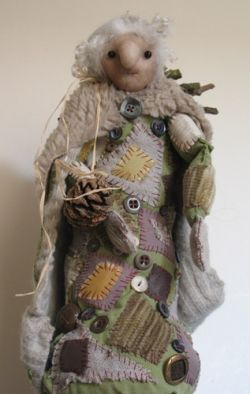
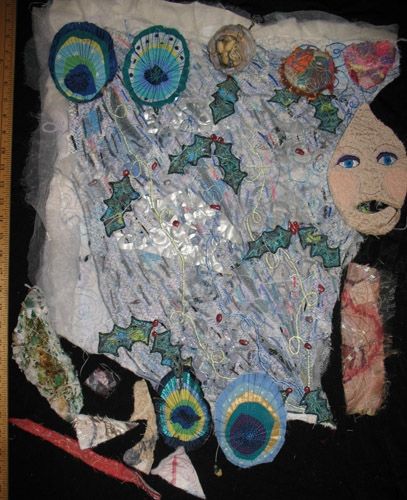
Baba Yaga
The doll shown opposite was completely hand sewn (like the Pumpkin Patch Hat shown above).
The head and body were made out of needle-felted wool and then covered with fabric which was hand sewn into place.
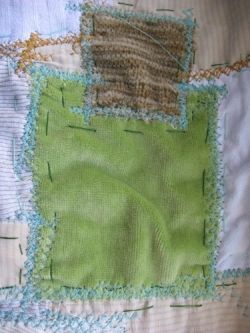
In the image opposite you can see where I've patched patches! How far could you take this? Could you build up a thick wodge of fabric with gradually smaller and smaller pieces of fabric? What could you use it for? Could you "carve" into it with a soldering iron?
As well as sewing lots of patches on top of the green background fabric I also used buttons.
Patches don't necessarily need to be made out of fabric - what else can you use? Will a button work just as well? How about pieces of thin metal? Paper? Plastic?
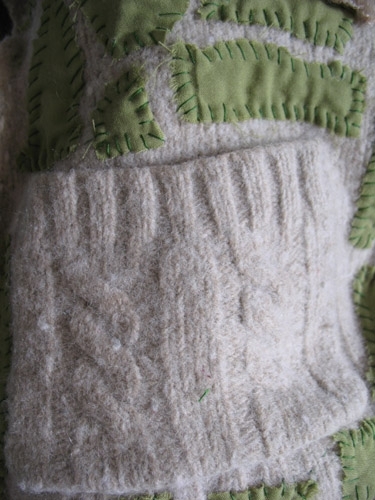
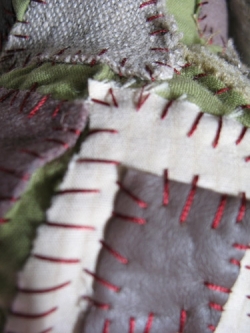
Above: This is a detail from Baba Yaga's cloak.
I used part of a felted cardigan to make the cloak - here you can see one of the pockets surrounded by patches of green fabric.
An interesting and almost quilted texture can be created from stitching plain, thin cotton onto felted wool.
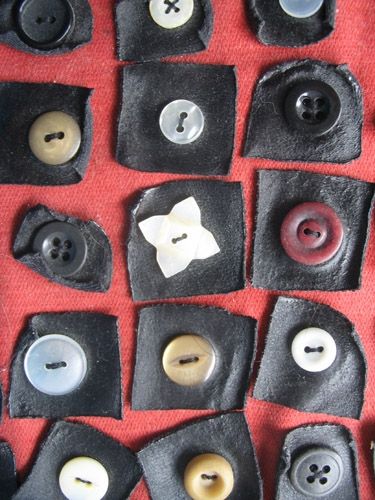
Above: Patches of fake leather were sewn onto a fabric background with buttons.
The piece was then melted with a hot air gun - check out the way the pleather has melted around the buttons - in some places it's almost like the buttons' shapes have been embossed onto the pleather.
Fabric Squares
Don't have a lot of fabric available?
Consider getting a pack of fabric squares - you get lots of choice without having to buy enormous quantities of fabric.

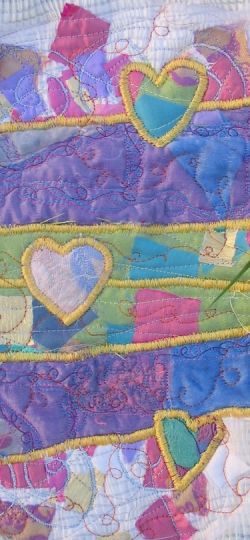
In the textiles piece below I added red and green squares to the Queen's dress to add more interest to it.
The fabrics I chose will fray a lot but I wanted the piece to look like a really old antique piece of cloth - the fraying is to my advantage.
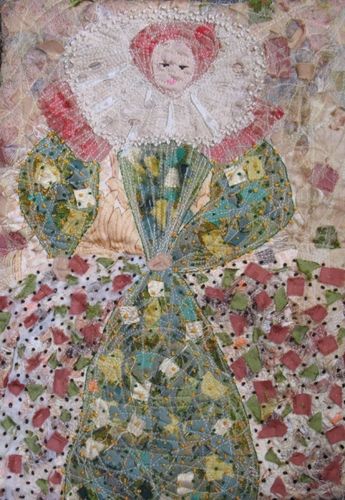
Above: The red and green patches on Queen Elizabeth's skirt were hand sewn into place.
I then used a cheese grater to fray them to make them fit in with the rest of the distressed piece.
Textile Patches
Patches don't have to be plain pieces of fabric.
As mentioned above, I often recycle off-cuts from my textiles pieces.
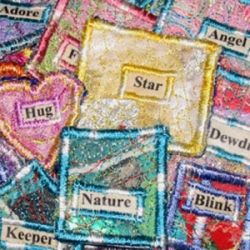
These brooches (opposite and below) were made from small fragments of textiles and could easily be used as patches instead of brooches.
I made the labels by printing words onto t-shirt transfer paper (remember to reverse the words otherwise they'll be the wrong way round on your fabric).
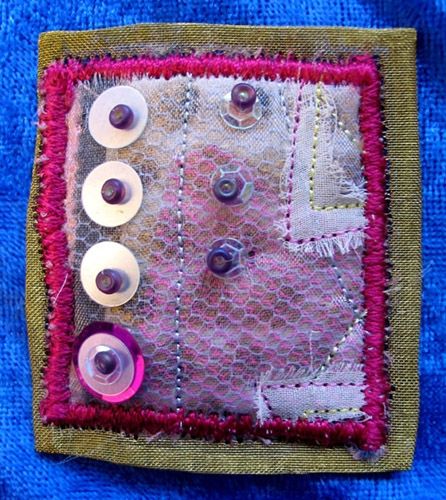
Above: This patch of textiles was edged with satin stitch, beaded and backed onto thin wire mesh.
I could just as easily have made this fragment into a patch to go onto fabric.
In the image below you can see where I've applied this idea, of patching the same sorts of textiles fragments I use for brooches, straight onto textiles.
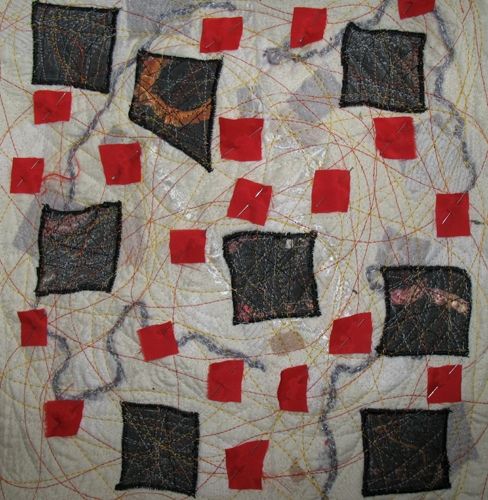
Above: A work in progress shot of a bag I made for my mother.
The black squares are separate pieces of textiles.
This bag was completely made from recycled scraps of textiles.
Make Do and Mend
I'm really into the idea of making do and mending.
People I know think I'm crazy for mending and making my stuff when you can just buy something new really cheaply - what they're not considering is that what you buy is costing you and everyone else so much more than you think.
And I'm not just thinking about carbon footprints, transporting materials, stuff ending up in landfills - but there are also the pollutants that come from mass producing items - consider the insecticides etc that are used to grow cotton etc and not only that but what about the people who make this stuff? They are most likely not getting paid anywhere near enough to make our $1 socks. They're probably having to work in dangerous conditions and they probably have to live in an environment full of toxins from their local workplaces.
Learning how to patch clothes, fix zips and take trouser legs up can save so much money in the long run and save the environment.
I think one of the main reasons that patching old clothes appeals to me is that at some point you're going to have changed this mass produced piece of clothing into something original and individual that no one else will ever have. How cool is that?!
Cath Kidston Mending Kit
Here's a cute kit for patching your clothes when you're away from your sewing kit. It even comes with an instruction booklet to help you with your mending projects!

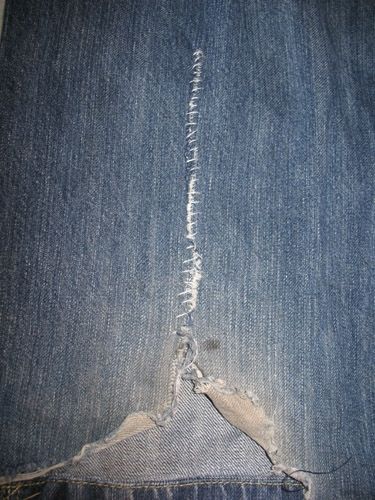
I guess I need to work on my make do and mend skills because the only image I could find was the one below which isn't very inspirational!
This is one of the bottom legs on my jeans. It got ripped the other day so I sewed it up.
You know what would make this look better? If I'd either used some sort of bright thread and fancy stitching or if I'd patched it up - maybe I will patch something over the top of it.
Make Do and Mend (Historic Booklet Series) - Ministry of Information

Hand Mending Made Easy

Patchy Clothes
At the moment I'm interested in making my own clothes - as I don't have a lot of any one type of fabric those clothes are going to be pretty patchy!
With clothes you have lots of options.
You could decide to cover something you already own with fabric patches.
You could make a large piece of fabric out of patches and then cut pattern pieces out of it - patchwork skirts with an elasticated waistband are always a good option.
You could cut out your pattern pieces and then apply the fabric to those before you sew the pattern together (don't make it too thick!).
Another option for skirts is to make a wrap-around skirt - that way you don't have to worry too much about shaping it to your body.
You could make a shawl.
In the top below I started experimenting with sewing strips of fabric to a t-shirt base. I'm not too sure what I'm going to do with it - it looks a little too much like a Hawaiian shirt at the moment! I wanted it to be glitzy and glamourous!
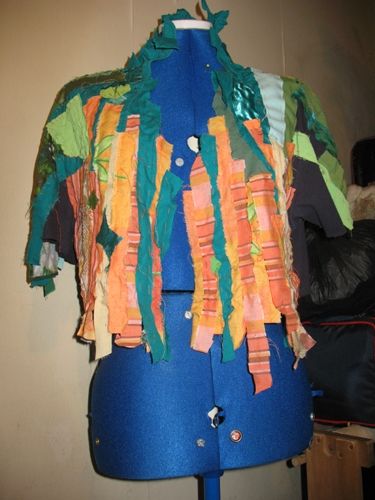
Above: Work in Progress.
I was attempting to make a little bolero jacket, using an old t-shirt as a base for strips of fabric.
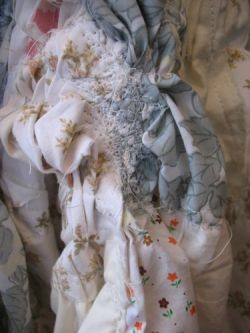
I made the skirt below (detail opposite) by sewing squares of fabric together (I didn't worry about seams or making them too neat - I just layered one square over the edge of the other and sewed it together).
I made gathering stitches across the top of each section and pulled them until the fabrics were ruffled up.
I made several sections for the skirt until I had enough to fit an old waistband (complete with pockets) that I cut from an old pair of trouser.
I then attacked the skirt with a sewing machine and sewed down the gather, not worrying about pulling the fabrics or making them buckle.
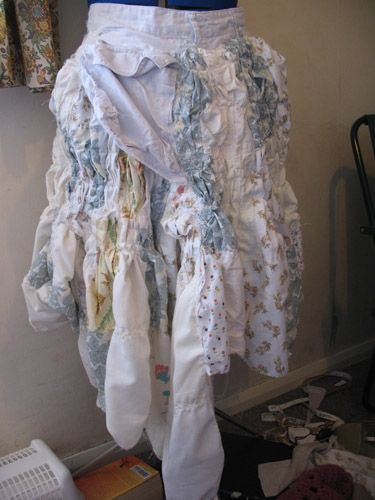
Above: A skirt made from scraps of fabric and a recycled trouser waistband.
Boro
The inspiration for this project came from an image of a beautiful jacket that one of my friends posted in their blog.
The jacket was on the website Sri Threads (which you can find links to below).
The jacket had been patched over and over until the whole thing was just a patched piece and you couldn't tell where the original fabric finished and where the patches started.
The technique is called "Boro" which means something like "tattered rags" and you can find out more about it below.
- Sri Threads
Sri Threads is a museum that specialises in Japanese Folk Textiles. This is their blog.
Boro: Rags and Tatters from the Far North of Japan

My Boro-Inspired Blanket
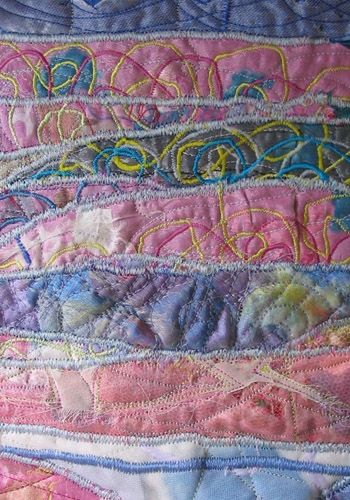
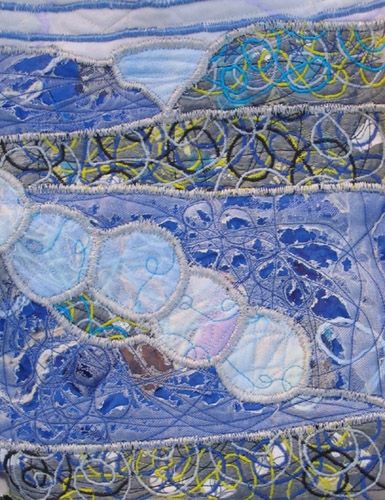
This blanket is nothing like the Boro textiles I've referred to above but I started making it as a reaction to looking at Boro textiles.
I loved the idea of the fabrics being patched over and over and tried to recreate this with all the patches I've used here.
I normally start my textiles pieces with a layer of wadding but here I've just started with a large piece of fabric which I've then started layering with other squares and rectangles of fabric (like the velvet pictured opposite).
I hand stitched all the blocks of fabric in place and then attacked it with my sewing machine - zig-zagging all the raw edges down with stitch.
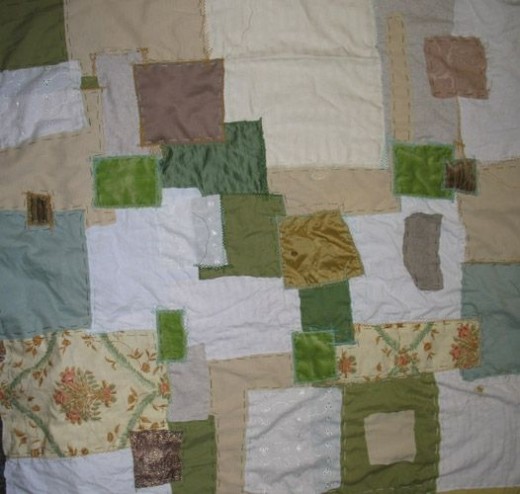
Above: This blanket is still very much a work in progress. I believe I still have some raw edges to stick down and I'm also thinking about getting some imagery into the patches. I'd certainly like to work into the piece with hand embroidery.
Adding History
A lot of the fabric scraps I use in my textiles pieces trigger memories for me.
This is probably because I use a lot of recycled clothing in my layered pieces - often clothing that belonged to me or my family.
How can you create history in your textiles pieces with patches of memory fabrics?
I saw a cute idea recently where someone had cut embroidered patches from their toddler's baby clothes and stitched them onto a toddler-sized dress so she could still wear all those pretty patches.
Perhaps you've ruined a favourite garment - can you salvage parts of it to patch onto something else?
Above: Detail from a textiles wrap.
That piece of hand embroidery layered into the wrap was part of a cushion cover my mother made.
Telling a Story with Patches
We've talked about using fabrics that are special to you and your family - but how about actually using those fabrics to tell a story?
I love the idea of how Brownies etc mark their skills and progression by sewing badges to their uniforms - it reminds me a little of how some people get tattoos to mark important events in their lives.
How about you?
What important events in your life can be expressed with scraps of fabric, or lace, or paper, or even photos? You could easily create a patch using t-shirt transfer paper.
")
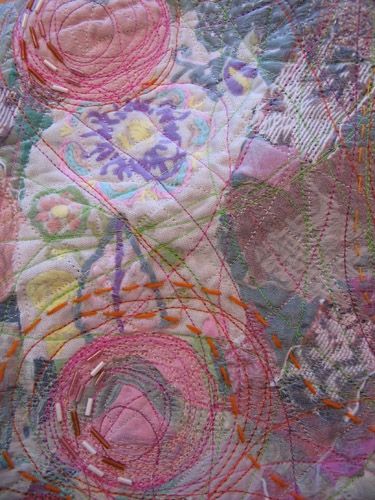
Above: A section from an art quilt that uses t-shirt transfer images.
The berries and leaves are from photos I took one Autumn.
T-shirt Transfer Paper

Patch Experiments
You can make "fake" patches by dividing your textiles piece up into sections. This is a great way to experiment with several different ideas at once - don't worry about making lots of different samples - just make one big one. All your experiments are joined together and are big enough to be put to use as the front of a bag or a cushion, for example.
The textiles piece below was divided into squares which I then decorated in several different ways.
This can get a bit tricky if you're dealing with layers!
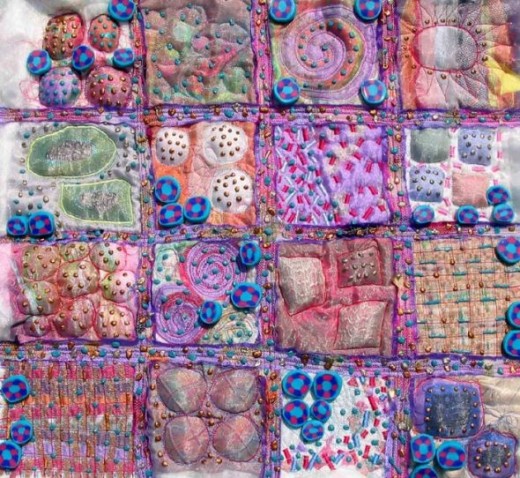
Above: Experiment using layering, stuffing, 3D paint, handmade Fymo beads and embroidery.


 Pattern With Step-by-Step Videos")
