Photoshop Tutorial: Make a 3D Photo Frame

Step One: Your Photo
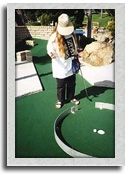
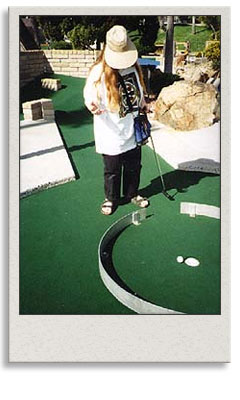
1. Open a photo in Photoshop. Ta-da! (Tip: See Where to Get Free Web Graphics -- Legally! for images to use.)
Notice how the white areas at the edge of the photo tend to merge into the webpage. A fancy schmancy frame will fix that!
How to Add a 3D Photo Frame to a Graphic
Here's a Photoshop tutorial to add a 3D frame to a photograph so that it looks like a polaroid snapshot.
For this 3D photo frames tutorial, you need Photoshop CS, Photoshop Elements, or a graphics program that uses layers and includes effects like drop shadows.
Note: Cmd/Ctrl-D means Command-D on a Mac, Ctrl-D on a PC.
Update April 2012: I made this tutorial in 2007, when we had to do everything manually,. Check out my list of free online photomanipulation websites that let you upload a photo into a template that adds a frame or realistic background like a billboard or television screen.
2. Choose "Duplicate..." from the Image menu and pick a new file name.
3. CLOSE the original and make sure you're working with the duplicate.
This way you can't accidentally mess up your original file. ;)
Step Two: Put Photo On Own Layer
Now that you have your photo,
1. Hit the "D" key to set default background/foreground colors to Black/White
2. Cmd//Ctrl A (Select All)
3. Cmd/Ctrl X (Cut under the Edit menu)
4. Cmd/Ctrl V (Paste under the Edit menu)
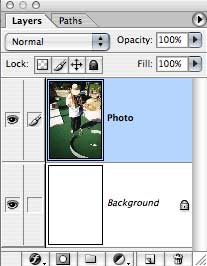
This should place the photo on its own layer above the background layer.
If the Layers Palette isn't visible, choose "Layers" under the Windows menu.
The Layers palette should now look like this:
Step Three: Expand Canvas
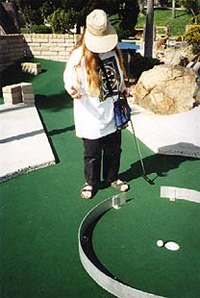
Under the Image menu, choose "Canvas..." and increase Canvas Size by about 30 pixels horizontally and vertically. Click Okay.
You'll now have a white border around your photo:
Step Four: Add an Outline
1. In the Layers palette, click on your photo's layer to work there. It should be highlighted.
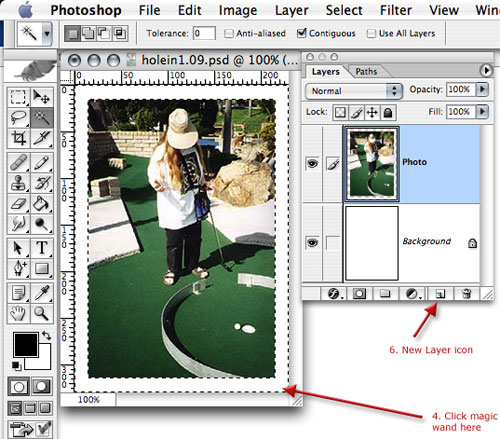
2. Select the Magic Wand tool (second from the top, to the right of the lasso.)
3. Check the tool's settings in the bar across the top. It should have a Tolerance of 0 and no anti-aliasing.
4. Click in the white area outside the photo. This should select the border.
5. Choose "Inverse" from the Select menu to have the selection box wrap around your photo. (Command-Ctrl-Shift-I)
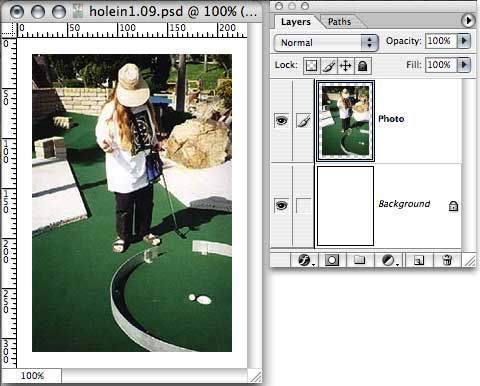
6. Click on the small notepad icon in the Layers palette to create a new layer (or choose New > Layer... from the Layer menu).
(Steps 4 and 6 illustrated)
7. Edit Menu > Stroke... and set the width to 1 pixel, the color to black, and the location to Outside. Ta-da! Outline.
8. Filter Menu > Blur... > Gaussian Blur... and set the radius to 1.
9. Cmd/Ctrl-D to Deselect.
10. In the Layers palette, adjust the Opacity of the outline's layer to your liking.
Steps 8 and 10 make the outline more subtle.
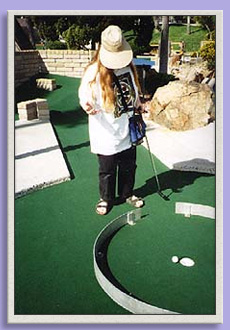
Now it should look like this:
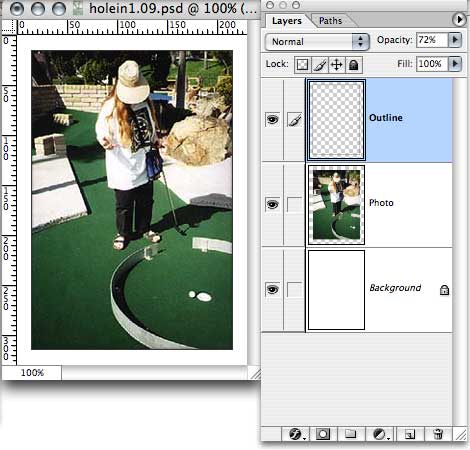
You may want to stop here -- that outline adds a subtle border. But read on for an advanced trick!
Step Five: Create Piece of Paper Behind Photo
1. In the Layers palette, click on the Background layer.
2. Click on the New Layer icon (the little notepad).
3. Choose the Selection Box Tool (upper left on the tool palette).
4. Select a rectangular area slightly larger than the photo.
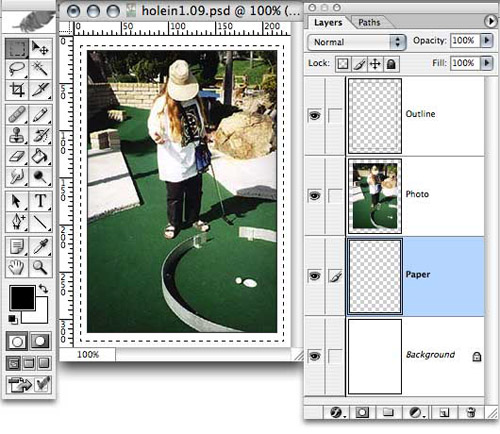
5. Edit Menu > Fill... and use White.
6. Hit Cmd/Cntrl-D to deselect everything.
At the moment this rectangle won't show because it's white on a white background. The next step will make it pop out.
Step Six: Making the Photo Frame Look 3-D
Now we get to be Stylish.
1. Choose Layer > Layer Style > Blending Options...
You're now in the Layer Styles window.
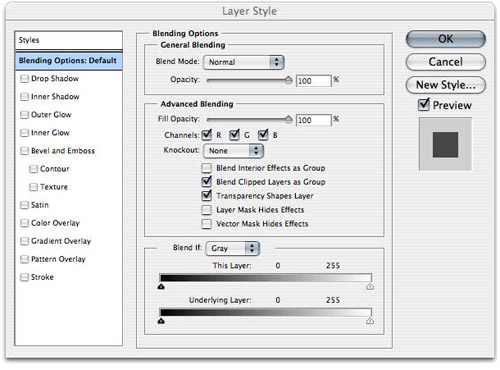
2. Click the words "Drop Shadow". Uncheck "Use Global Light". Set the Opacity around 35, the angle about 45, and the Distance and Size about 6.
3. Click the words "Color Overlay." Set the color to some sort of pale beige or cream. Set the Blend Mode to Multiply, and the Opacity about 50%.
4. Click the words "Gradient Overlay." Set the Opacity to 5 or so, and the Angle to 55 or so.
5. Click the words "Pattern Overlay." Set the Opacity about 55. Click the down arrow next to the Pattern swatch and pick some sort of papery pattern, one of the pale gray crinkly patterns.
6. Click on the words "Bevel and Emboss". Uncheck "Use Global Light." Set the Direction to Up, the Size to 1 or 2, the Angle around 45, the Altitude about 20, and the Opacity of the Shadow about 35.
7. Fiddle with these controls until the "piece of paper" behind the photo looks about right, and the top/right edges are visible against the white background.

8. Click on the "New Style..." button at right and SAVE THIS STYLE for future use. Check both boxes to include both "Layer Effects" and "Blending Options."
In future you'll be able to skip 2-8 and instead, once you've opened the Layer Style window, click "Styles" at upper left and pick your saved style.
9. Click "OK" to leave the Layer Style window.

Step Seven: Finishing Touches
1. Choose the Move Tool (top right of tool palette) and move the "piece of paper" under the photo until it's centered.
2. If you want to change the dimensions of the "piece of paper," go to Edit > Transform > Scale.
3. Leaving extra space at the bottom will make it look like a polaroid. You will have to increase the the Canvas Size under the Edit menu to have more room. (This looks better with square photos.)
4. If your web page isn't white...
- Take a screencap of it.
- Load the screencap into Photoshop.
- Use the eyedropper to pick up the background color of the web page.
- Return to your photo.
- Select the Background layer in the layers palette.
- Choose the Paintbucket tool and click on the photo to fill the background layer to the new color.
5. Save the photoshop document -- that keeps all your layers.
6. File Menu > Save For Web...
Usually High is good enough quality for a web graphic, and will take less time to load since it's a smaller file size.
7. Upload it to your web site, Flickr account, or Photobucket account.
That's it!
Photo Enhancement Tips
I use the following tools to make my photos look good. While you have a photo open, play with the sliders of these to get a feel for them.
- Filter Menu > Unsharp Mask to sharpen details. Gives you more fine-tuning controls than "Sharpen Edges" or "Sharpen."
- Image Menu > Adjustments > Levels... to help adjust dark/bright areas. More fine tuning than Brightness/Contrast.
- Image Menu > Adjustments > Curves to help adjust dark/bright areas. Even more fine tuning.
- Image Menu > Adjustments > Shadow/Highlight to help adjust dark/bright areas. Yet more fine tuning.
- Advanced Trick: Creating a Greyscale Mask
- Copy/Paste photo to new layer.
- Image Menu > Adjustments > Desaturate
- In Layers palette (use View Menu to show it if it's hidden), change Mode from Normal to Soft Light.
- In Layers palette, adjust opacity of new layer.
© 2007 Ellen Brundige