Pop Tab Bracelets
Pop Tab Crafts
Ever wonder what you can make with your recycled pop cans? I'm sure most of us have lots them sticking around being saved up to take to the recycling company. Well you can make fun crafts with them especially the tabs. You can make all sorts of jewelry with them.
One craft in particular you can make with pop tabs are bracelets. So go through your pop cans or any other cans with tabs. Pull them off; save them up for making fun jewelry crafts.This is a fun Eco friendly craft made out of your recycled pop can treasures.
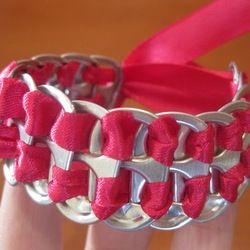
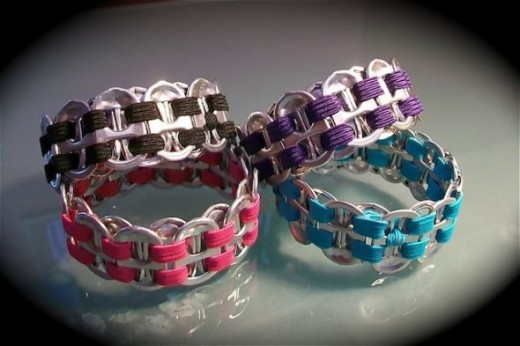
Featured in this lens is a stylish pop tab bracelet craft. You will find instructions and how-to video's to show how to make them. You can make them with plain silver pop tabs or collect colored tabs from energy drinks.
This is a fun and easy recycled craft for kids, teens and even adults.

Pop a Top!
Collecting pop tabs has been around for years.
One of the biggest donations with pop tabs over the years has been to the Ronald McDonald House program. They like to save just the tabs instead of the whole can for cleanliness and storage. Proceeds from the pop tab collections go to families with ill children and help there stay at the Ronald McDonald be financially easier.
Not only are pop tabs for donations; they are used to make fun crafts with. You can make all sorts of jewelry, key chains, purses and so on. In this lens you'll be learning to make a pop tab bracelet.
Pop Tab Bracelet - Supplies and Instructions
Here are the supplies, directions and a basic photo you'll need to make the pop tab bracelets. this photo is a good start on how to make the bracelet as well I think that looking at the video is easier then reading the directions. Below these instructions you will find a video to give you a better look and feel on to making these bracelets.
Supplies Needed
- 20-30 Pop Tabs
- Ribbon or Hemp String
- Scissors
- Tape
Instructions
- Collect aluminum tabs and wash them in warm soapy water. Dry them completely before making the bracelets.
- Measure your wrist with the ribbon then cut it the length times three. Fold it half making a loop at the top and taping it to your work surface.
- First Tab: UP.
Start with inserting the ribbon through the first tab hole.
- Second Tab: DOWN.
Take your second tab and place it underneath the first tab. Then weave the ribbon through the bottom tab and back up through the first tab.
- Third Tab: UP.
Take the third tab placing it next to the first and on top of the second tabs. Weave the ribbon over the side of the top tabs to connect them, weaving it through both the tab holes that connect the bottom and the third tab together.
- Fourth Tab: DOWN.
Place another bottom tab and proceed with the same directions in step 5. Follow the sequence from steps 3 through 5 to make the bracelet.
- Tie a knot with the 2 ends of the ribbon to secure
- To close the bracelet, bring one end of the 2 ribbon ends up and through the loop on the other end.
Tie into a bow and you are done!
Colored Ribbon
You can get ribbon in many colors and designs to work with. Colors are fun and you coordinate them with your outfits. Getting patterned ribbons are pretty neat too.
Stretch Pop Tab Bracelet
Making a stretch pop tab bracelet is much the same way as you make the ribbon ones. With the stretch ones you make a criss cross design with your cord so that is different as well in how your start the cord with this bracelet. Stretch cords comes in various colors and are great for making pop tab bracelets with.
Click here for directions: Cutout + Keep
Pop Tab Jewelry Kit
In this pop tab kit you can make bracelets, earrings and necklaces. There are three pop tab colors and 46 tabs that come in this kit along with ribbons, cords and jewelry parts. Don't miss out; get your kit today! I think a starter kit would be perfect to start with. That way you can see exactly what you need to make these. As you work on a kit it will give you ideas to expand to your own style.
© 2013 Cheryl Fay Mikesell


