- HubPages»
- Arts and Design»
- Crafts & Handiwork»
- Paper Creations
Summer Popsicle Greeting Card Craft
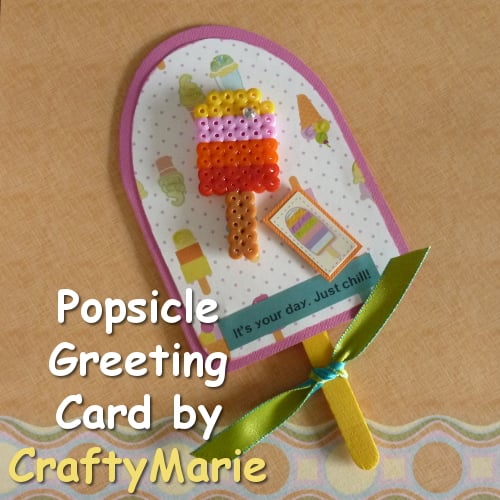
Chill Out and Make a Summer Themed Popsicle Greeting Card to Banish Winter Blues
I don't know about you but I tire very easily of the long and cold winter months so I deliberately chose a real summer themed popsicle or iced lolly card to inject some fun and warmth into my papercrafting. Since I expected to make quite a few of these for upcoming birthdays, I made a printable template which I'm sharing on this page too.
There are a number of fun sentiments that you can use for this project and I included my favorites here for you. With decorating the card, you could choose to make the finished design look different by cutting or punching out a section so it looks like someone has taken a bite. Or try a cute Kawaii version which would have a smiley face on the front. Enjoy coming up with your own ways of making this crafty project uniquely your own.
All Personal Images belong to the author of this article: Marie Williams Johnstone
It's Your Birthday, Just Chill!
Use Bright Summer Pattern Papers and embellishments for a Cool Card. My daughter had a selection of bright, summer colored popsicle craft sticks that she didn't know what to do with but I knew as soon as I saw them what I'd want to use them for. I was really ready for a fun, summertime crafts project that would take my mind off the wet, cold and windy weather outside. So the sticks came in very handy.
I'd already made some multi-colored perler bead iced lolly treats and I had an idea that they might form the main embellishment on the front of the cards. I'll give you the link in a while so you can make those exact items if you want but you could easily cut out something similar from craft foam sheets, felt fabric or even use a rubber stamp or stickers instead.
You can make the entire design as it is or go a little further and punch out a shaped area at the top to look like someone has already tasted the iced treat and had a bite already. How you decorate it is entirely up to you - get creative!
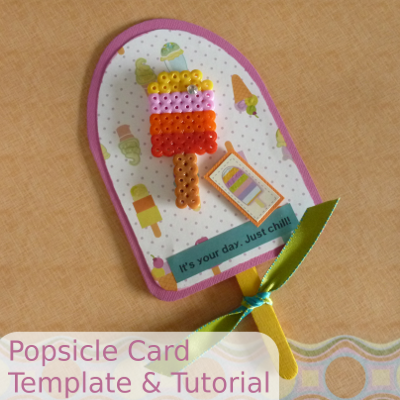
How to Make a Popsicle Shaped Card
Here's all the instructions that you need to make a quick and easy iced treat of a card on a stick! Once you've finished this design, it won't stand up like normal greeting cards do. You can send it as a novelty idea (maybe even add some ribbon or twine at the top so you can hang it instead) or you can make this like an embellishment and stick it onto the front of a large blank card instead to get an opening version.
Materials and Tools to Make this Design
Materials:
- Grab your Popsicle Template
- A Card Blank or Card to Make Your Own
Colored Popsicle Craft Sticks (mine are 4.5 inches high)
- Summery Patterned Paper to decorate
- Chosen Embellishment(s)
Tools:
- Glues/Adhesive
- Scissors
Written Instructions to Make Your Own
1. Print out the popsicle template provided for you in the Materials List on this page or make up your own template if you are confident at drawing one. A template makes it easier when making more than one card. Even though I have a cutting machine, I still love all my card templates which are quick and simple to use. Cut out the larger template design.
2. You can use a ready-made card blank (providing it is big enough) or you might prefer to score your own from your choice of card. I used a scorer to make my own greeting card blank so I could use this hot pink Bazzill cardstock which is perfect for a summer theme. You need to line up the left side of the template with the fold on the card as shown. Then draw around it.
3. Now fold the card blank back up and carefully cut around the shape you drew out, taking care not to cut down where the fold is. Once you have cut this out, you'll have the shape of your iced treat.
4. Use the smaller template design to cut out some different color cardstock or some patterned paper. I chose some really fun paper with ice creams and popsicle designs on.
5. Stick the paper or cardstock into the middle of the card blank. Next choose an embellishment to go in the middle. I already had my matching perler bead design in mind but you might prefer to use a rubber stamped design, a sticker or a different embellishment. I like the idea of flip flops too.
6. To add in a greeting, I printed one out using my dymo letratag printer. I love this thing. It's so fast at printing out quick little sentiments for all kinds of projects. I have to keep this away from my daughter since she loves this too!
7. Glue your stick inside the card. You can add it where I have or you can pop it at the back of the card front. A glue gun will stick this one down well or some good glue dots.
8. On my finished version, I added ribbon, glitter glue and a matching sticker that I found. I hope you've enjoyed reading this hub today, thanks for your visit. What design can you make for yours? You can always let me know in the comments section below.
Themed Sentiments for Your Craft Projects
You melt my heart
You're so cool
Have a sweet birthday
Let's stick together, sweet friend
It's your day, just chill
Summery Papers and Stickers for Your Project
There are Tons of Cute Papers and More to Choose From. For this project, I really prefer the colored popsicle sticks that you can get instead of the plain ones. They just look like a lot more fun and can match up really nicely with summer packs of scrapbook papers and cardstock. The sticks I used were 4.5 inches high.
Ways to Add this Theme - On to Your Icy Cool Card Design
If you don't fancy having a go at making an iced treat embellishment from fused Perler beads, here's some other ideas on how to easily add to your design. There are cute summer fun stickers (I love the flip flops) rubber stamps and even coordinated ribbon to make your finished design look superb. And you can use these for so many other summer projects too!
Tips on Using Stickers
Stickers are easy to use and you don't have to stick them on flat. Try sticking them onto cute colored cardstock, cutting around to leave a border and then sticking on using raised 3D foam squares - this will make your embellishments POP more!
© 2014 Marie
