DIY Quick and Easy Yarn-Wrapped Christmas Trees


Looking for a quick and fun holiday craft that even your kids can help with? These beautiful yarn-wrapped Christmas trees make a festive statement around the holidays. They can be matched to any color scheme and they have endless decorative combinations, so they are perfect for everyone!
If you have just a few minutes to spare this holiday season, you can create a yarn-wrapped Christmas tree that you'll enjoy displaying year after year.
Time required: 30
Difficulty: easy
Cost: Varies
Materials:
- Bouquet foam cones (yes, the type you'd put fake flowers into)
- Yarn (2-3 varieties), 80-90 meters each
- 20 gauge copper wire
- Floral/Decorative wire
- Bouquet pins
- Berry branches
Tools:
- Scissors
- Wire Snips
Start the Base
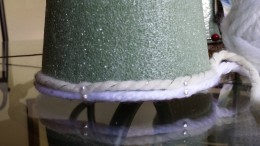
1. Take each of your yarn threads (I used two different colors: one white, and one cream with gold flecks) and wrap them around the base of your foam cone. Pin them every two to three inches to secure them in place. You only need to pin the yarn in place until you wrap the yarn around the base one time.
Step 2: Wrap To the Top
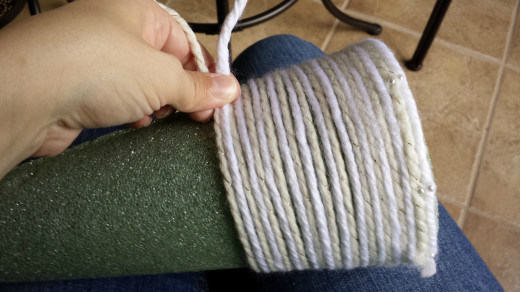
Continue wrapping the yarn around the foam cone. Remember, there is no need to continue to pin at this point. I found it easiest to hold the threads on one hand, and rotate the base of the cone with the other. This is a quick and easy step that is perfect for children! No need to be super-precise, as we are going to wrap the yarn back down the cone to fill in the gaps later.
Step 3: Cover the Top of the Tree
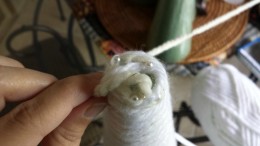
Once you've wrapped the yarn all the way up the cone, you'll need to cover the top. Use your pins to secure the yarn in place. I found I needed 8-10 pins for this step.
Step 4: Wrap Yarn Back Down the Tree
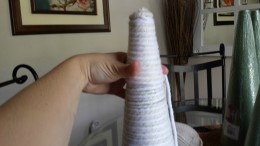
After the top is secure and covered, wrap the yarn down the foam cone. This will cover any gaps that you may have. Once you get to the bottom, pin in place.
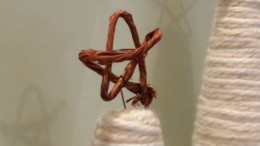
Step 5: Craft a Detail for the Top
Decorate the top of your yarn Christmas trees with a star! Take about 10 inches of decorative wire and form into a star--no two will be exactly alike; that just adds to the charm! Trim the excess with wire snips and wrap around itself to secure it into the star shape. Affix copper wire to the bottom of the star; this will be poked through the top of the tree, as shown.
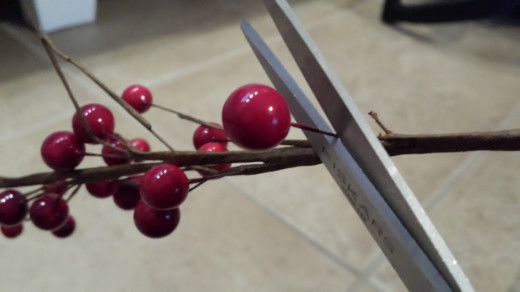
Step 6: Apply Colorful Berries
Using scissors, snip some berries off of your berry branch. Be sure to leave as much of the stem as possible, as you'll use this to poke into the trees.
The berries are what really make the tree!
Straight Pins for Securing