Style a Plain Flannel Shirt

Here's a Big Picture of the Finished Project

Transform Boy's Shirt for Feminine Shape
From Store-Bought to Custom-Designed
Great Fall Fashion
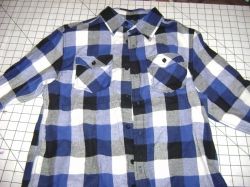
Turn an inexpensive flannel shirt from the boys' department into a comfortable and stylish top for a tween girl. I made this using remnants from past sewing projects, so the flannel shirt itself was my only expense. Why did I do it? One of my daughters was on the verge of outgrowing a lovely, comfortable flannel blouse and I wanted to create a reasonable facsimile as a replacement.
The shirt pictured was made shapely and feminine with the addition of an elastic waist at the back and the removal of bulky cuffs to create 3/4-length sleeves. The whole process took less than an hour, once supplies were on hand.
(All photographs are the author's.)
Gather the Materials
Required Notions
I am assuming you already have access to a sewing machine and some basic sewing supplies, e.g. pins and sharp shears.
This project requires:
- one boy's flannel shirt;
- 1" satin or grosgrain ribbon or bias tape: about 1/2 yard;
- coordinating all-purpose sewing thread;
- 3/4" non-roll elastic: about 1/2 yard.
Clear off a flat surface for marking and cutting. Thread the sewing machine.
Measure, Cut, and Sew - Custom Fitting the Shirt

Mark and Sew Carefully
Have the girl who will wear the shirt try it on. Use pins or chalk to mark the waistline in the back of the shirt. Mark the ends of the casing about two inches from the side seams, Mark the desired sleeve length as well, anywhere above the top of the sleeve placket (the opening at the bottom of the sleeve that attaches to the cuff.)
Cut the sleeves, allowing an extra inch to turn under for hems. Center your ribbon or tape on the marked line at the back and cut it the length of the marked casing plus an inch for turning under at the cut ends. Cut your elastic three to four inches shorter than the ribbon or tape.
Press under 1/2 inch hems at each short end of the ribbon or tape. Center on marked casing line on wrong side of shirt. Stitch very close to edge along both long sides of casing, leaving ends open.
Insert elastic, using a bodkin or large safety pin to thread the elastic inside the casing. Stop when back edge of elastic is even with one end of the casing. Stitch this end through all layers with two rows of stitching to secure elastic. Finish threading elastic, gathering the casing until the loose end of elastic is even with the open end of the casing. Secure with straight pins, remove bodkin or safety pin, and stitch with two rows of stitching through all layers. Remove pins.
Finish by pressing under 1/2 inch at sleeve edges. Press under again, enclosing raw edges, and topstitch the hems. Shirt is complete!
Step-by-Step Photographs - 1-Hour Shirt Restyle
Click thumbnail to view full-size


Take a Poll


