What is Graduated Neutral Density filter?

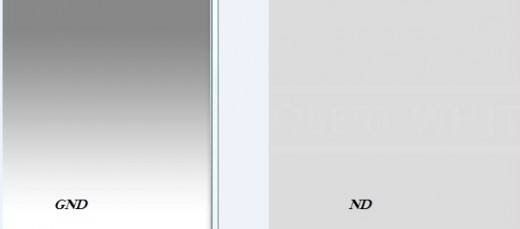
A GND filter is similar to a ND filter; the difference is how the light intensity is transmitted through, which varies across the surface of the filter. This means there are areas in the filter that transmit more light compared to others.
They have graduation from no ND effect (reduce light less) to full ND effect (reduces light more). The filter has an edge that provides a transition of the amount of light transmitted from the dark side to the clear side allowing the filter to blend the darkening effect into the image and achieve a more natural appearance.
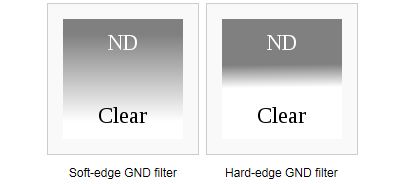
This transition can either be smooth such that the transition is gradual hence less noticeable or sharp/abrupt whereby the transition is sudden and change in lighting is well defined. If you have a dark subject that is breaking into the brighter region e.g. a tall tree breaking into a bright horizon, using a filter with sharp transition will darken the sky and will also darken the tree. In a scene like this you would prefer a soft transition filter.
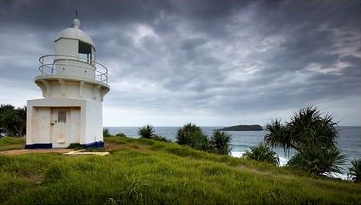
The GND filter is usually very useful when you have some regions in a scene that are very bright and others are dark - this is referred as a broad dynamic range. The dynamic range of the camera sensor maybe narrower than the dynamic range of the scene where the darker areas of the scene get underexposed or the brighter parts gets overexposed. Even when shooting in Raw format to capture your image you may still need a GND filter this is because the camera will still need to operate within its maximum dynamic range to avoid washed out or black spots on your image which cannot be recovered during post-processing.
It may not be possible to use an ND filter in a scene with this kind of high contrast in lighting since an ND filter reduces the amount of light equally across every part of the filter.
Just like the ND filters the GND filters are grey in colour and they come with varying density depending on the amount of light they reduce. The darker the filter the more light it reduces compared to clear ones. They also come in different sizes and shapes and it will depend on the focal length of your widest lens to choose the right size.
<pic - densities>
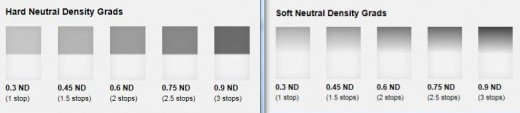
Choosing the best density of a GND filter will depend on how the scene appears. Having filters with different densities will help you chose which one suits best in that situation.
You can stack the filters as well, so if you need more neutral density to really hold back the sky, then stack your 2 & 3 Stop for 5-Stops!! (5 stops will most likely no longer look natural, but some great effects can be achieved.
GND are not recommended during daytime skies unless the lighting is very extreme. Using GND in this time will darken the sky and make look unnatural. For a better picture during this time of day try use a Polarizer filter mostly when the sun is at 900 above you.
Other types of GND transitions include:
Curved GND– in this type of filter the graduation is curved to suit scenes that have a dark subject that is breaking into the brighter region are curved e.g. a mountain, a tall tree breaking into a bright horizon.
There is also the Reverse GND filter which goes smoothly from clear to dark, and then smoothly back to less dark at the top. E.g. when shooting sunsets, you will have a clear foreground, bright sun at the horizon, and then less dark as the sky goes up above the sun.
There are also some GND filters that are centre weighted – which are darker ate centre and get clear at the edges. They are used in situation where you have a lot light coming from the centre of the scene. They are referred as Centre-spot filters.


