Auto Inspection Service


In addition to my previous hub How to Perform a Car Maintenance Inspection this hub goes into exact, step-by-step, detail of how to perform the Inspection.
From the moment of pulling the vehicle into the inspection bay to the final walk-around, this hub will walk you through the details of an inspection, so there's no guess work about the process.


Start Your Inspection
Be cautious of long hair and loose clothing when working in the engine of a vehicle.
When I pull the vehicle into the inspection bay there is a rut for the front wheels to set in so the vehicle will not roll when it is in neutral. If a rut is not available chock the tires, so the vehicle won’t roll. I perform a light inspection while I’m in the driver’s seat. The engine can be shut off at this point.
In a garage the light inspection can be performed alone using the walls as a reflector. If there isn't a wall available to reflect off of you must have another person walk around the vehicle as you activate each item, giving you a yes or a no as you activate each:
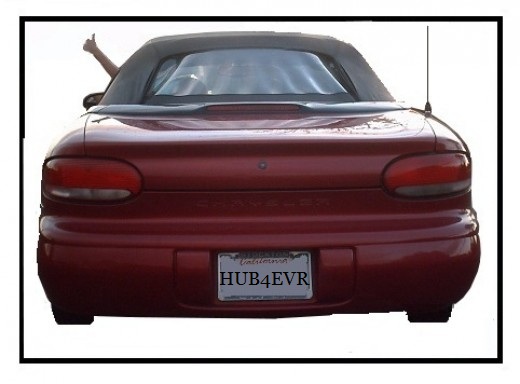
- Turn on the headlights.
- Turn high beams on, then turn high beams and headlights off.
- Activate left turn signal, deactivate.
- Activate right turn signal, deactivate.
- Activate warning flashers, deactivate.
- Place your foot on the brake to check brake lights. (Close the garage door enough so the brake lights will reflect off of it or have your assistant stand behind the vehicle and indicate whether they both come on or not.)
- Keep your foot on the brake pedal and place the vehicle in reverse to check the backup lights. (Again, look for the reflection on the garage door or have your assistant stand behind the vehicle and indicate for you.)
- After checking the backup lights, with your foot still on the brake, place the vehicle in neutral and slowly release the brake, paying close attention to the vehicle not moving!! If the tires are not set in the rut the vehicle may roll forward or back just an inch or so to set itself, this is ok. If the wheels are chocked and it rolls, re-apply the brake, put the vehicle in park, apply the emergency brake and re-chock the tires! When you put it in neutral again, the vehicle should not roll forward or back when on chocks and a minimal amount if using a rut. Leave it in neutral so you can perform the rest of the inspection.
Before exiting the vehicle:
- Honk the horn to be sure it is working.
- Turn the steering wheel looking for excessive play. There should be no more than 8 degrees play in the steering wheel.
- Turn on the interior lights making sure all light up.
- Tug each and every seat belt in the vehicle to be sure they all retract properly.
- Check seats and floor for tears, trash, liquid spill, etc.
- Verify there is a working fire extinguisher on board.


Inspect the Undercarriage
Exit the vehicle and lift it with the car lift or raise it with a jack and set it securely on jack stands. You’re inspecting the underside of the vehicle, aka, the undercarriage. Bring a flashlight with you for this part of the inspection.
- At this point I remove the oil drain plug (usually a 15mm wrench) and drain the oil, allowing the oil to drain while I run the undercarriage inspection.
- Starting at the engine, check for oil leaks, direct the light up into the engine inspecting the underside of the hoses and belts. Anything that may be out of the ordinary needs to be looked into further.
- Spin the Tire – Using a good flashlight, spin the tire slowly looking for any foreign objects that may have lodged in the tire. Use needle nose pliers to remove objects, unless it is thoroughly embedded! If it is embedded it is better to leave it until the tire can be changed. The foreign object is acting as a plug, removal would release the air in the tire leaving you with a flat to change
- While checking for foreign objects also look at the wear on the tread. Is it at least 1/32 of an inch or at least at Lincoln’s hair on a penny?
- Check the wear of the wheel bearings by grasping each tire at the bottom and attempt to lift it up and outward, it should barely move.
- Using your flash light, direct the beam so you can see the brake pad and check its wear. Check the brake lines for cracks and leaks.
- Check that all the leaf springs are still intact and no cracks in the hangers.
- The shock absorbers should be free of oil or build up on them. Grim and dirt on the shock absorber is a sign it is going bad or is bad.
- Look at the wires on the under carriage, are there any broken or dangling wires?
If you drained the oil:
- Remove the old oil filter and replace it with a new one of the same type. Do not use a tool to install the new oil filter. When the threads are correct, the new filter will screw on with a spin and HAND TIGHTEN ONLY.
- Replace the oil drain plug. DO NOT OVERTIGHTEN.


Final Steps of Inspection
Lower the vehicle, put the transmission into park at this point.
If you are not familiar with engine identification this link has a detailed photo of an engine and it's components.
Open the hood.
- Again from the top-side now, inspect the hose lines, belts and wiring for broken, loose or worn parts. The serpentine belt should not have cracks on it. If cracks appear, replace it.
- Top off the brake fluid, power steering fluid, windshield wiper fluid and radiator fluid. If you performed an oil change don’t forget to add oil.
- Check the air filter. Remove any loose debris. Use high pressure air to blow out any accumulated dirt.
- Refill the oil if you drained it.
- Start the engine, look under the vehicle to see if the oil filter or oil drain plug are leaking. If either is leaking, turn the vehicle off, slide under the vehicle and tighten it.
- If no leaks, shut the engine off and leave it in park. Check the oil dipstick to be sure oil is full. If it's not full, add appropriate amount to make it so.
- With the vehicle in park and the emergency brake set, start the engine again. Check the transmission fluid with the engine running. Shut the engine off and add transmission fluid if needed.
- Walk around the outside of the vehicle checking the pressure in each tire as you go. Look for loose, broken or missing moldings, mirrors, glass.
- Check the windshield wiper blades making sure they are ready for engagement if needed.
You've now completed the inspection. Record your findings, or lack of findings, in a folder for that specific vehicle. Make appointments to have any problems resolved.
Related

Ford Everest vs. Suzuki Every: Which Is the Better Family Car?

Romney, Hythe & Dymchurch Railway. The only public miniature railway that went to war.

How to Put in a Child's Hearing Aid

Engine Control Module and Sensor Locations

The M1009 CUCV: A Manly, Eco-Conscious, Military-Rejected, Survivalist's Dream Vehicle


