How To Tint Tail Lights
What You Need
1. Spray on tint. VHT Nite Shades is the top choice but Rustoleum works as well.
2. Clear coat. Any brand will work, Krylon will dry faster than the rest. If you want a satin finish, get a satin clear coat. If you want a gloss finish, get a gloss clear coat.
3. Waterproof sandpaper. At least 1500 and 2000 grit. 3M's Wetordry line works very well.
4. Spray bottle full of water.
5. Masking tape.
6. Wrench(es) or ratchet and socket(s). Needed to remove the tail lights from the vehicle.
7. A few microfiber towels.
8. Rubbing compound.
9. Polish
Remove Your Tail Lights
The easiest way to tint your tail lights is to remove them. It can be done with the lights still on the car, but it will require a lot of taping and covering of surrounding areas. Most tail lights can be removed in a few simple steps:
1. Remove trunk carpeting
2. Remove nuts holding tail lights on
3. Remove tail lights from vehicle
4. Remove bulbs from tail lights (remember what order they go in)
Cleaning And Taping
Clean the tail lights well and dry them very well. Dirt and water on the tail lights while they get pained will ruin the finish and make the tint job look amateur at best. Once the tail lights are clean and dry, tape off any weather stripping and areas you don't want tinted. Some people like to leave the reverse light sections untinted. An exacto knife or razor blade can easily cut tape to perfectly fit over such areas. Double check your tape work then set the tail lights somewhere that they won't be disturbed during the painting process. Painting outdoors (especially under trees) is not recommended.
Spray On The Tint
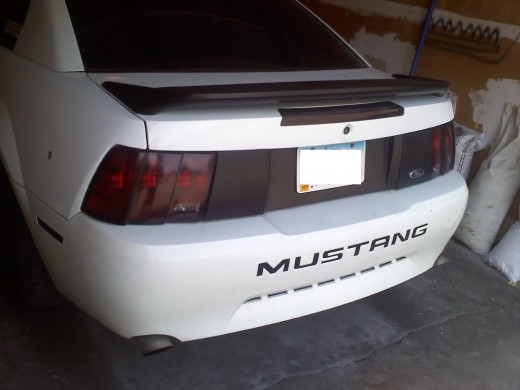
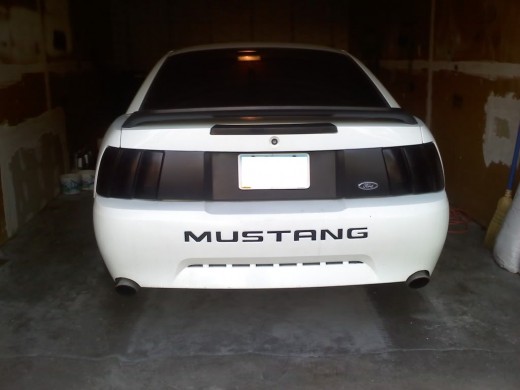
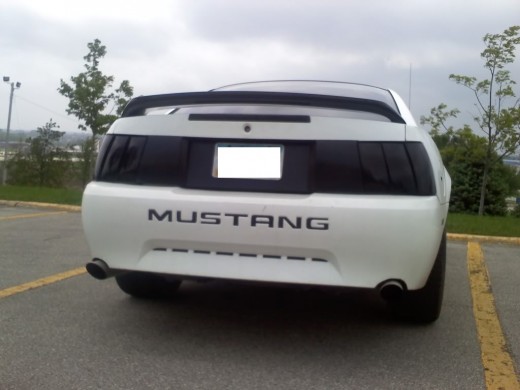
Before you start spraying, you need to decide how dark you want your tail lights. At the end of this guide, you will find pictures of what I consider to be "light," "medium," and "dark."
The process of tinting your tail lights is basically just building up layers until you reach your desired darkness. Start each spray off of the taillight and end the spray off the opposite end of the tail light. Hold the can ~8 inches from the tail lights (hold the can ~5-6 inches from the tail lights for heavy layers) and go in up and down or left and right patterns, slightly overlapping the last spray. This will help you lay down nice, even layers.
You want to lay down thin, light layers until you are nearly to your desired darkness. Give each light layer about 3-5 minutes to dry before adding the next layer. When you get near your desired darkness, you need to finish with a heavy layer. Before you spray your heavy layers, practice on some cardboard. Make sure you're comfortable laying down a heavy layer but not a heavy layer that runs. Runs will lead to more wet sanding than is necessary.
All spray on tints are meant to be glossy, but you can achieve a more satin finish if you feel it would suit your car better. Here is my basic chart for finishes and darkness:
2 light layers = Light tint, satin finish
1 light layer, 1 heavy layer = Light tint, gloss finish
4 light layers = Medium tint, satin finish
3 light layers, 1 heavy layer = Medium tint, gloss finish
6 light layers = Dark tint, satin finish
5 light layers, 1 heavy layer = Dark tint, gloss finish
You can also play around in between to find the perfect darkness for you. By no means should you venture beyond 6 layers (at least 5 being light) unless your car is strictly for shows.
If you finished with a light layer for a satin finish, allow 4-6 minutes for the tint to become fairly tacky/dry before moving on. If you finished with a heavy layer, allow 13-18 minutes for the tint to becoming fairly tacky/dry before moving on.
Spray On The Clear Coat
This process is the same as the previous process. Simply build up light layers of clear coat. Drying time is dependent on the brand of clear coat that you chose. Rustoleum can take up to 24 hours to dry, Krylon can take 5-15 minutes to dry, and Duplicolor can take up to an hour to dry. No matter what brand you chose, you should be just fine to add light layers every 10 minutes or so.
Again, finish with a heavy coat (or two) for a nice glossy finish or a light coat for a satin finish.
Allow The Paint To Dry
If you used:
1. Krylon - Allow at least 1.5-2 hours for drying.
2. Duplicolor - Allow at least 3-4 hours for drying.
3. Rustoleum - Allow at least 24-36 hours for drying.
Do not touch your tail lights at all during this time and keep them somewhere warm. If you touch the paint while it is wet or tacky, you will leave a fingerprint which you'll have to spend time wet sanding out later. If you absolutely need to move your tail lights, lift them from the bottom.
Wet Sand, Buff, And Polish
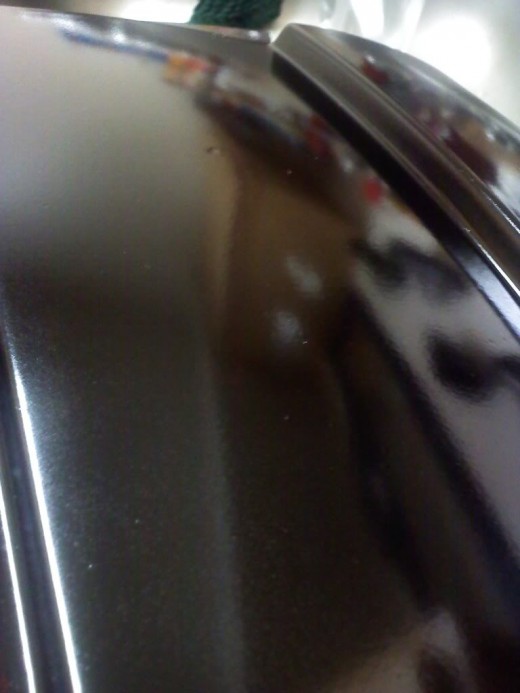
1. Use your 1500grit sandpaper, 2000grit paper, possibly higher grit sandpapers, spray bottle, and towel to wet sand both tail lights. Wet sanding will remove imperfections/blemishes from the paint. If you're not how to wet sand, you can learn how to with my wet sanding guide.
2. Use your rubbing compound and a microfiber towel to buff your tail lights. If you have a power buffer and a way to secure your tail lights without damaging them than you can do that instead, but tail lights are small enough that buffing by hand won't hurt. Buffing should remove the majority of hazing left by wet sanding. To buff:
- Scoop (or pour, depending on the brand) a small amount of rubbing compound on to your towel
- While applying some pressure (not a ton, just some) make small circles and slowly go over the entire area that has been painted
- Once you've covered the entire tail light, find a clean area of your towel
- Apply pressure and make small circles as you did before, but in the opposite direction of your initial circles (this should remove the rubbing compound)
- If the tail lights still look very hazy, repeat. If not, move on.
3. Use your polish and a microfiber towel to polish the tail lights. Again, this can be done with a power buffer but is just as easily done by hand. Polishing should bring out the shine in your paint. To polish:
- Scoop (or pour, depending on the brand) a small amount of polish on to your towel
- While applying some pressure (not a ton, just some) make small circles and slowly go over the entire area that has been painted
- Once you've covered the entire tail light, find a clean area of your towel
- Apply pressure and make small circles as you did before, but in the opposite direction of your initial circles (this should remove the polish)
- If the tail lights aren't quite shiny enough, repeat. If not, move on.
Reinstall Your Tail Lights
1. Put the bulbs back in place.
2. Put the tail lights back on the car and loosely put the nuts back on. The tail lights were probably held on tight when you took them off but they won't stay on so easily now.
3. Tighten down all the nuts.
4. Reinstall the trunk carpeting.
5. Stand back and enjoy.
Wax
Allow the paint to cure for at least 2 weeks before applying wax.
*Legality Note*
Tinting your tail lights is illegal. It can result in tickets or you being at fault in the event that you get rear ended. If you choose to tint your tail lights, you are doing so at your own risk. Tinting your tail lights is considered an "off road" modification for things like car shows. Please be aware of the risks before tinting your tail lights and decide if the look is worth the risk for you.


